CLI
CLI
You can install the Shipyard CLI locally and connect your Shipyard account to access, manage, port forward, or exec into your containers.
Installation
- Linux and macOS
- Windows
- Homebrew
curl https://www.shipyard.sh/install.sh | bash
Download the executable from Releases.
brew tap shipyard/tap
brew install shipyard
Get your token
Set the environment variable SHIPYARD_API_TOKEN to your Shipyard API token.
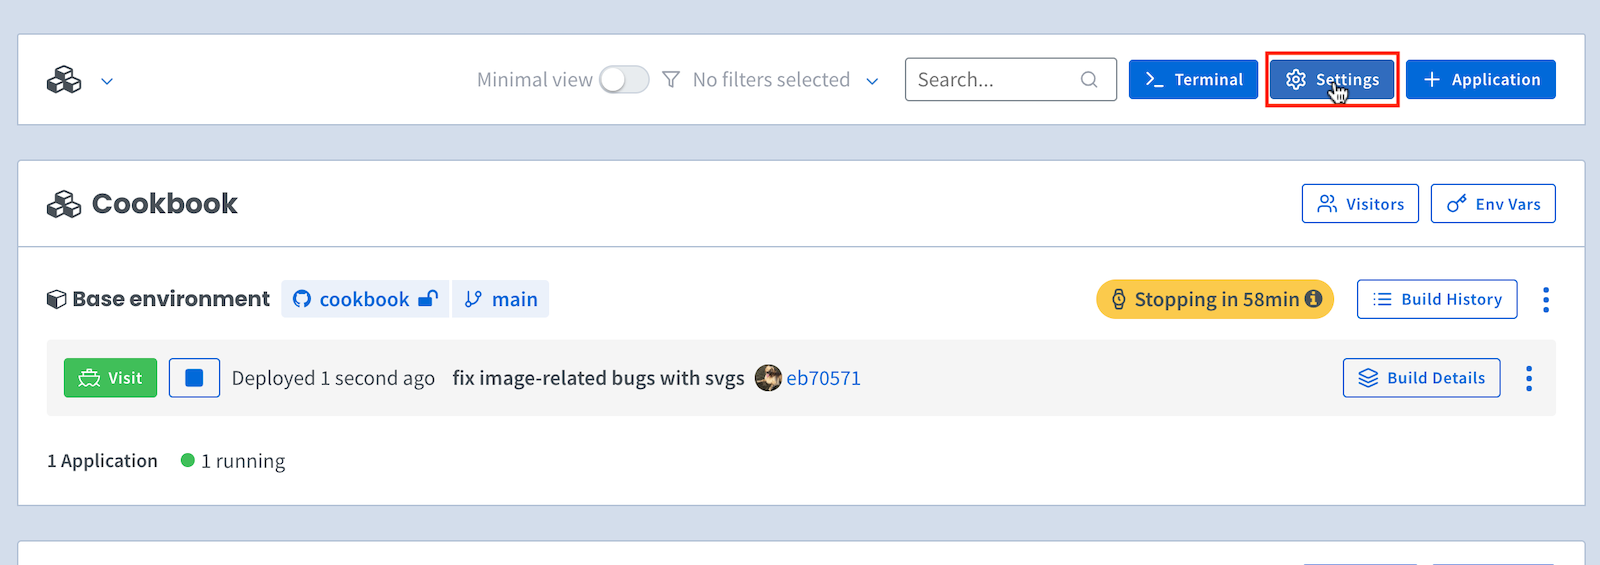
To access your Organization Settings page, click on Settings at the top of your main dashboard:
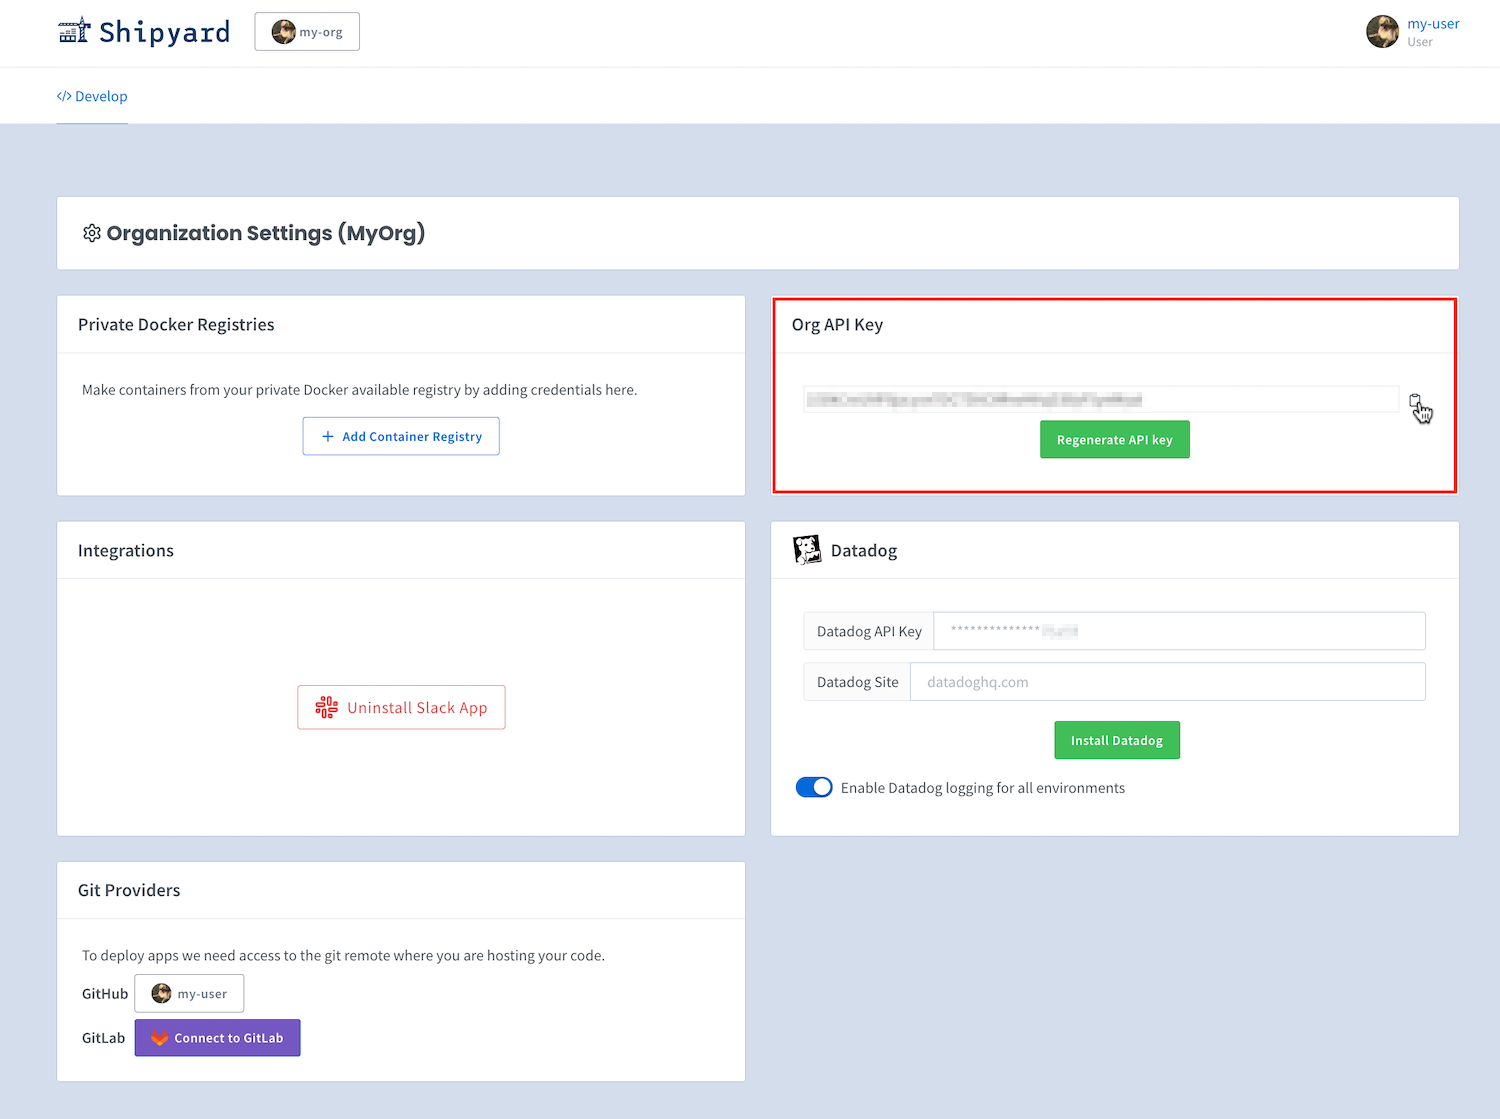
If you have the Shipyard API enabled for your organization, you can grab its token by going to the Org Settings page and clicking the copy button:
Set a Shipyard token
shipyard set token
If you would like to enable API access for your org, contact us at support@stackgen.com.
Alternatively, you can use a configuration file stored in $HOME/.shipyard/config.yaml by default.
When you run the CLI for the first time, it will create a default empty config that you can then edit.
You can also specify a non-default config path with the --config {path} flag added to any command.
Add any configuration values in your config and ensure the file follows YAML syntax. For example:
SHIPYARD_API_TOKEN: <your-token>
ORG: <your-non-default-org>
The values of your environment variables override their corresponding values in the config.
Basic usage
If you are a part of multiple organizations that use Shipyard, then you can view all organizations and select your default org.
Get all orgs you are a member of
shipyard get orgs
Set the global default org
shipyard set org {org-name}
Get the currently configured org
shipyard get org
List all environments
After you have set up your org, you can list a few details of all your environments and their current states. This list includes the UUID for each environment, which you will use to manage that environment through the CLI.
You should run this command each time you connect to your Shipyard containers to get the correct UUIDs.
shipyard get environments
Available flags:
| Name | Description | Type | Default Value |
|---|---|---|---|
| branch | Filter by branch name | string | |
| deleted | Return deleted environments | boolean | false |
| json | Print the complete JSON output | boolean | false |
| name | Filter by name of the application | string | |
| org-name | Filter by org name, if you are part of multiple orgs | string | your default org |
| page | Page number requested | int | 1 |
| page-size | Page size requested | int | 20 |
| pull-request-number | Filter by pull request number | string | |
| repo-name | Filter by repo name | string |
Examples:
- List all environments running the repo
flask-backendon branchmain:
shipyard get environments --repo-name flask-backend --branch main
- List all deleted environments:
shipyard get environments --deleted
Get details for a specific environment by its UUID
This command shows the services running for a particular environment with their associated ports:
shipyard get environment {environment_uuid}
Available flags:
| Name | Description | Type | Default Value |
|---|---|---|---|
| json | Print the complete JSON output | boolean | false |
| org-name | Filter by org name, if you are part of multiple orgs | string | your default org |
Managing your environments
Now that you have the information you need, such as the UUID, available services, and their associated ports, you can start managing your containers locally.
Stop a running environment
shipyard stop environment {environment_uuid}
Restart a stopped environment
shipyard restart environment {environment_uuid}
You can't restart a cancelled environment; you have to rebuild it.
Cancel ongoing build for an environment
shipyard cancel environment {environment_uuid}
Rebuild an environment
shipyard rebuild environment {environment_uuid}
Revive a deleted environment
shipyard revive environment {environment_uuid}
Deploy a detached environment
Create a new, independent ("detached") environment by cloning an existing application build. Requires detached environments to be enabled for your org.
shipyard detached deploy {application_build_uuid} --name my-detached-env
Override branches per-repo and control whether the detached environment rebuilds on new commits:
# Override the branch for a repo, and never rebuild on new commits
shipyard detached deploy {application_build_uuid} --name my-detached-env --branch web=feature-x --build-on-commit never

# Per-repo build-on-commit settings (always | inherit | never)
shipyard detached deploy {application_build_uuid} --build-on-commit-for web=always --build-on-commit-for api=never
Get all services and exposed ports for an environment
shipyard get services --env {environment_uuid}
Exec into a running environment's service
Execute any command with any arguments and flags in a given service for a running environment. Pass any command arguments after a double slash.
In order to exec into your container, it must have a shell.
If your container doesn't have a bash shell, you'll see this error when attempting to exec:
exec: "bash": executable file not found in $PATH: unknown
A container's shell (or lack thereof) usually depends on its base image. For example, a distroless or minimal image typically won't include a sh or bash shell, but its debug/dev version may have one.
shipyard exec --env {environment_uuid} --service {service_name} -- bash
Copy a file into a running environment's service
Append the contents of a local file to an existing file in your running remote environment.
cat local-file.txt | shipyard exec --env {environment_uuid} --service {service_name} -- bash -c "cat > remote-file.txt"
Port forward a running environment's service's port
Use this function to port forward a service from a running environment to a localhost port. The service_port is the service's internal container port.
shipyard port-forward --env {environment_uuid} --service {service_name} --ports {local_port}:{service_port}
Get logs for a running environment's service
shipyard logs --env {environment_uuid} --service {service_name}
Available flags:
| Name | Description | Type | Default Value |
|---|---|---|---|
| follow | Follow the logs output | boolean | false |
| tail | # of recent log lines to show | int | 3000 |
Work with volumes
List all volumes in an environment
shipyard get volumes --env {environment_uuid}
List all volume snapshots in an environment
shipyard get snapshots --env {environment_uuid}
Reset a volume in an environment
shipyard reset volume --env {environment_uuid}
Create a snapshot in an environment
shipyard create snapshot --env {environment_uuid}
Load a volume snapshot in an environment
shipyard load snapshot --env {environment_uuid} --sequence-number {n}
Upload a file to a volume in an environment
shipyard upload volume --env {environment_uuid} --volume {volume} --file {filepath.bz2}
Connect to telepresence
shipyard telepresence connect --env {environment_uuid}
From there, you'll be able to communicate directly with all pods in the namespace. You may have to use the
namespace hostname to communicate with services, which you can get via telepresence status under the Namespace field. For example, to communicate with redis, you'd use redis.shipyard-app-build-{uuid}.
Build executable from code
You can make an executable by running the following command:
make
To run this new executable:
./shipyard
Enable autocompletion
- Bash
- Zsh
- fish
- PowerShell
This script depends on the bash-completion package. If it is not already installed, you can install it via your package manager.
To load completions in your current shell session:
source <(shipyard completion bash)
To load completions for every new session:
On Linux:
shipyard completion bash > /etc/bash_completion.d/shipyard
On macOS:
shipyard completion bash > $(brew --prefix)/etc/bash_completion.d/shipyard
If shell completion is not already enabled in your environment, you will need to enable it:
echo "autoload -U compinit; compinit" >> ~/.zshrc
To load completions in your current shell session:
source <(shipyard completion zsh); compdef _shipyard shipyard
To load completions for every new session:
On Linux:
shipyard completion zsh > "${fpath[1]}/_shipyard"
On macOS:
shipyard completion zsh > $(brew --prefix)/share/zsh/site-functions/_shipyard
You will need to start a new shell for this setup to take effect.
To load completions in your current shell session:
shipyard completion fish | source
To load completions for each session:
shipyard completion fish > ~/.config/fish/completions/shipyard.fish
To load completions in your current shell session:
shipyard completion powershell | Out-String | Invoke-Expression
To load completions for every new session:
shipyard completion powershell > shipyard.ps1
and source this file from your PowerShell profile.