IaC from State Files
Ingest your existing IaC files, enhance and remediate them to ensure reliable, standardized, and secure IaC. Generate IaC for resources created manually or by ClickOps.
Ensure that your deployment files are saved in .tfstate or .json format.
Follow these steps to create an appStack using existing deployment files.
-
From the StackGen Home page, navigate to appStacks and click the + New appStack button.
-
Select From Deployment Files.
-
You can either drag your deployment file or click the Click to upload IaC files panel to upload your file, and click Proceed.
 note
note-
Click the Identify modules and nested resources from uploaded tfstate toggle to allow StackGen to automatically identify and represent your module nesting. If you use this option:
-
StackGen will prompt you to Create appStack directly.
-
Select the Cloud Provider.
-
You will be redirected to the topology canvas with the resources automatically mapped and configured.
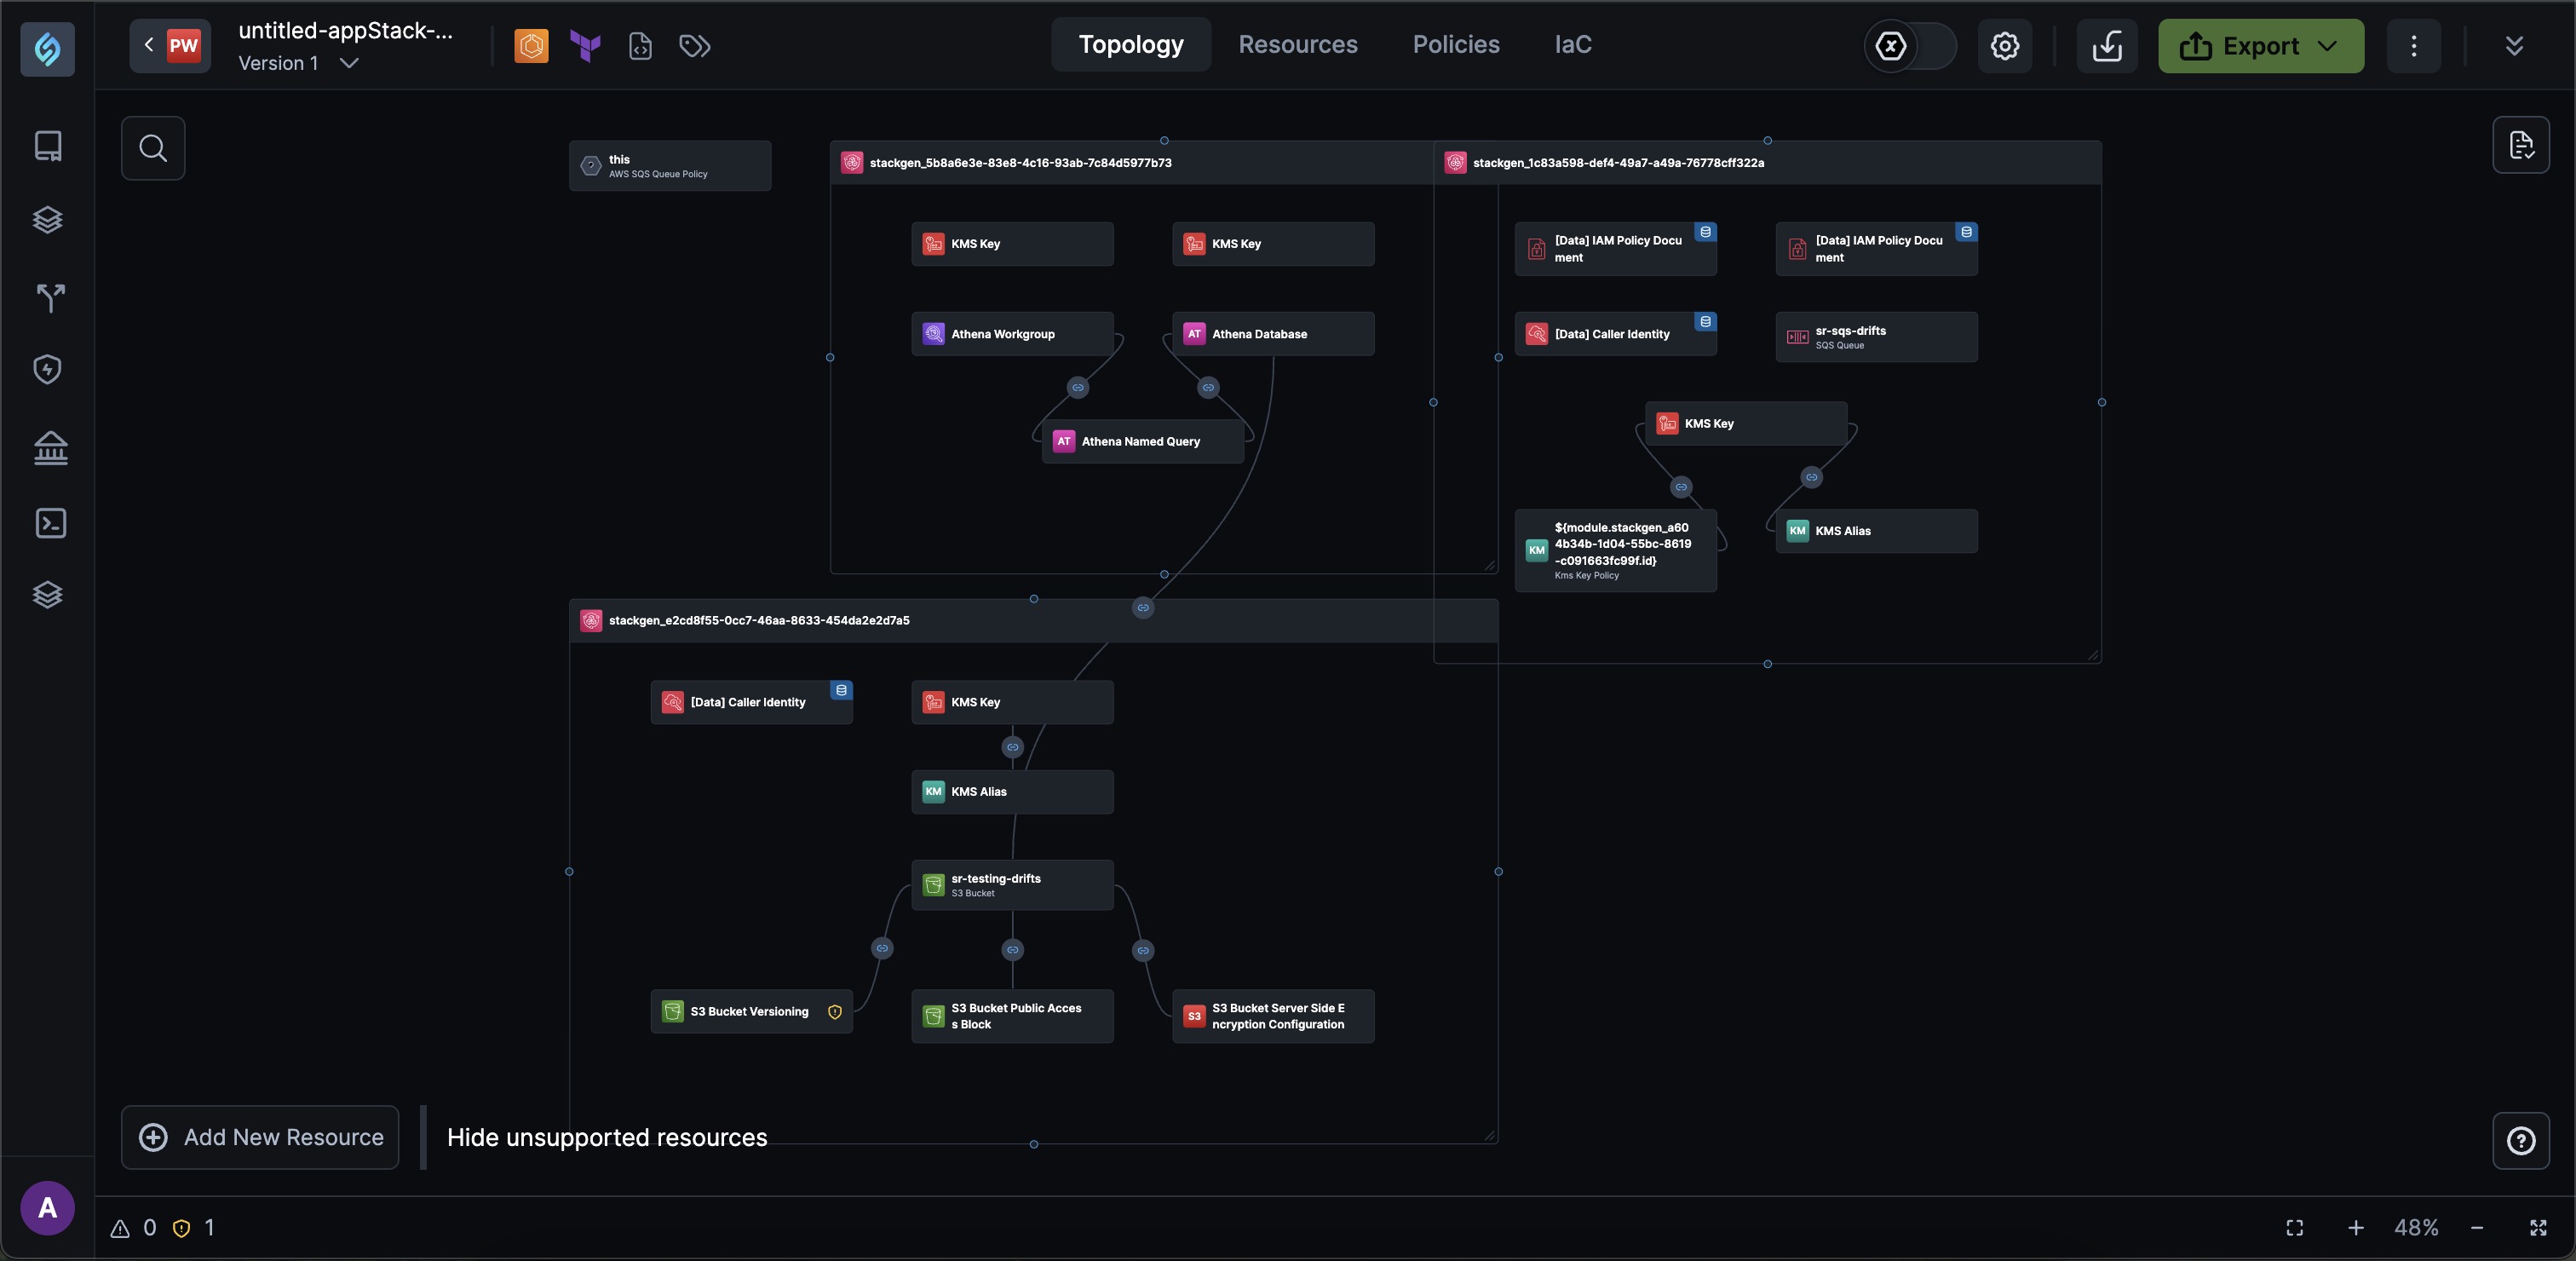
-
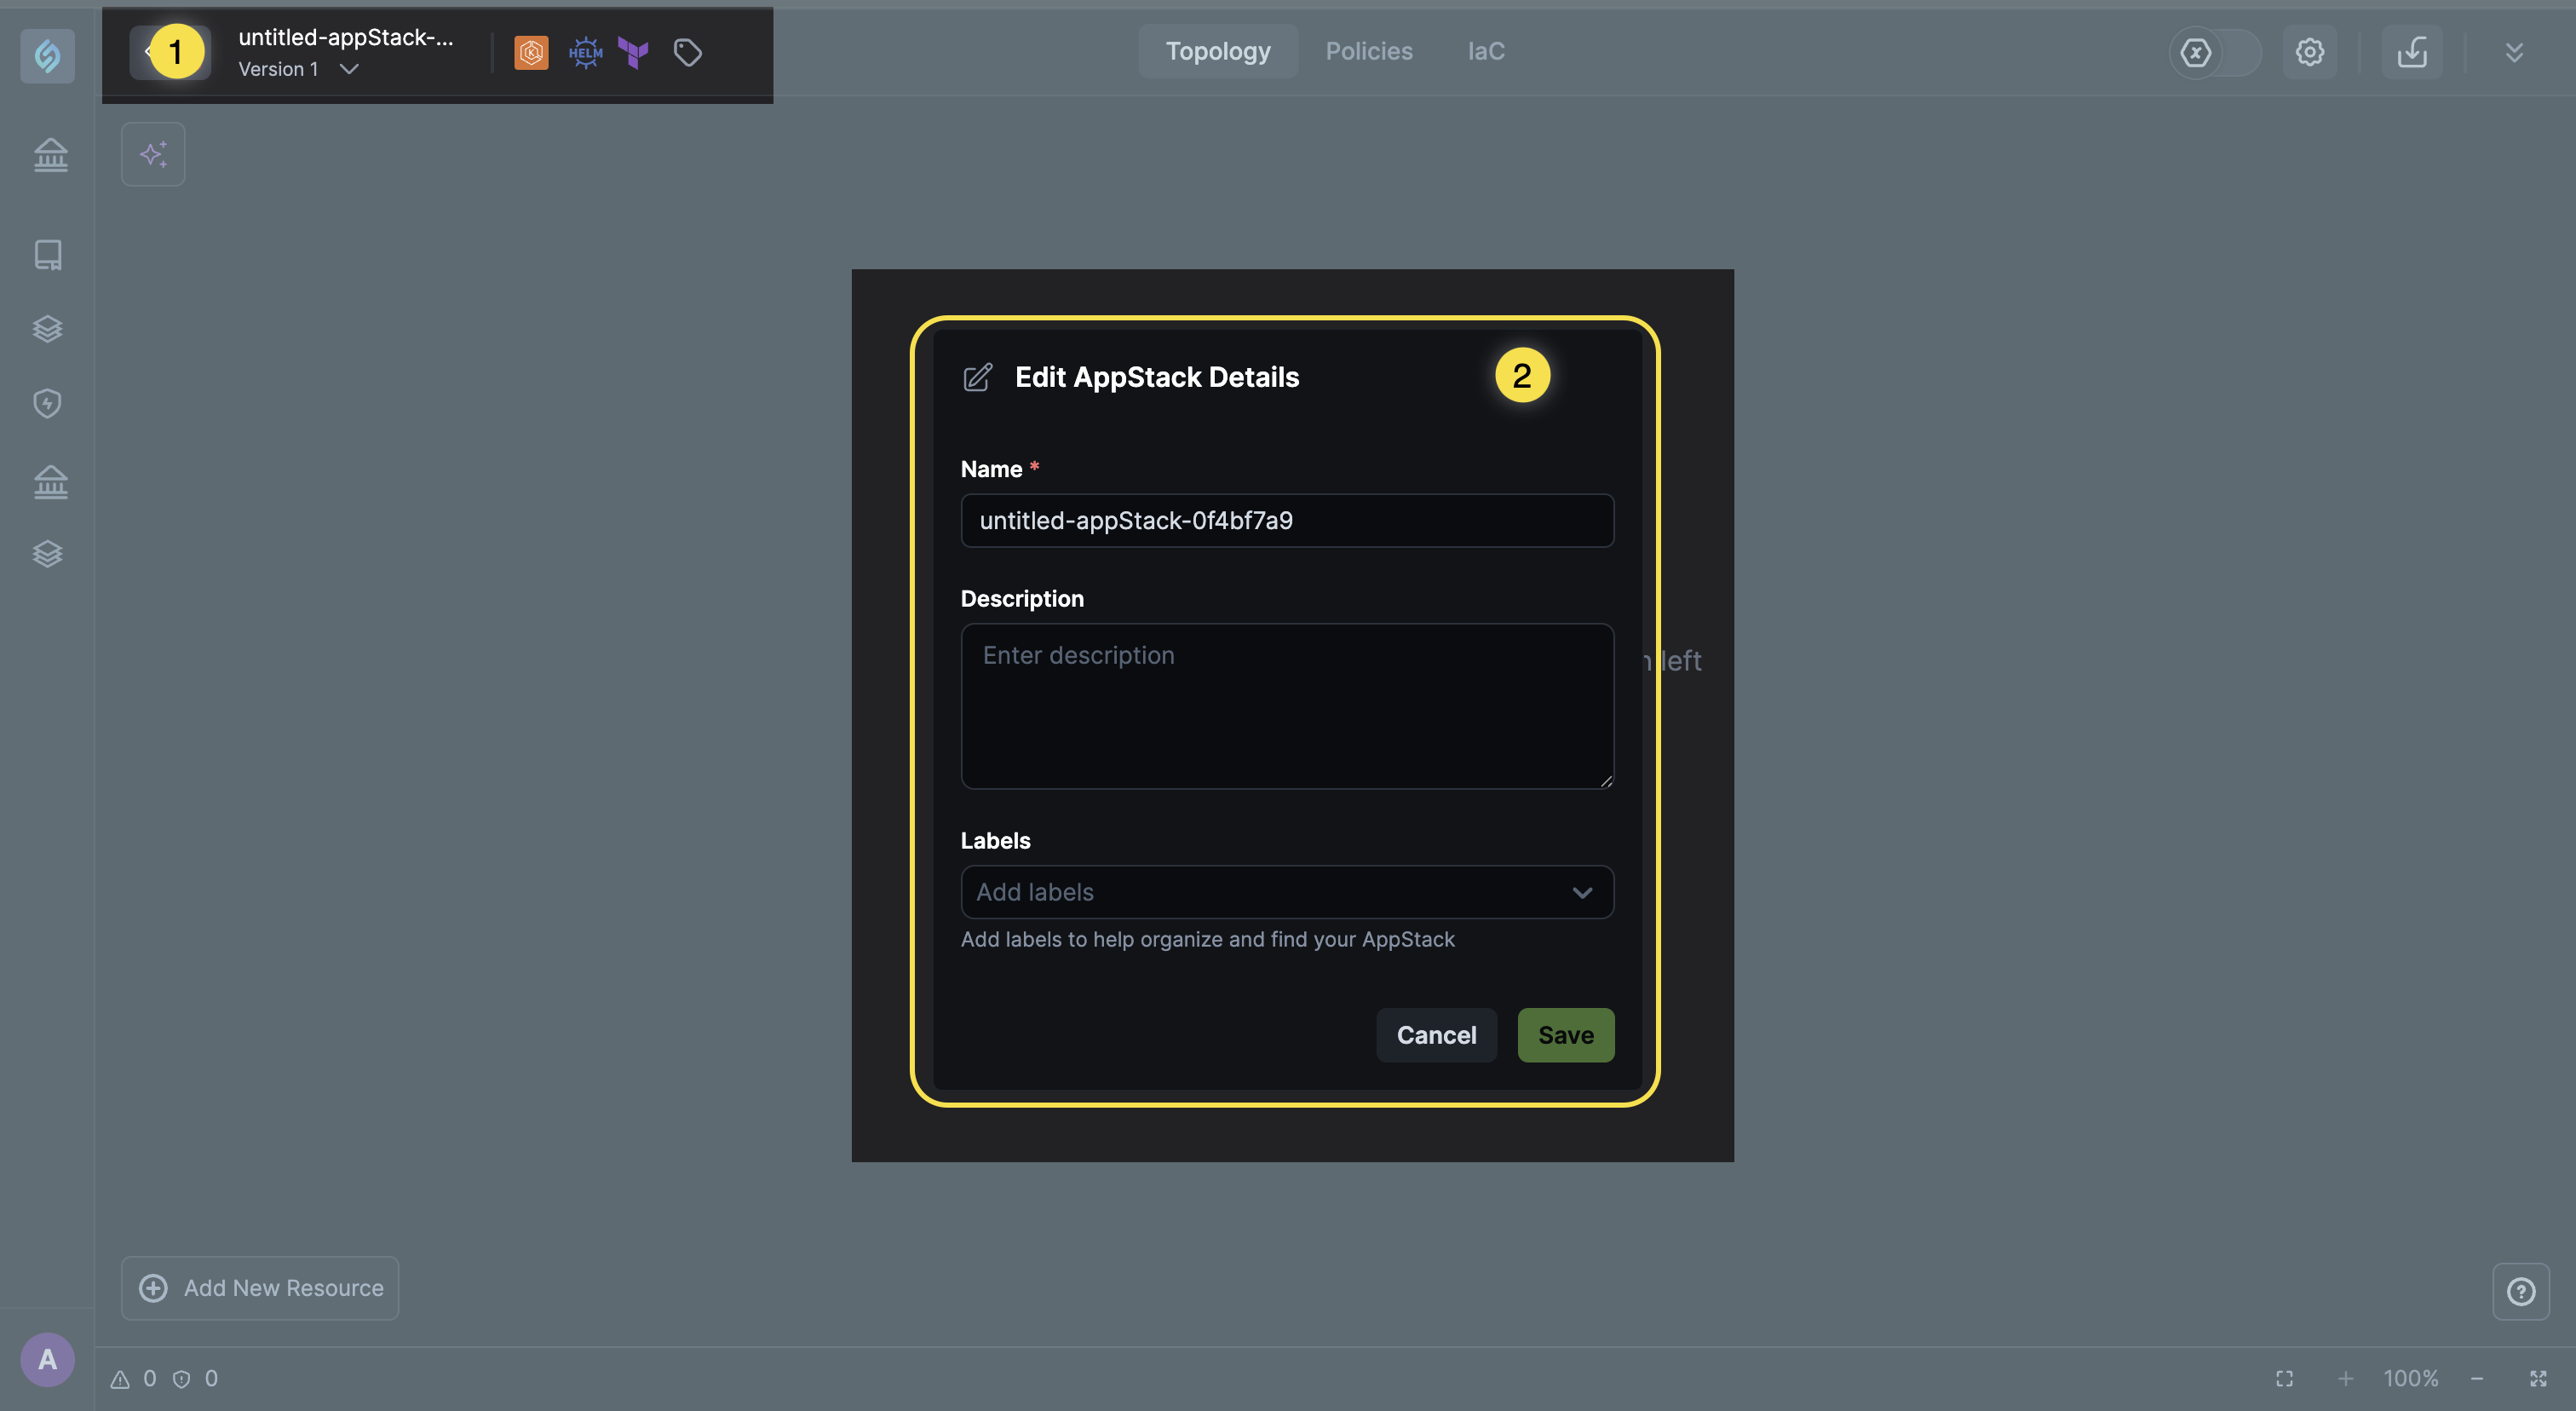
You can edit the appStack name and description via the Edit appStack Details modal.
-
-
Your deployment file should be saved as a
.tfstatefile using the Cloud to Code CLI for this feature to work.
-
-
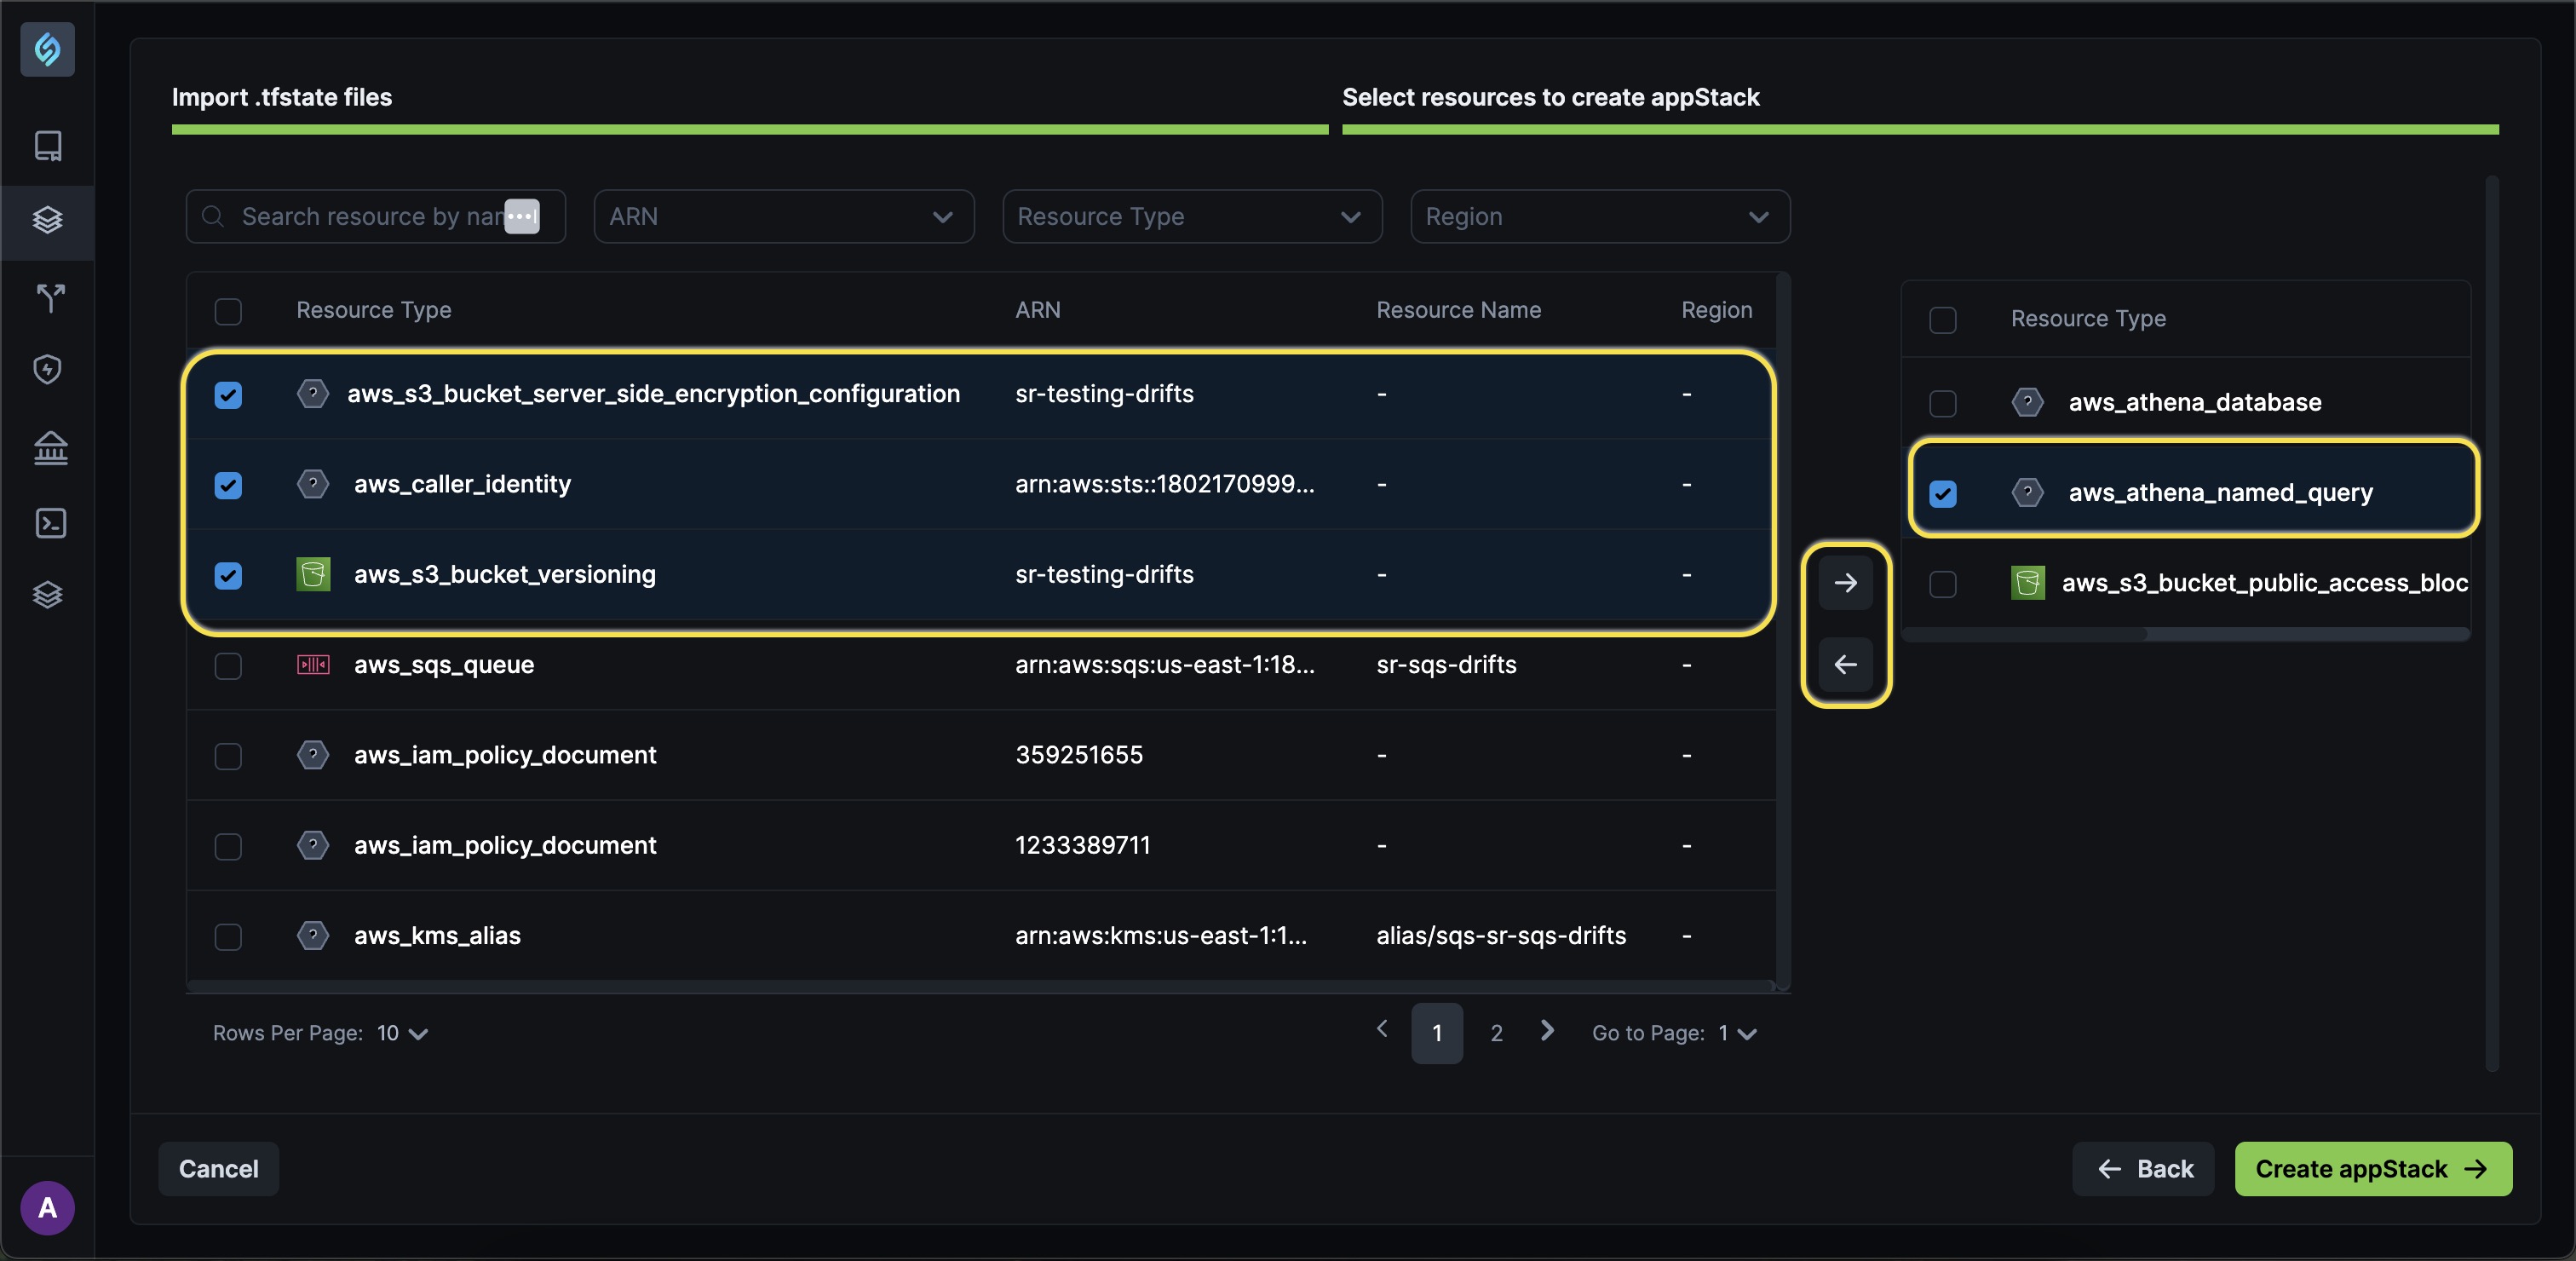
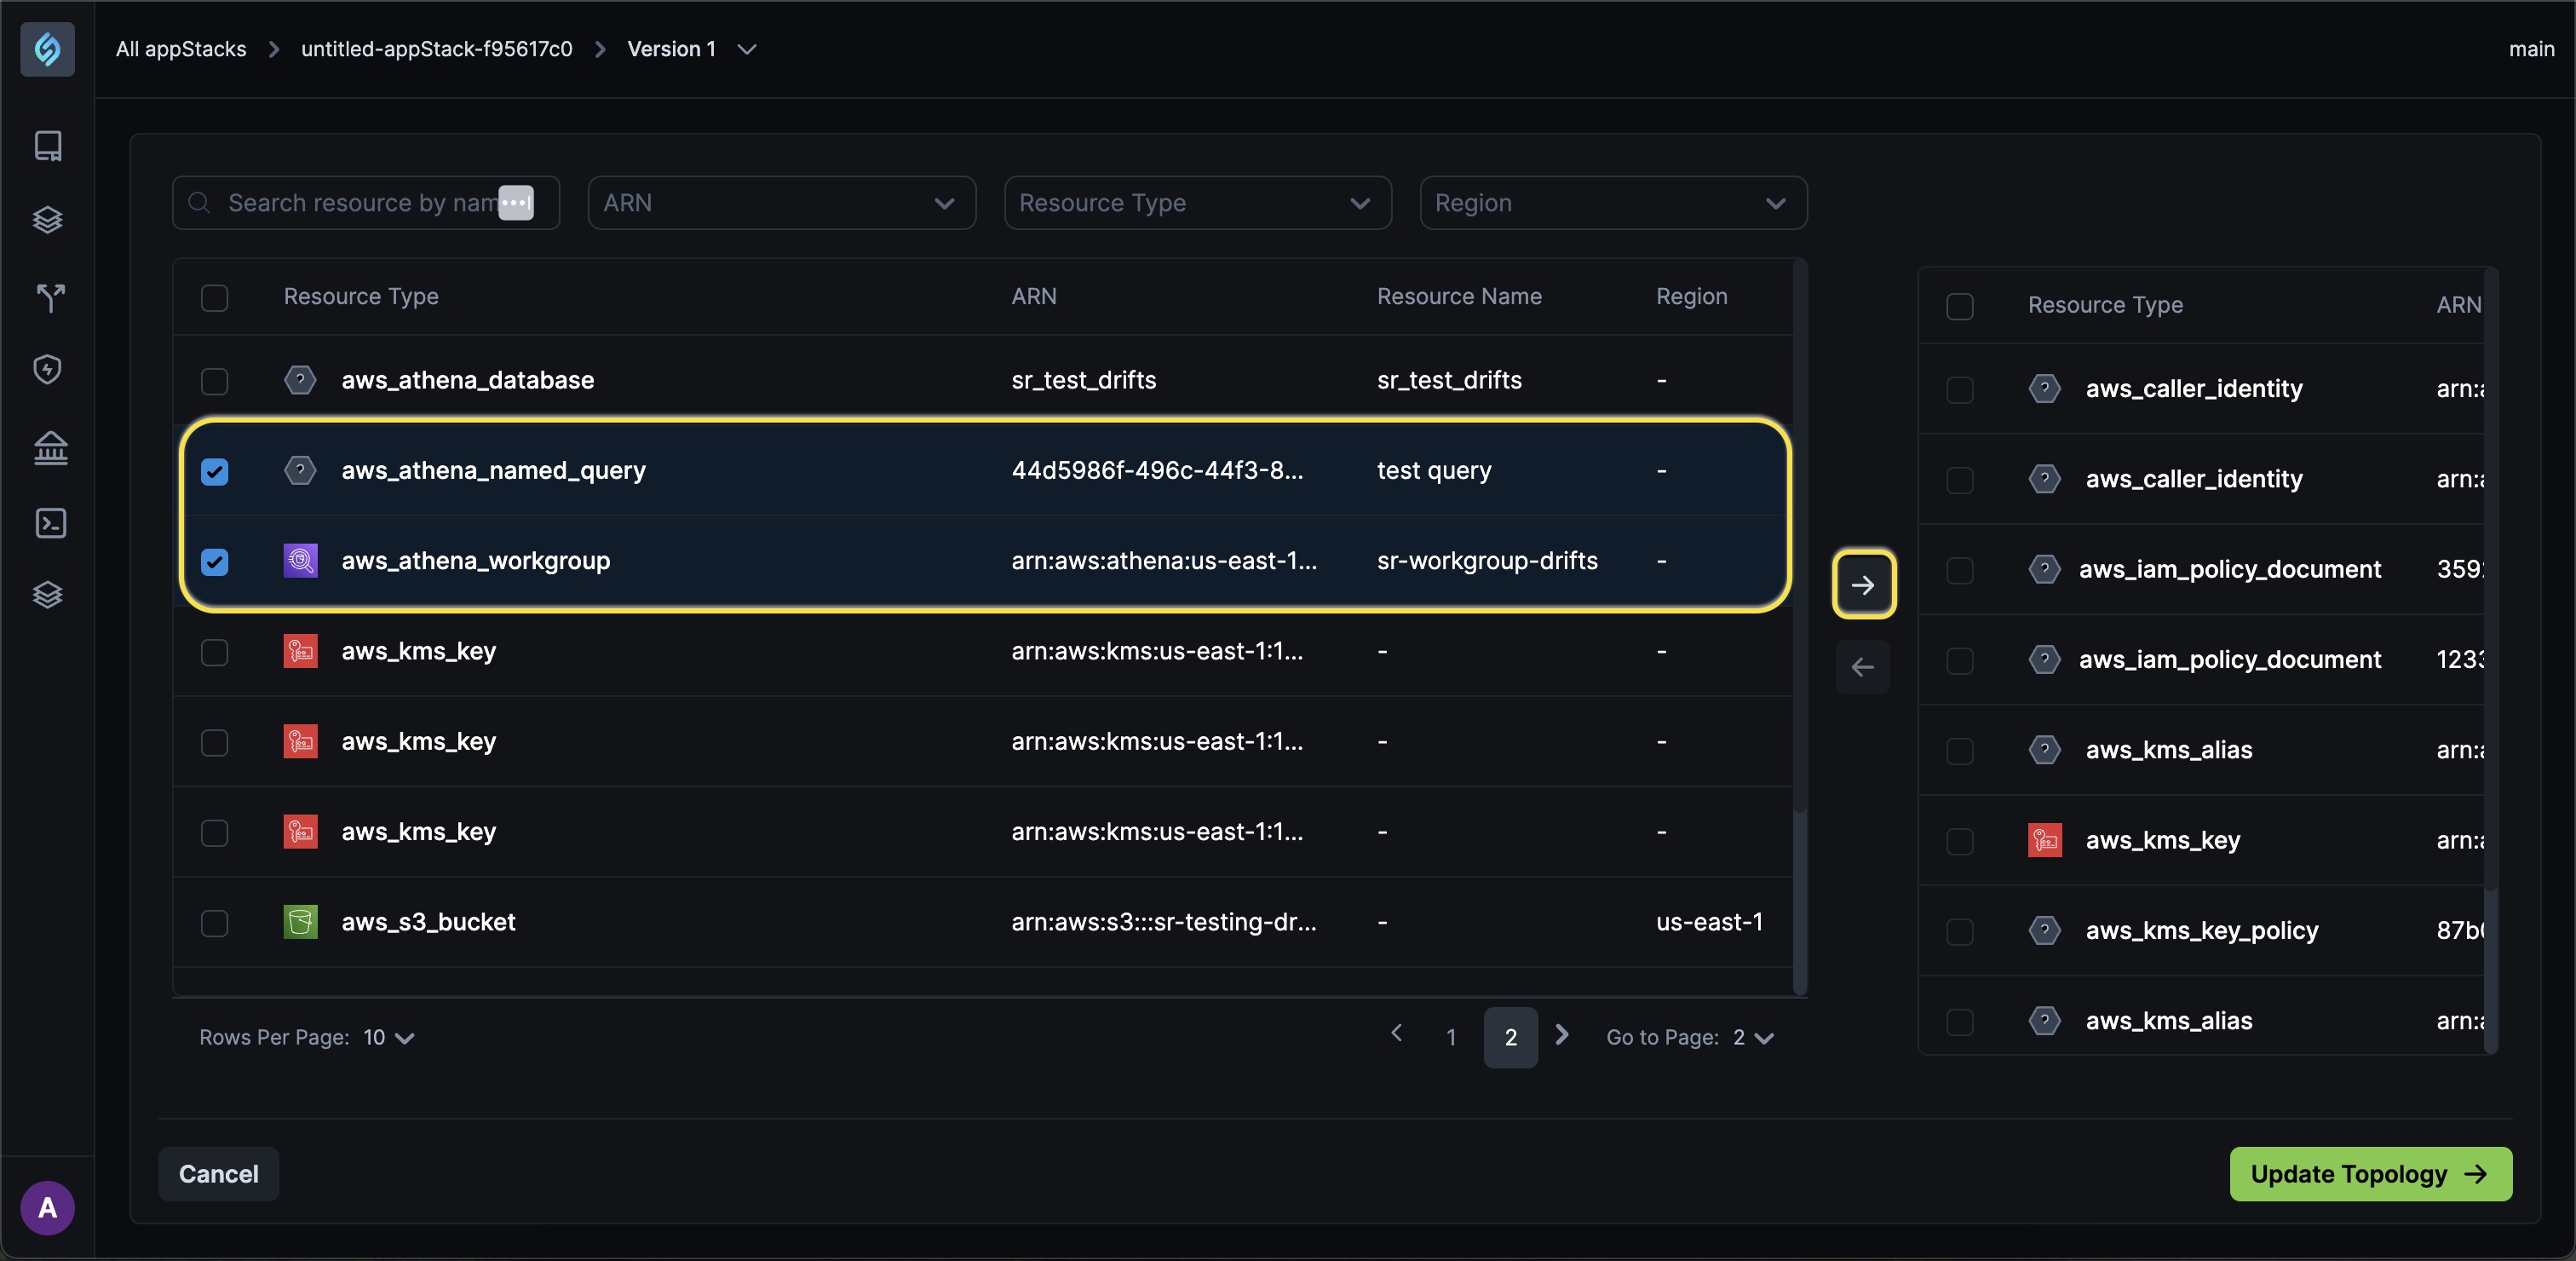
StackGen will identify all the resources within your
.tfstatefile.-
You can select all resources or a few and click the forward arrow → to create your appStack.
-
To unselect a resource, click the back arrow ←.
-
-
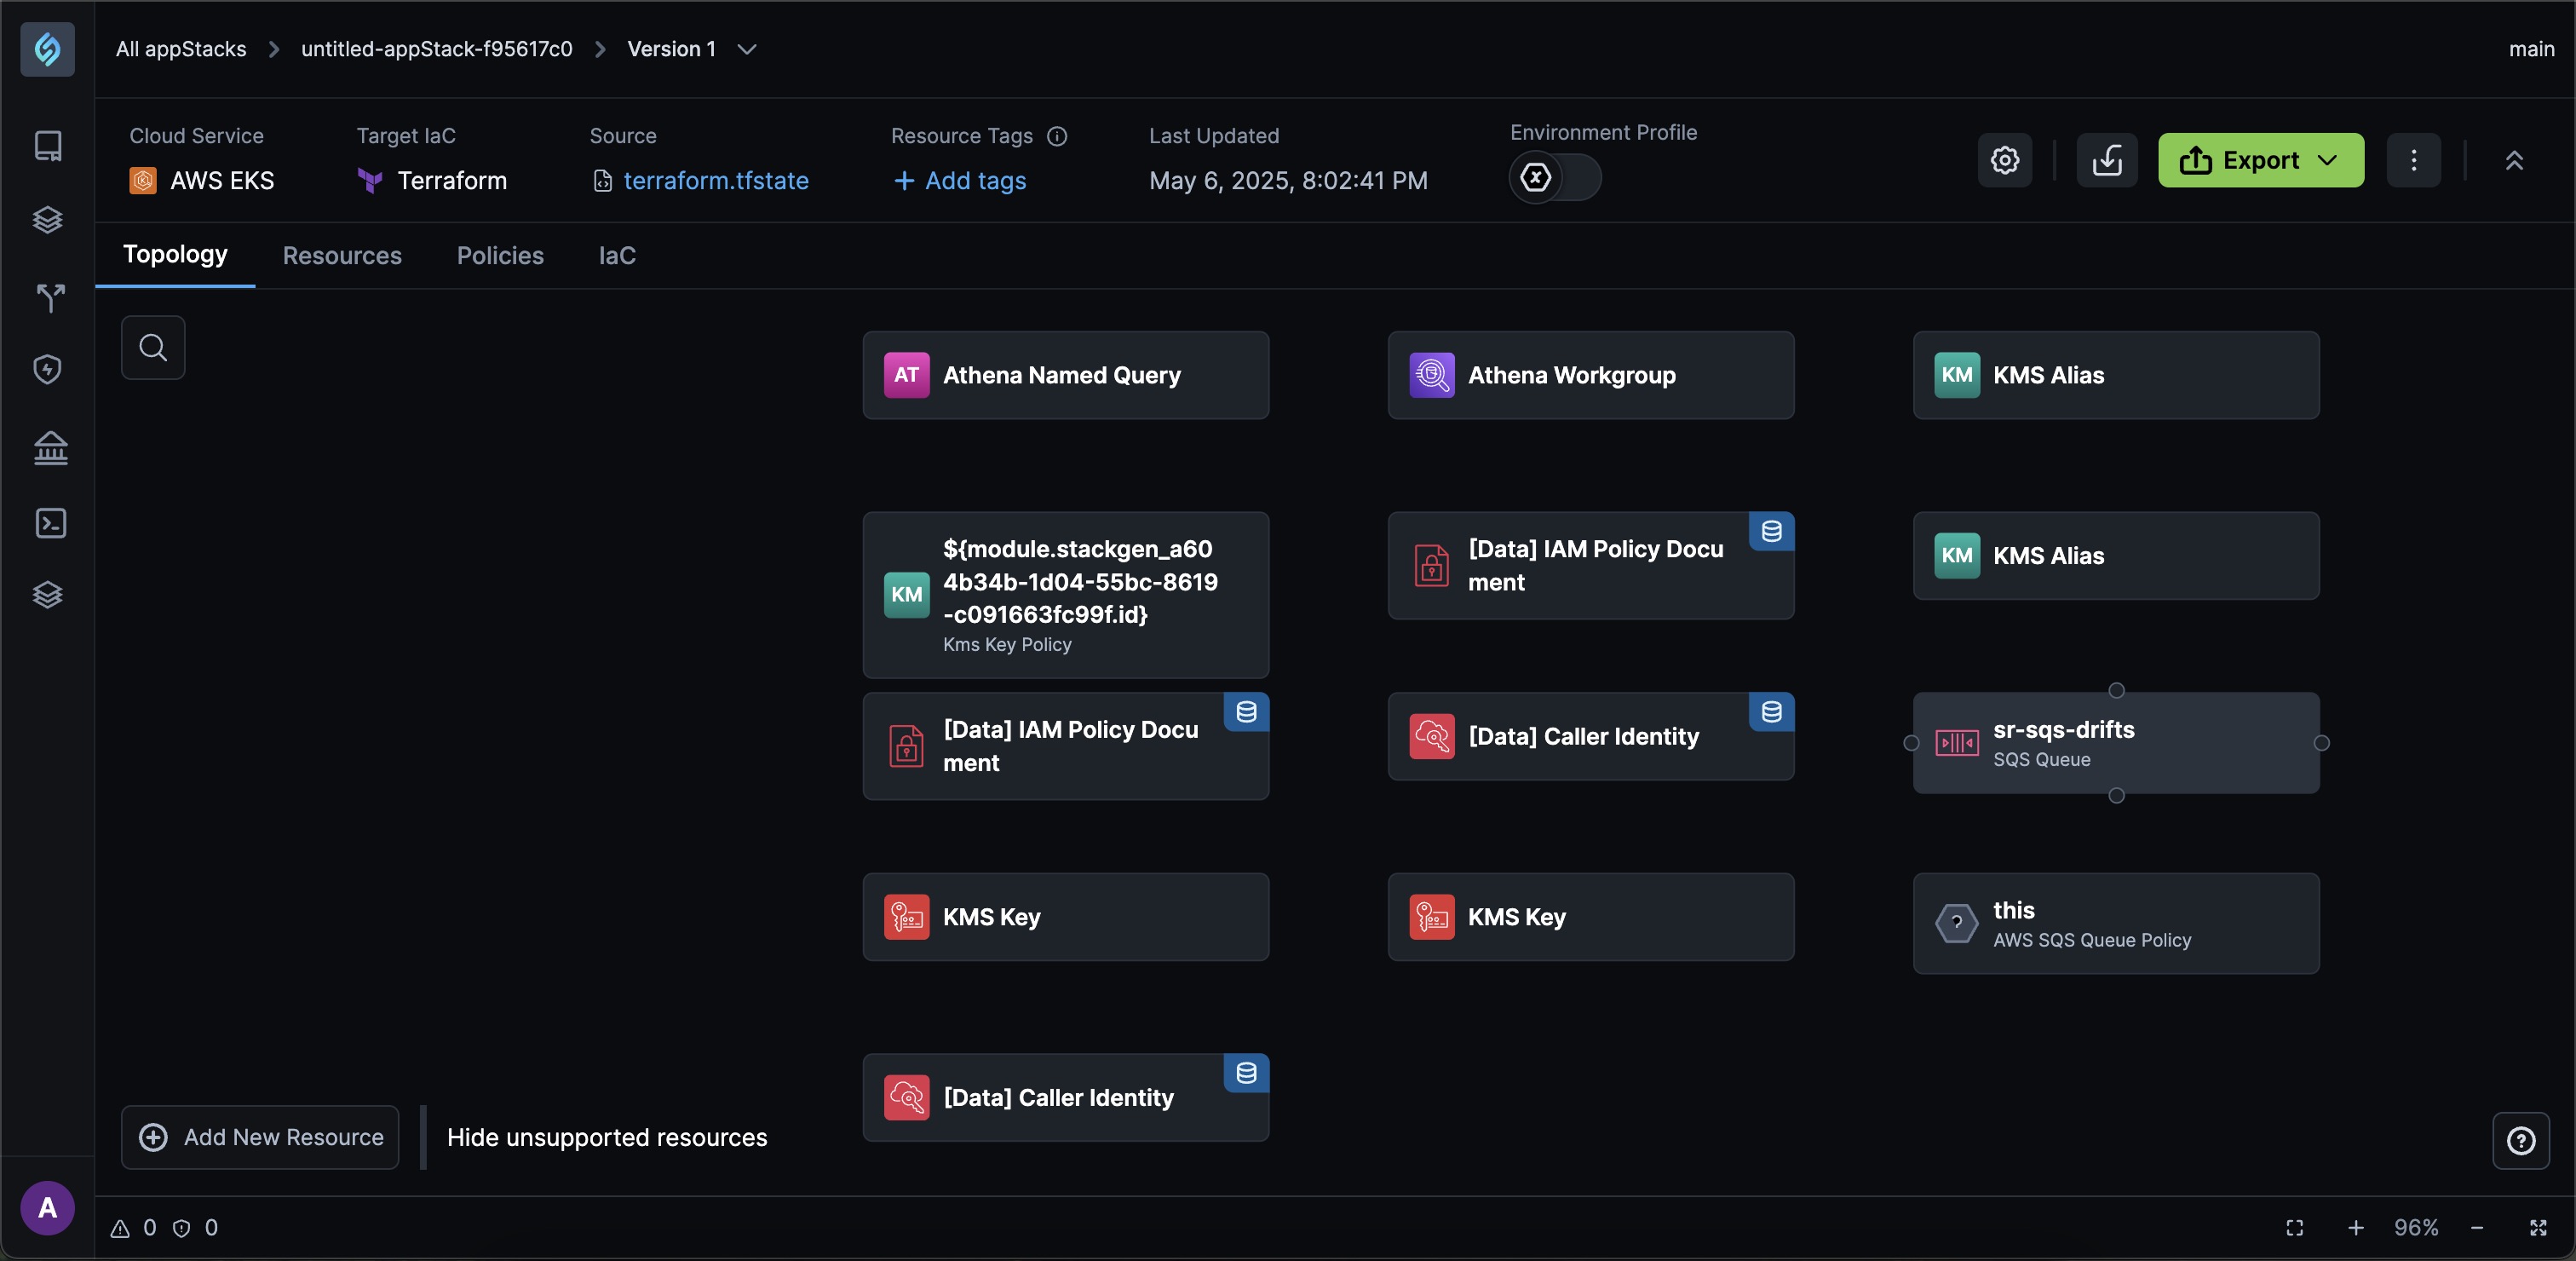
Click the Create appStack button. You will be redirected to the Topology Canvas.
You can edit the appStack name and description via the Edit appStack Details modal.
-
At any point in time, if you want to go back and select or unselect resources from your appStack:
-
Click Source icon from the appstack details menu.
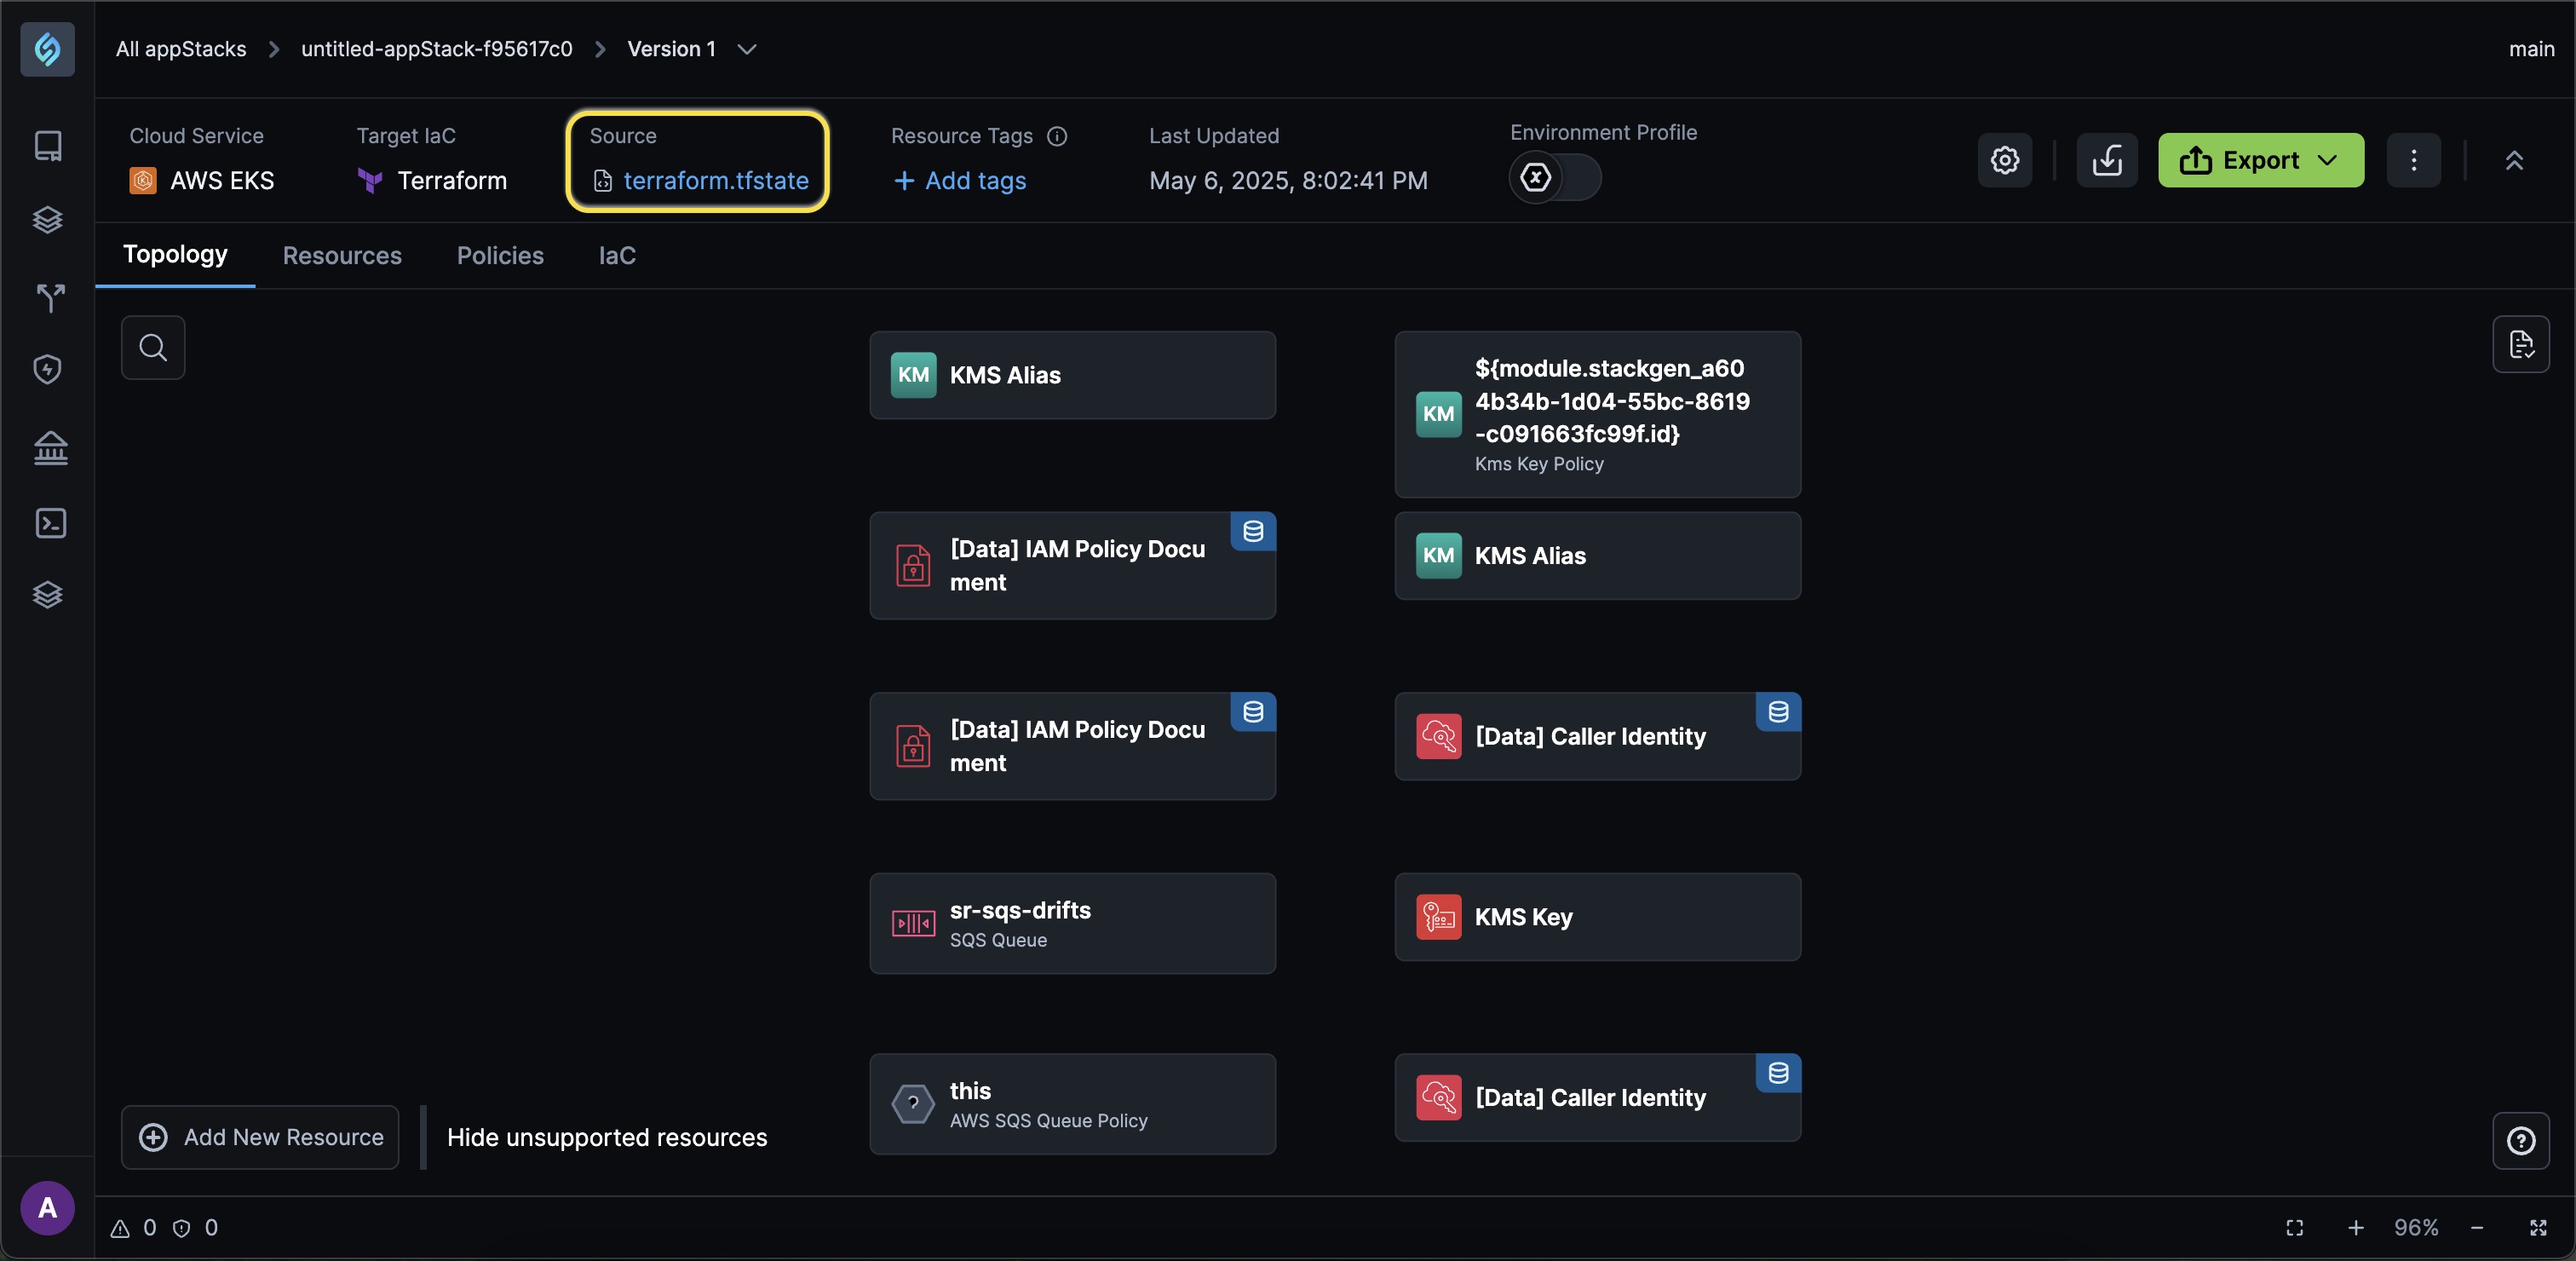
-
You can select the resources required, and click the forward arrow → to include them in your appStack.
 note
noteYou cannot remove the resources that you've added while creating the base appStack.
-
Click Update Topology. Your appStack will be updated with the selected resources.
-