IaC from App Code
Auto-generate IaC based on application code with golden standards applied. Deploy to AWS, Azure or GCP. Build for new applications or refactor legacy applications from the ground up. You can connect StackGen with your application source code to generate your deployment architecture. This method lets you:
- Connect to a source control management tool.
- Select from branches, language, and container images.
- Choose your target IaC and,
- Create your appStack.
Currently, we support the following source control management tools:
- GitHub
- GitLab
- Azure DevOps
- Bitbucket
Prerequisites
Click to view
- You will need to ensure that StackGen has access to the repositories that you will use to build your application. You can connect StackGen with several repos consisting of various microservices or a single monolithic repository. Please refer to the article [Connect to a repository](../../../quickstart/appstackgit merge march-releases.md#connect-a-repo) to add and connect new repositories to StackGen.
- While creating an appStack, you will be prompted to provide specific information to help StackGen accurately analyze and set up your application's environment. Here’s what you need to know about each field:
- appStack Name
- Description: The unique name you assign to your appStack for identification.
- Format: Enter a descriptive name without spaces, which should be URL-safe.
- Description (optional)
- Description: A brief overview of what your appStack is and what it represents.
- Format: Free text field, optional for additional context.
- Label
- Description: A label that lets you classify and search your IaC.
- Format: Enter a descriptive label without spaces, which should be URL-safe.
- appStack Name
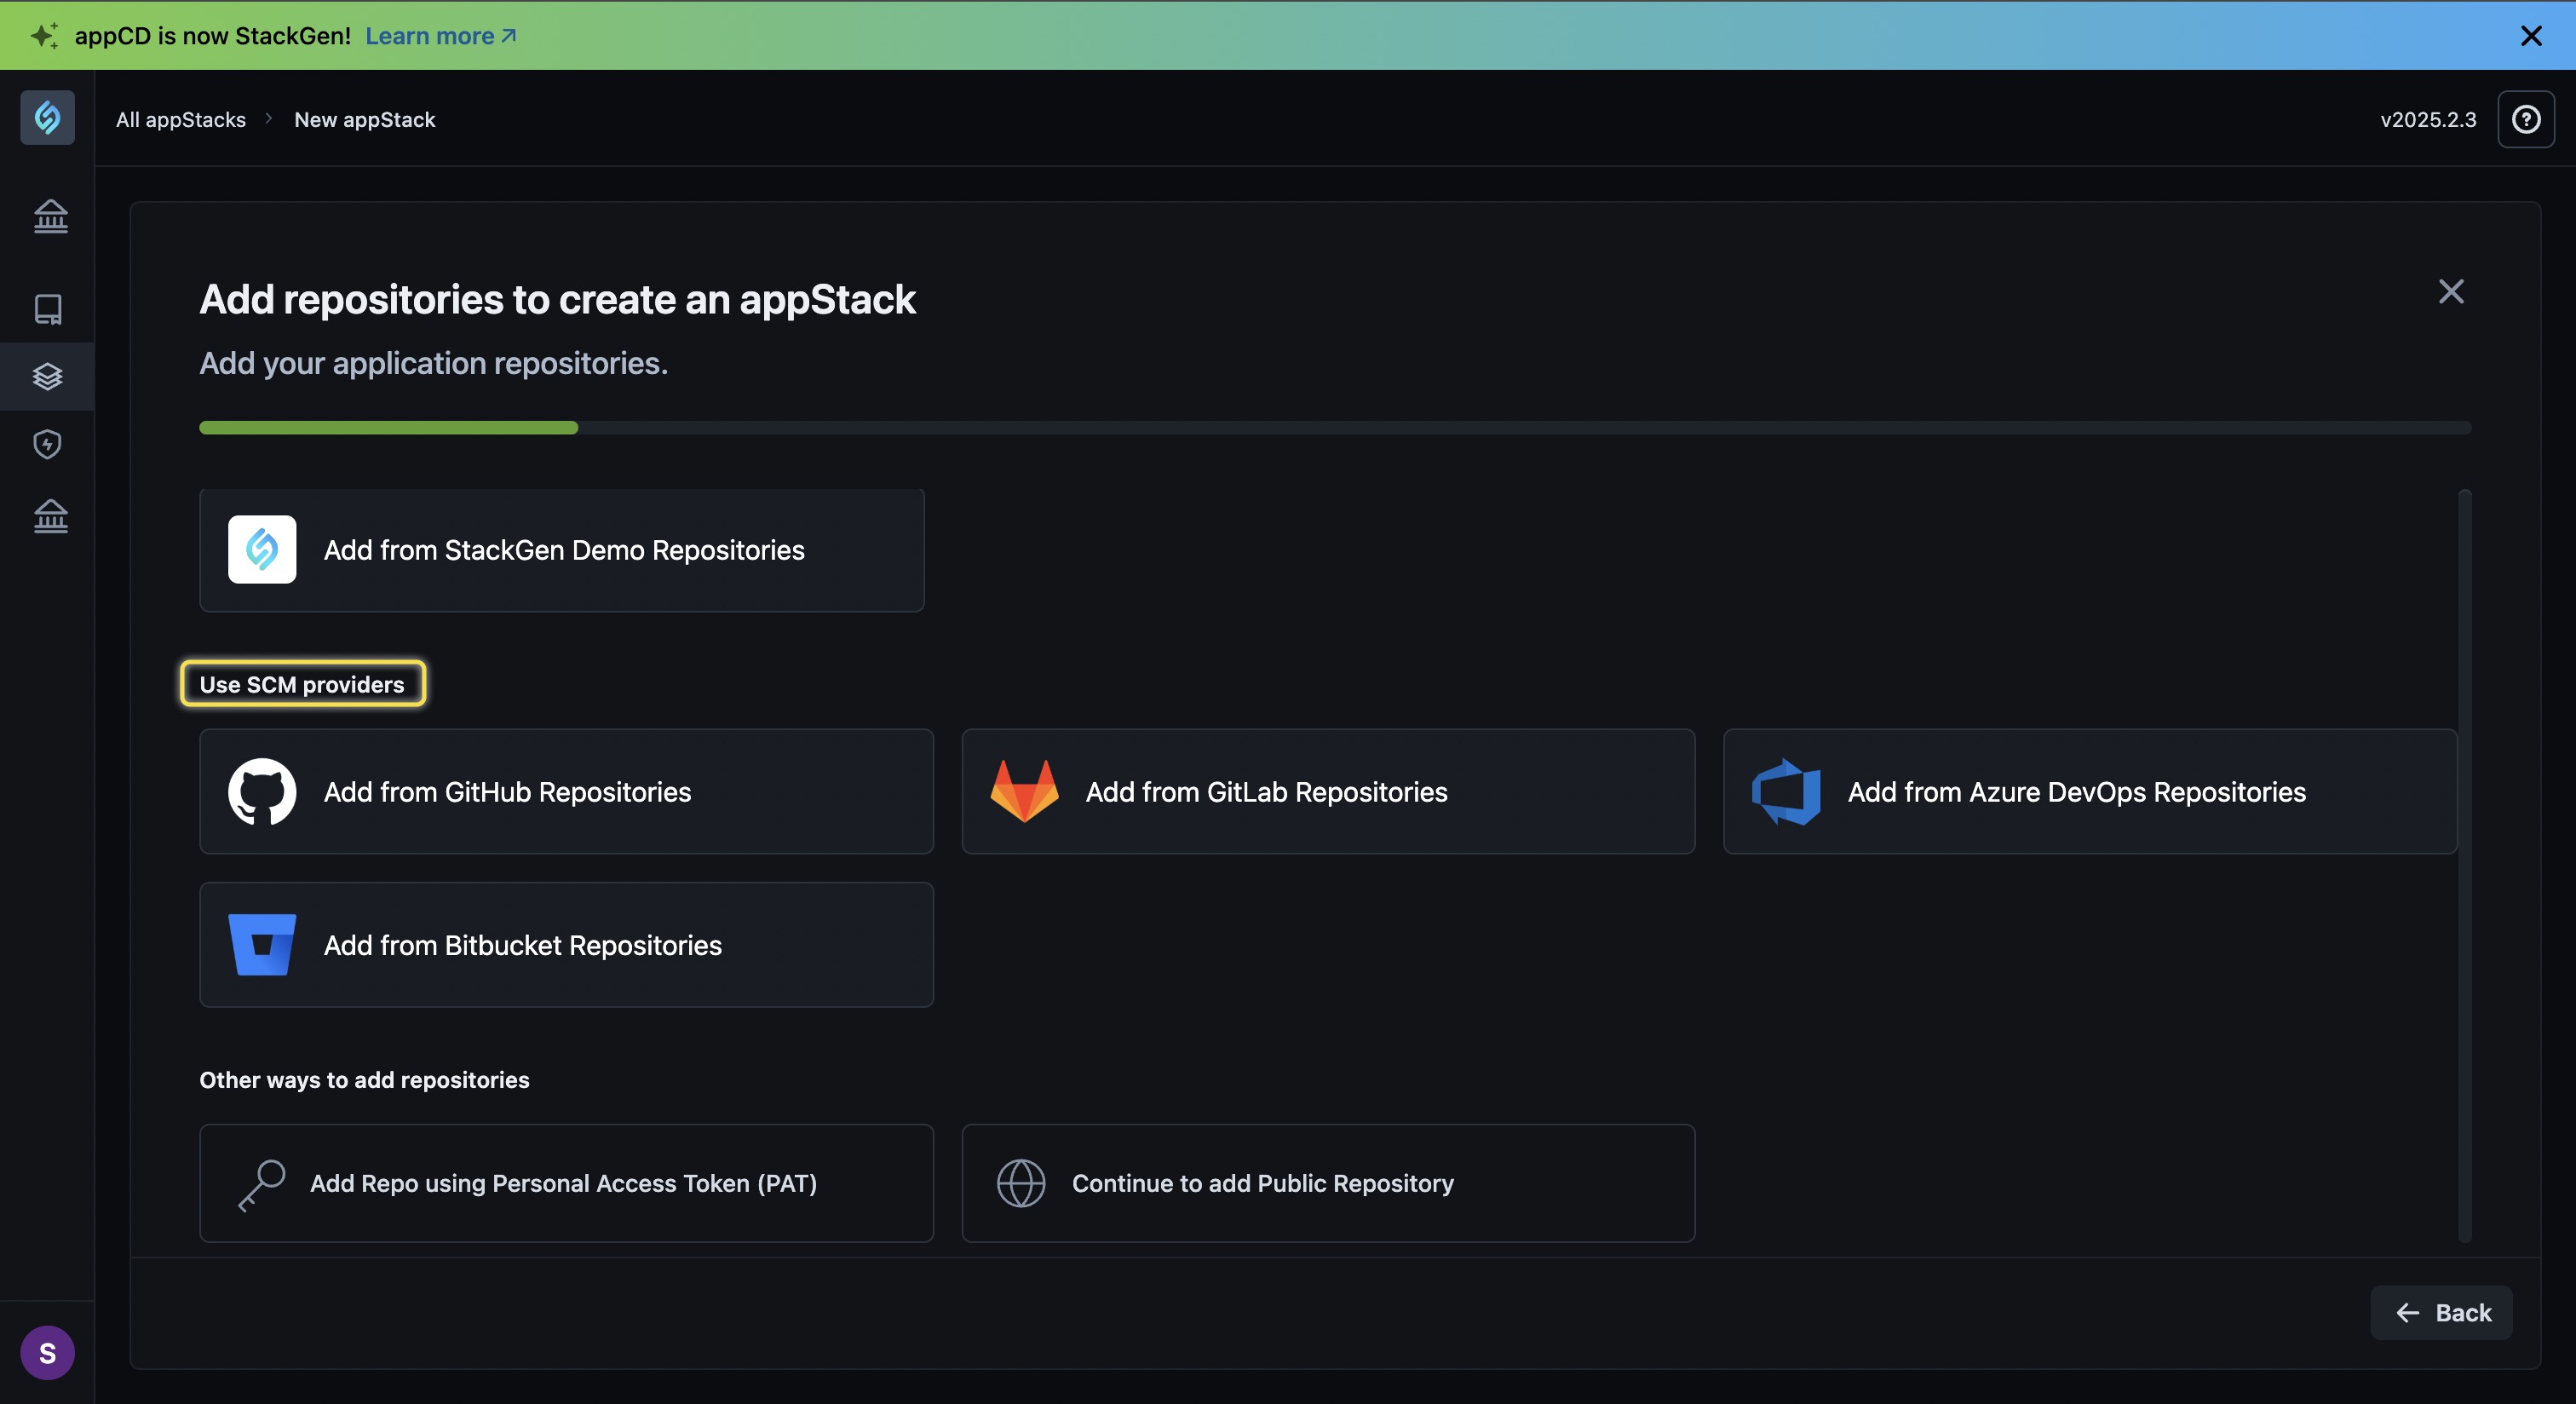
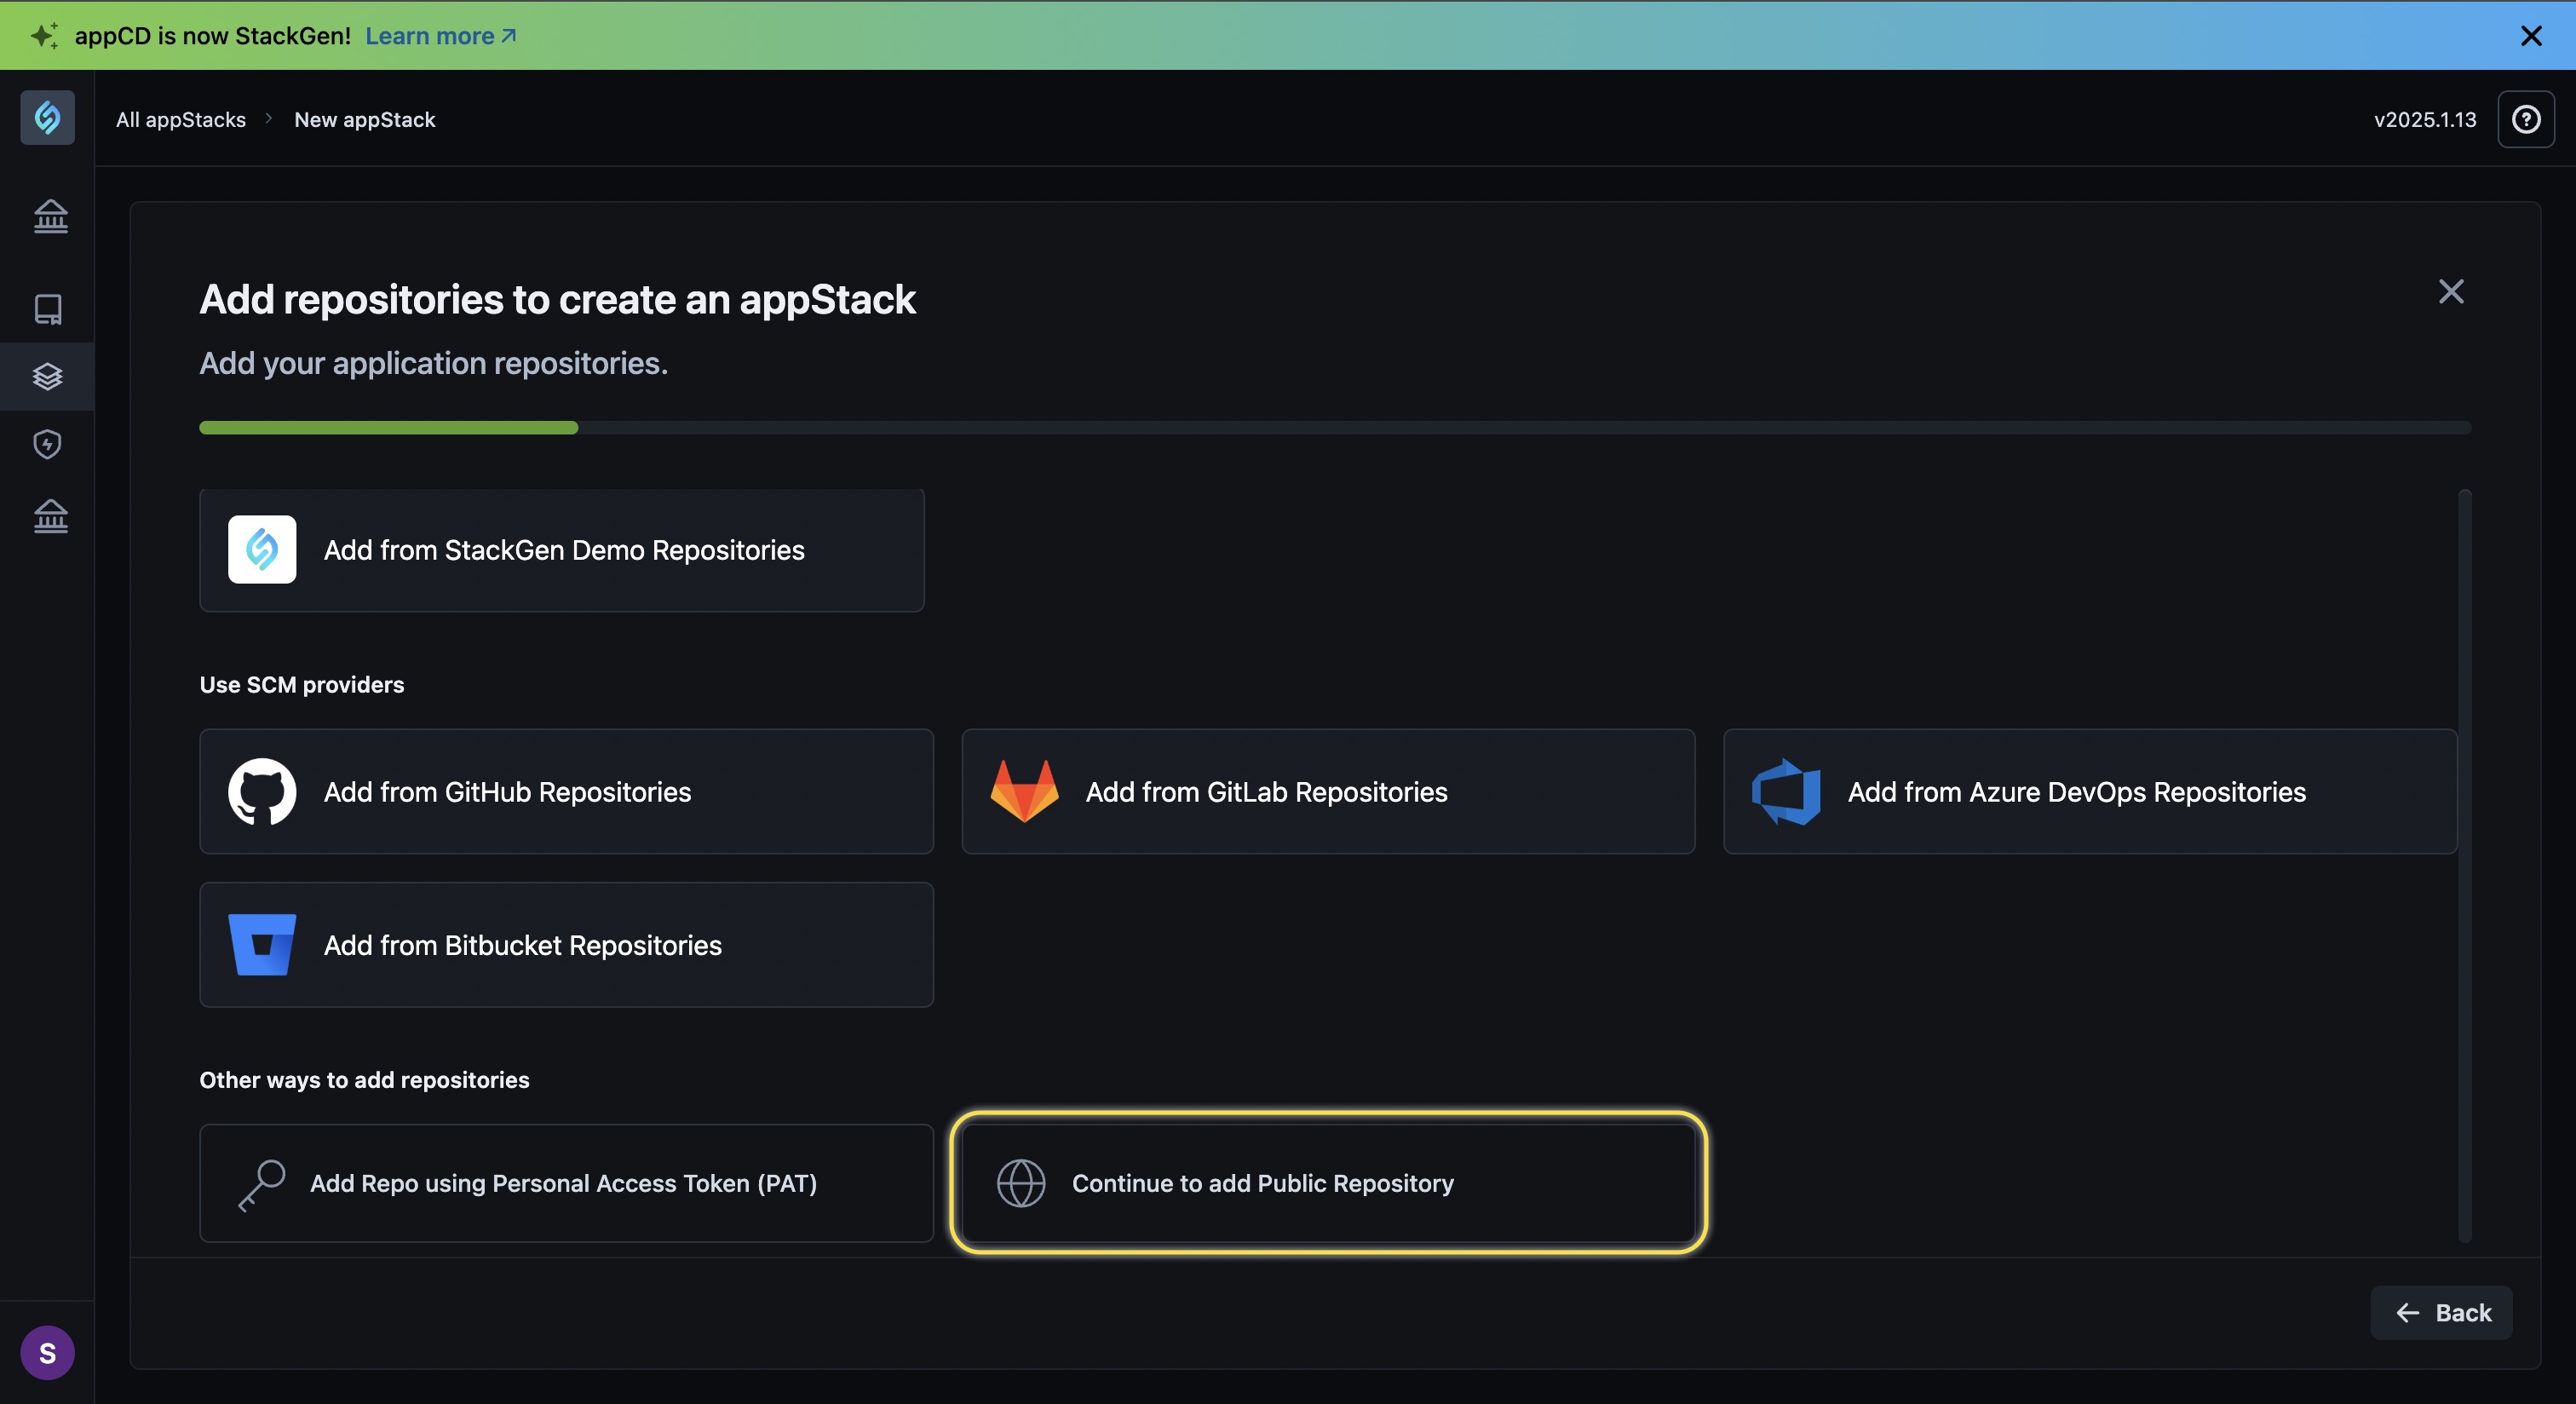
You can connect StackGen with the application source code repository in three ways:
- Connect and Authenticate Your Source Code Repository With StackGen.
- Use a Personal Access Token (PAT) to Connect With StackGen.
- Provide the URL to a public repository that hosts your IaC image files.
Connect and Authenticate Your Source Code Repository With StackGen
Click to view
Follow these steps to connect your source code repository with StackGen:
-
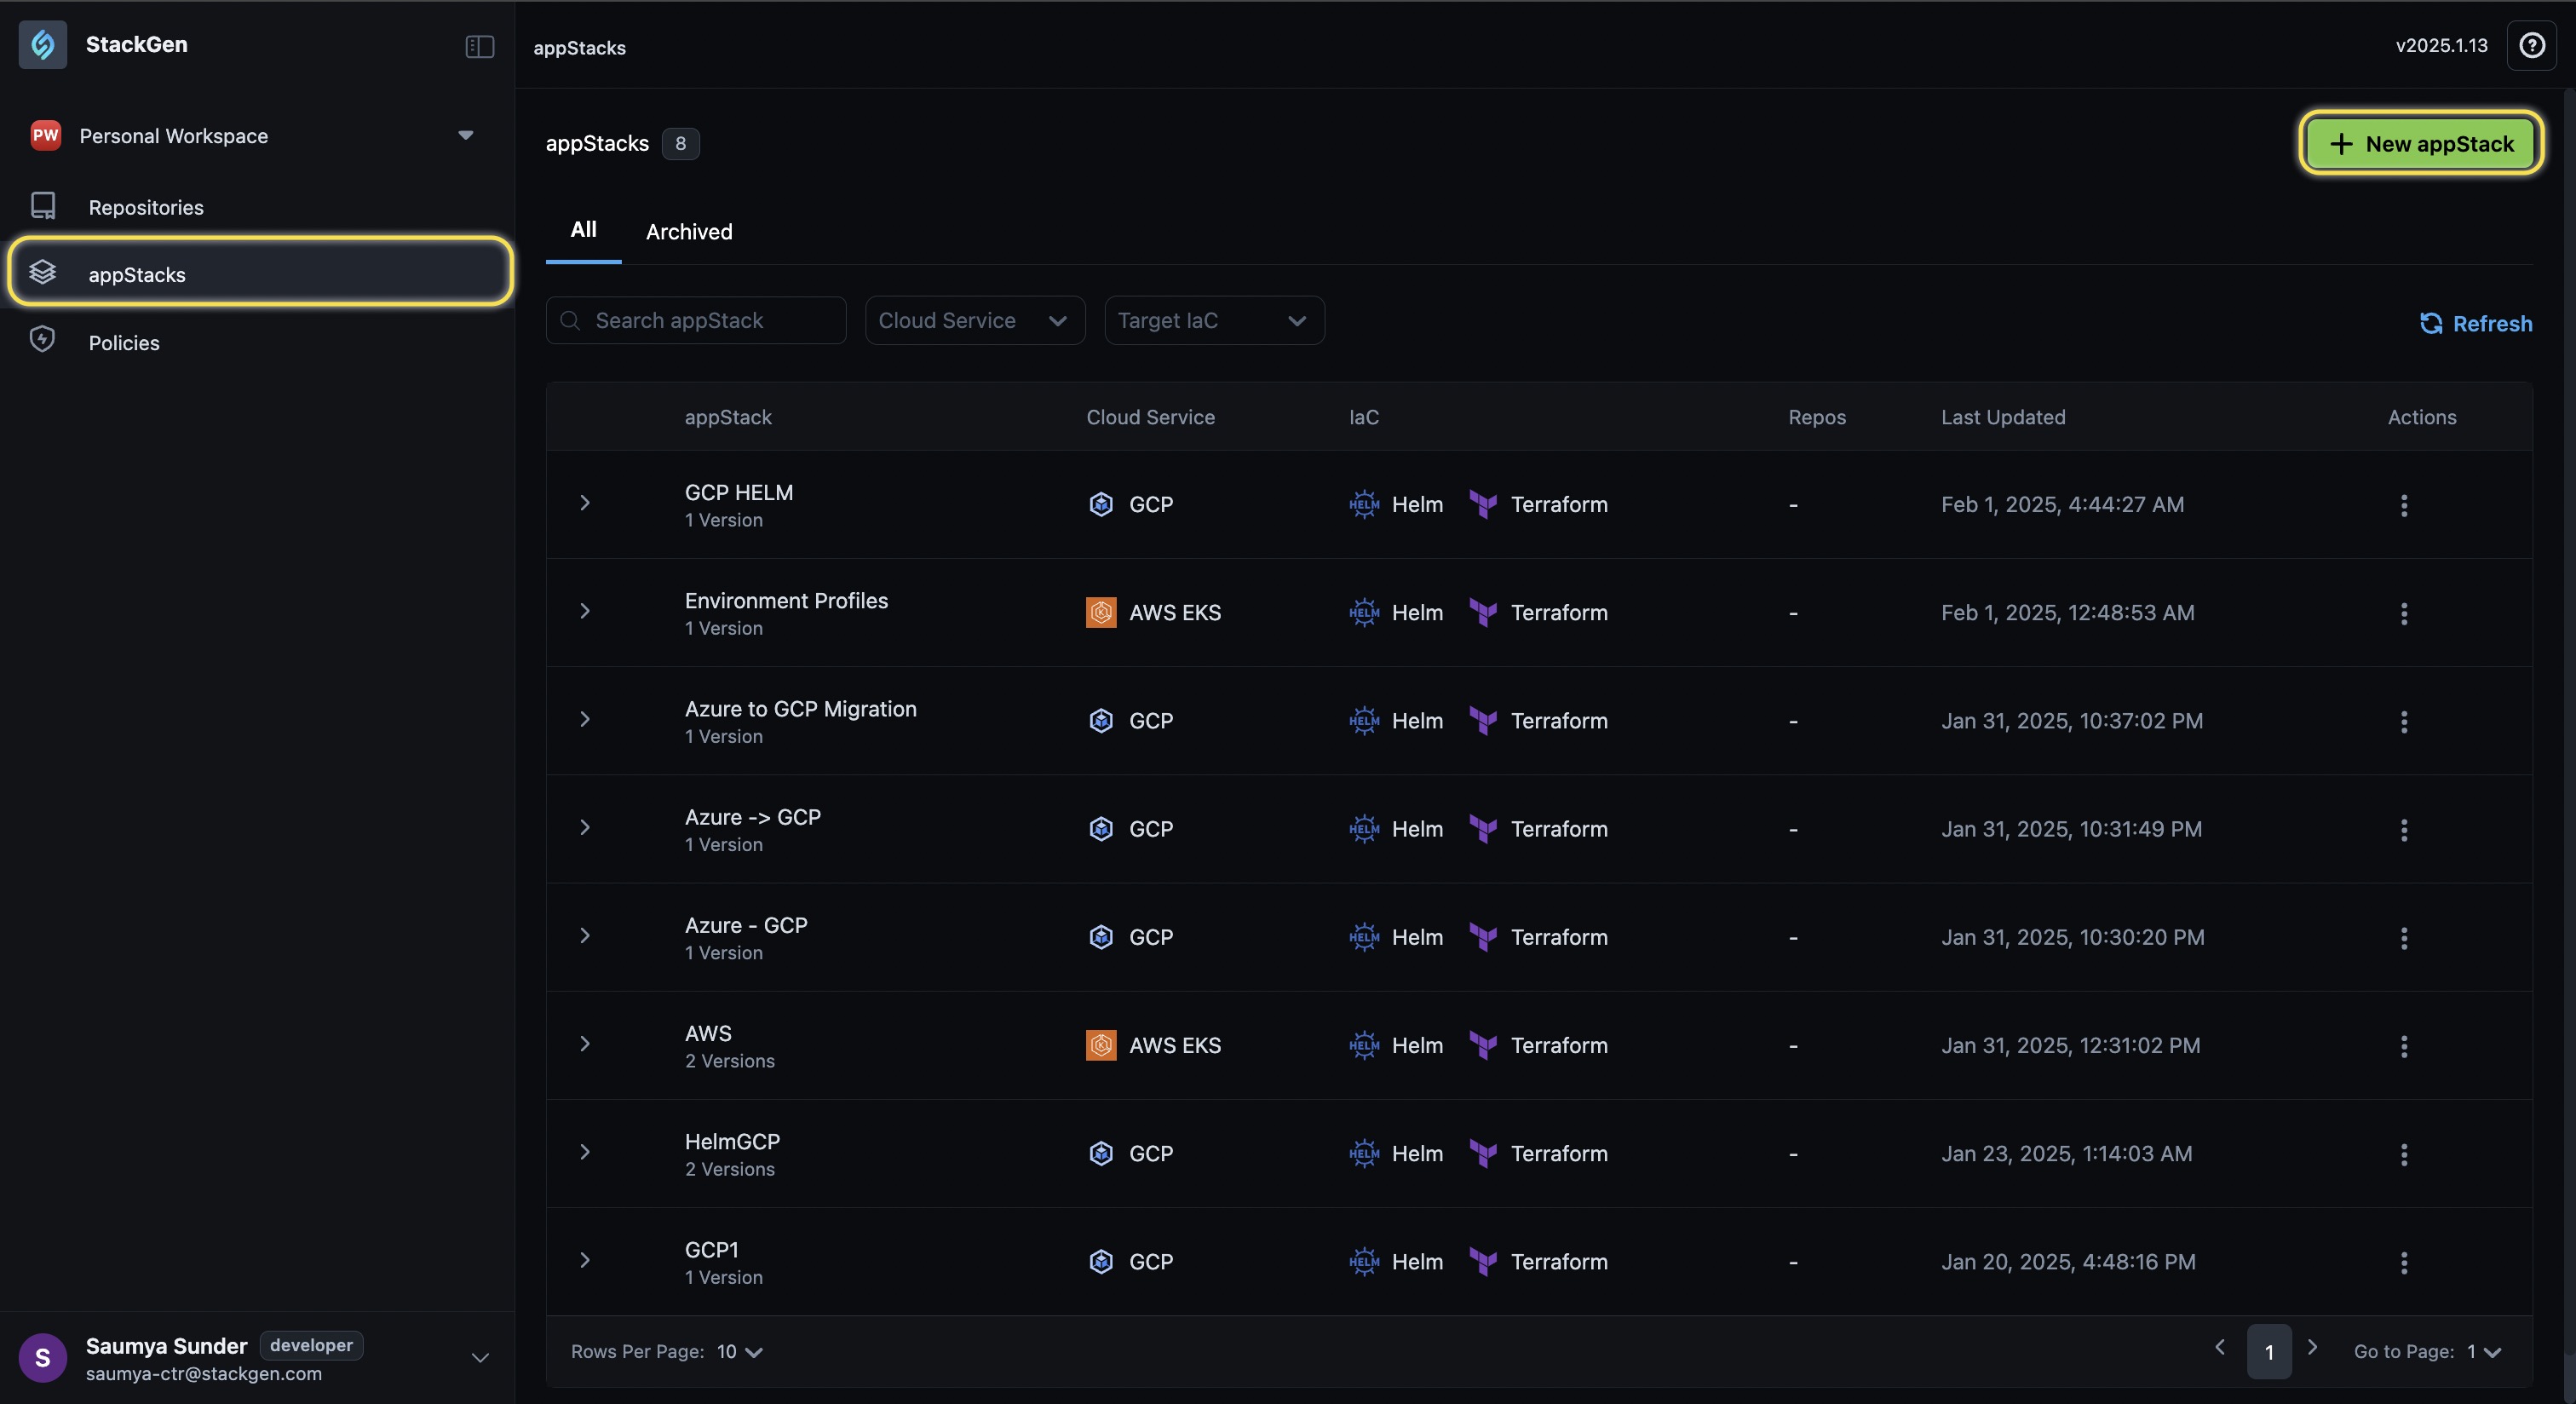
Click the + New appStack button.
-
Select From source code.

-
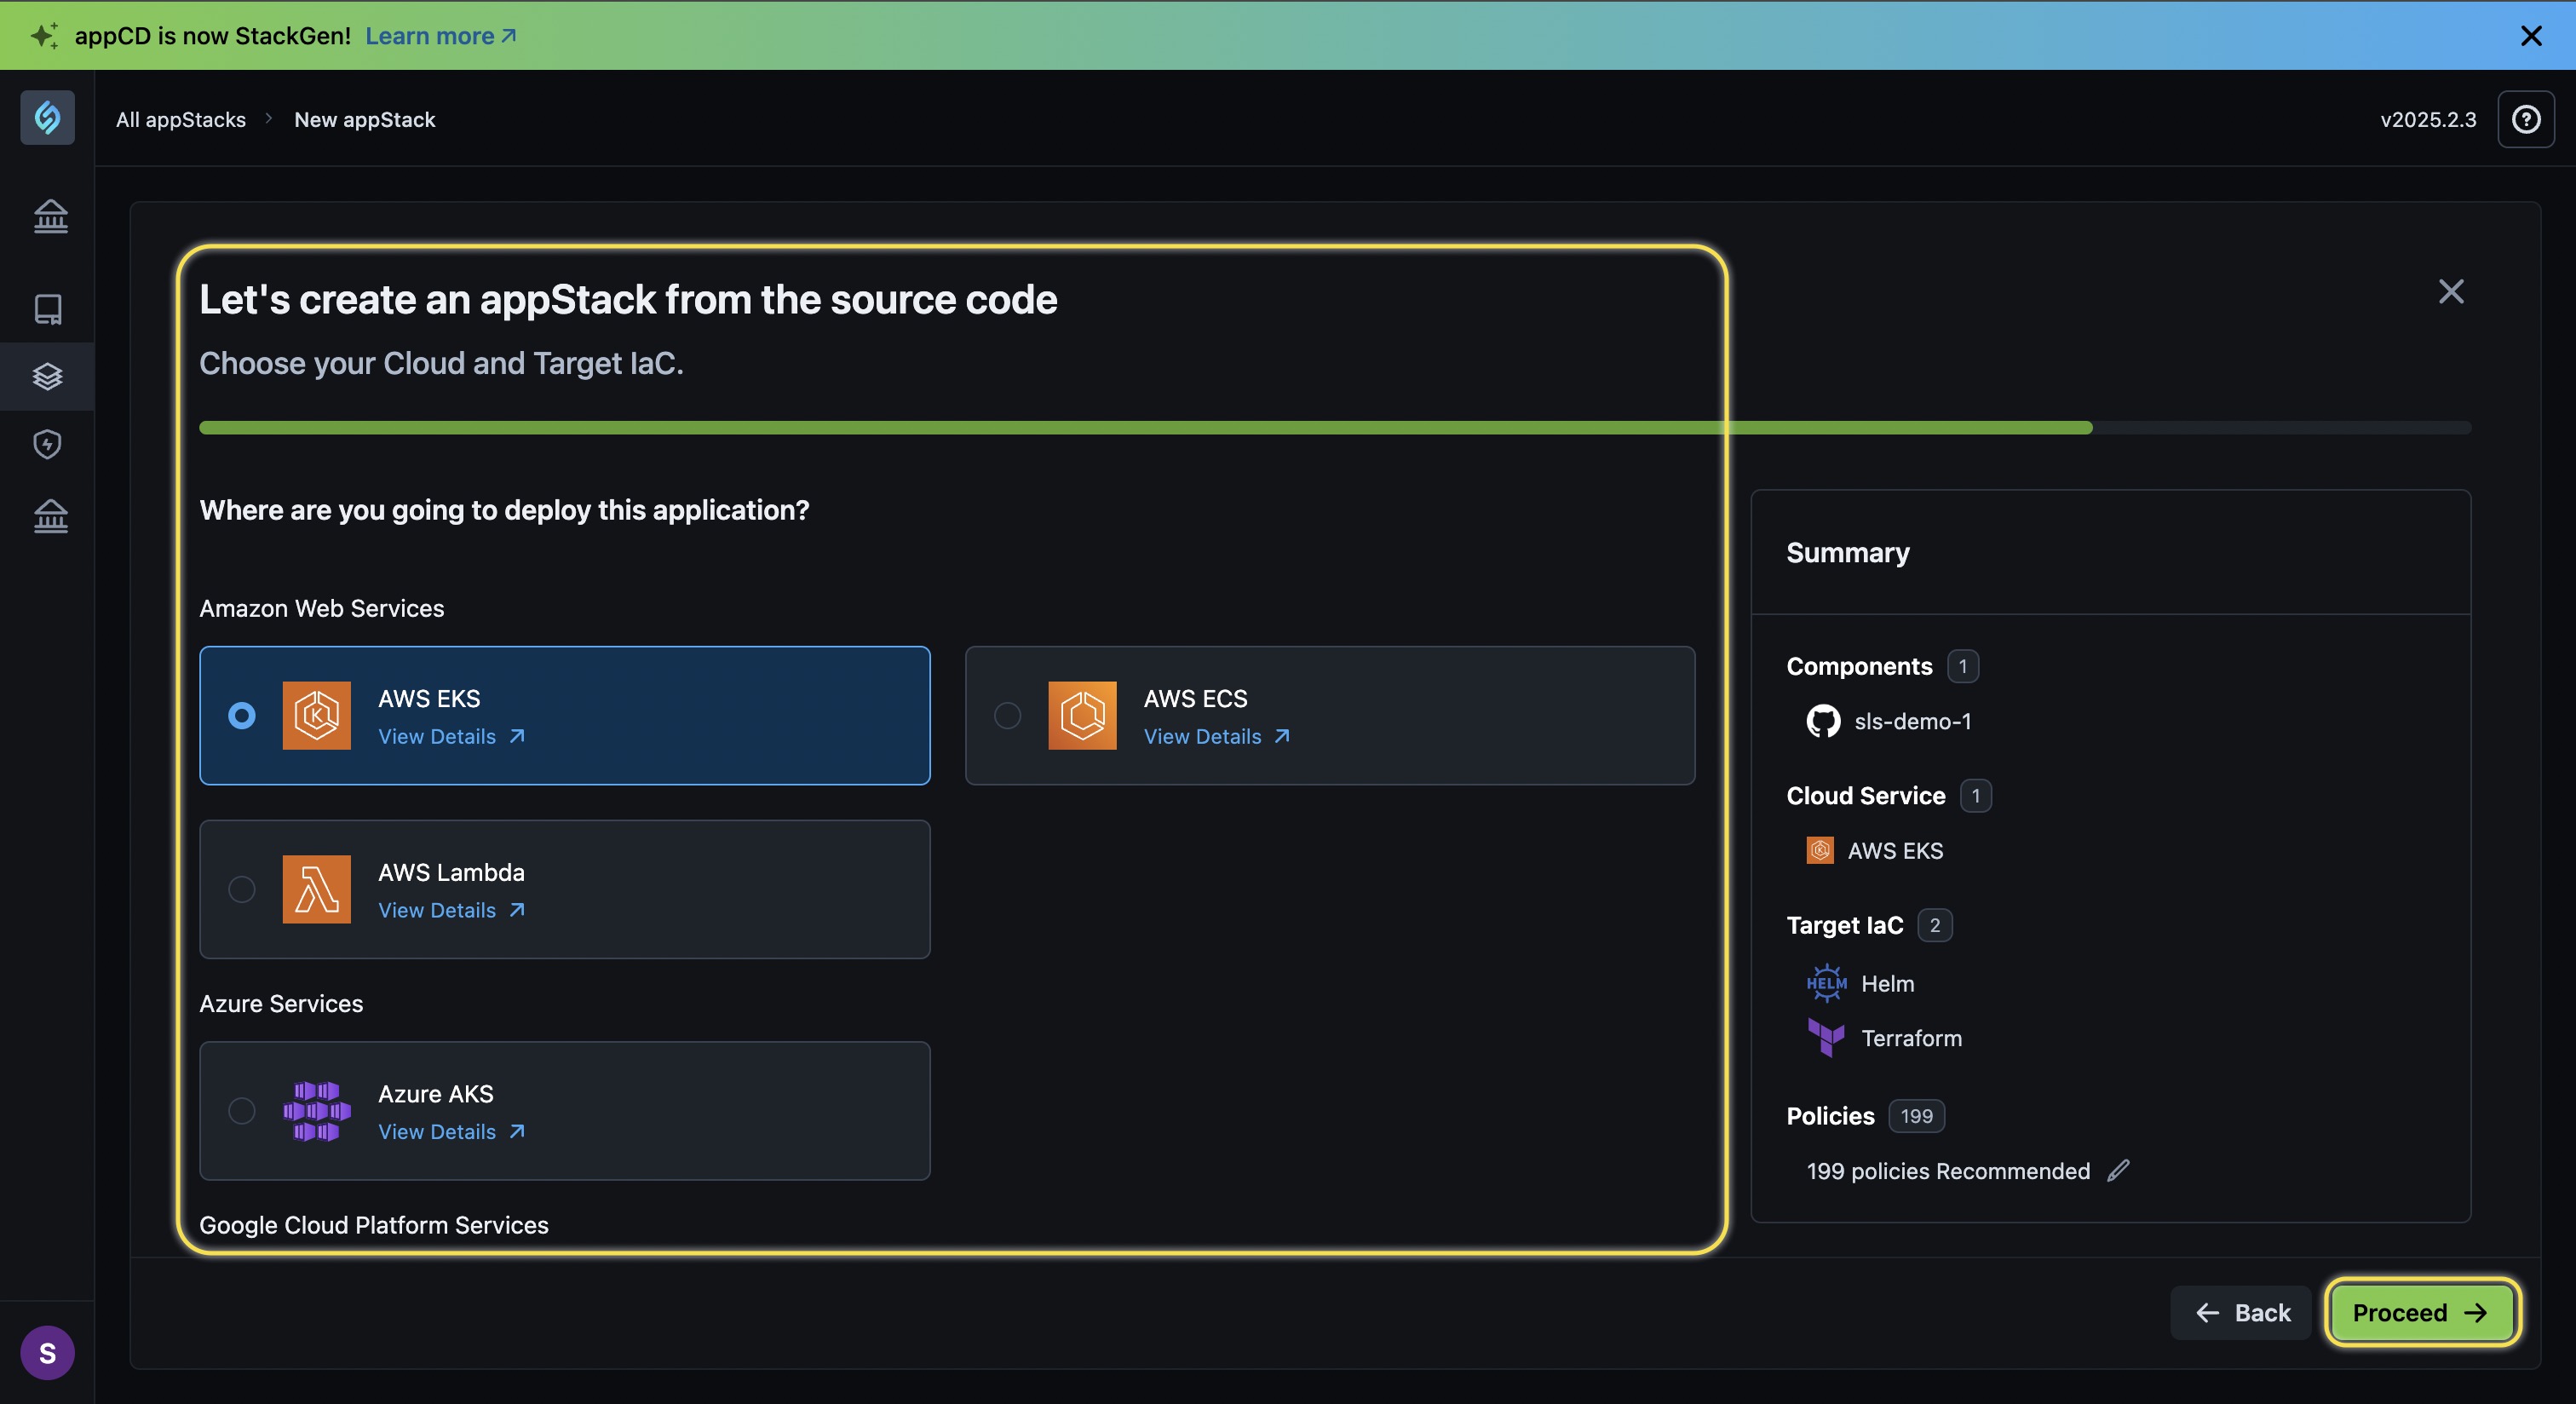
Select the Source Code Management (SCM) provider you use to host your source code.
-
Authorize your SCM provider, and click Proceed.
-
Enter the following details:
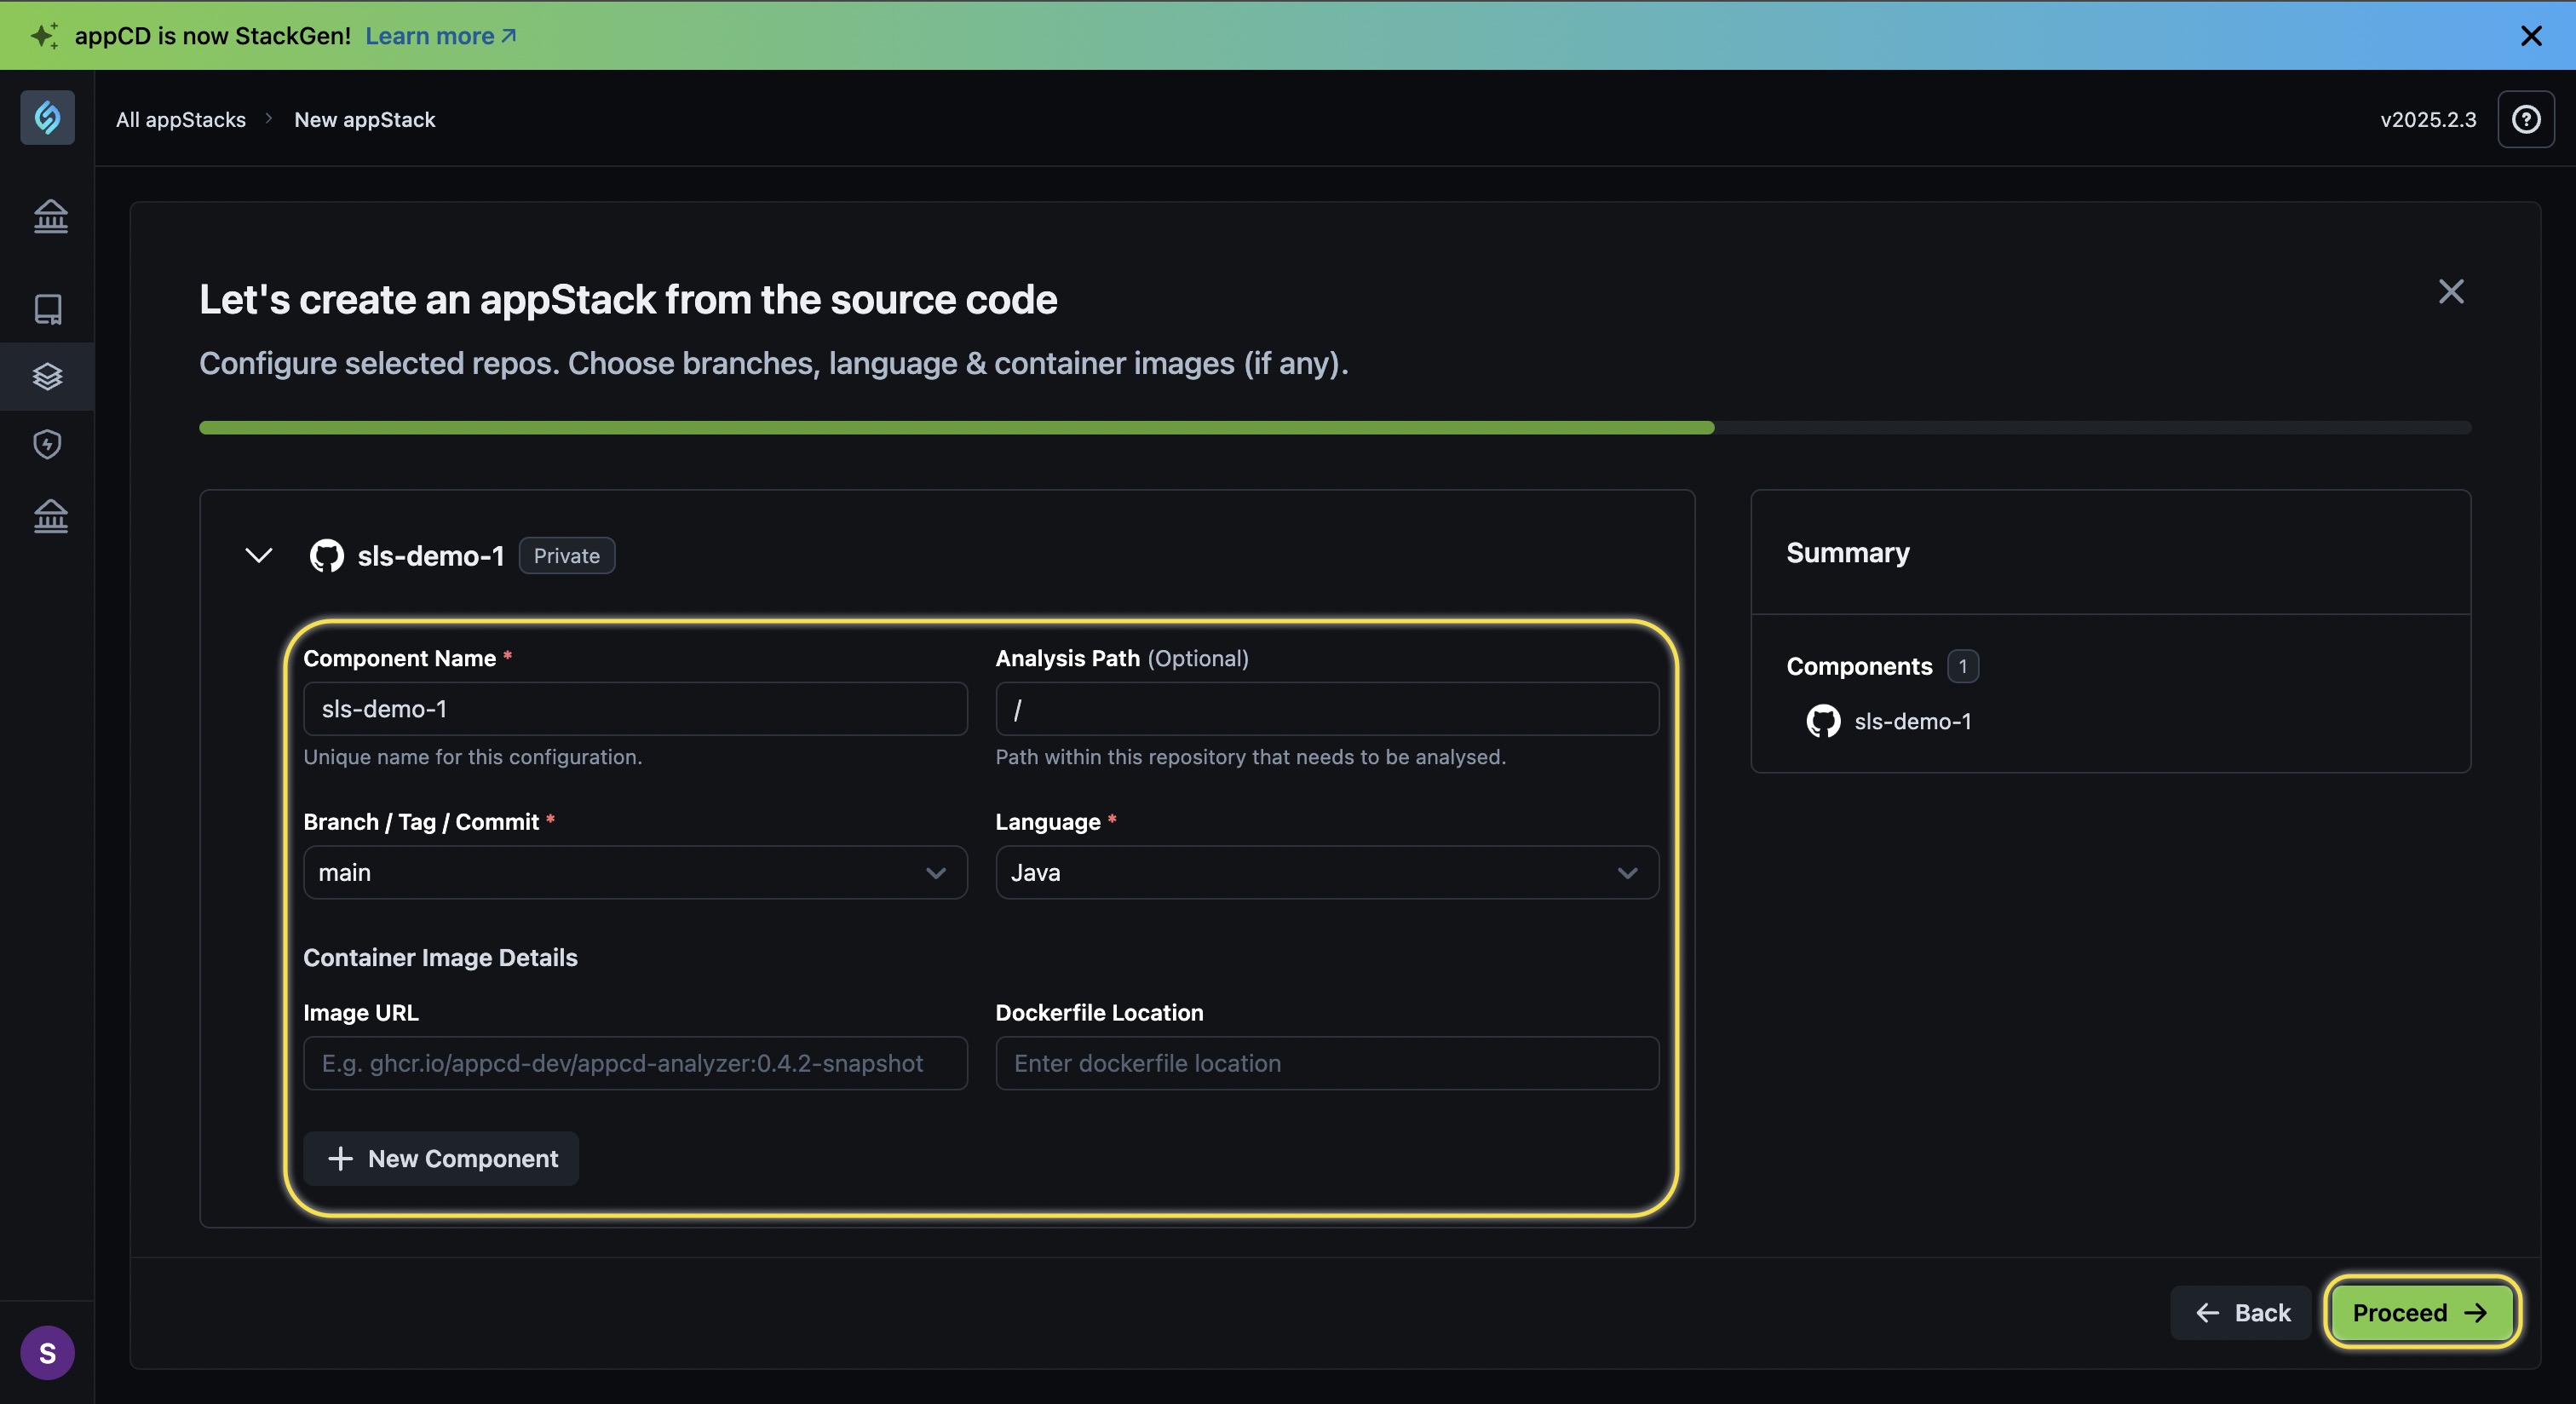
- Component Name *: Enter a unique name for your custom module.
- Analysis Path (Optional): Provide the path within the repository that StackGen needs to analyze to generate an IaC
- Branch / Tag / Commit *: Select the Branch, Tag or the Commit for your image file.
- Language *: Choose the language of your repository where the image file is placed.
- Container Image Details:
- Image URL: Enter the relative path of your image file.
- Dockerfile Location: Enter the relative path of your docker file in the repository.
- New Component: If you host microservices within the repository, you can add those components by clicking this option.
- Summary: You can view the component details under the Summary panel.
-
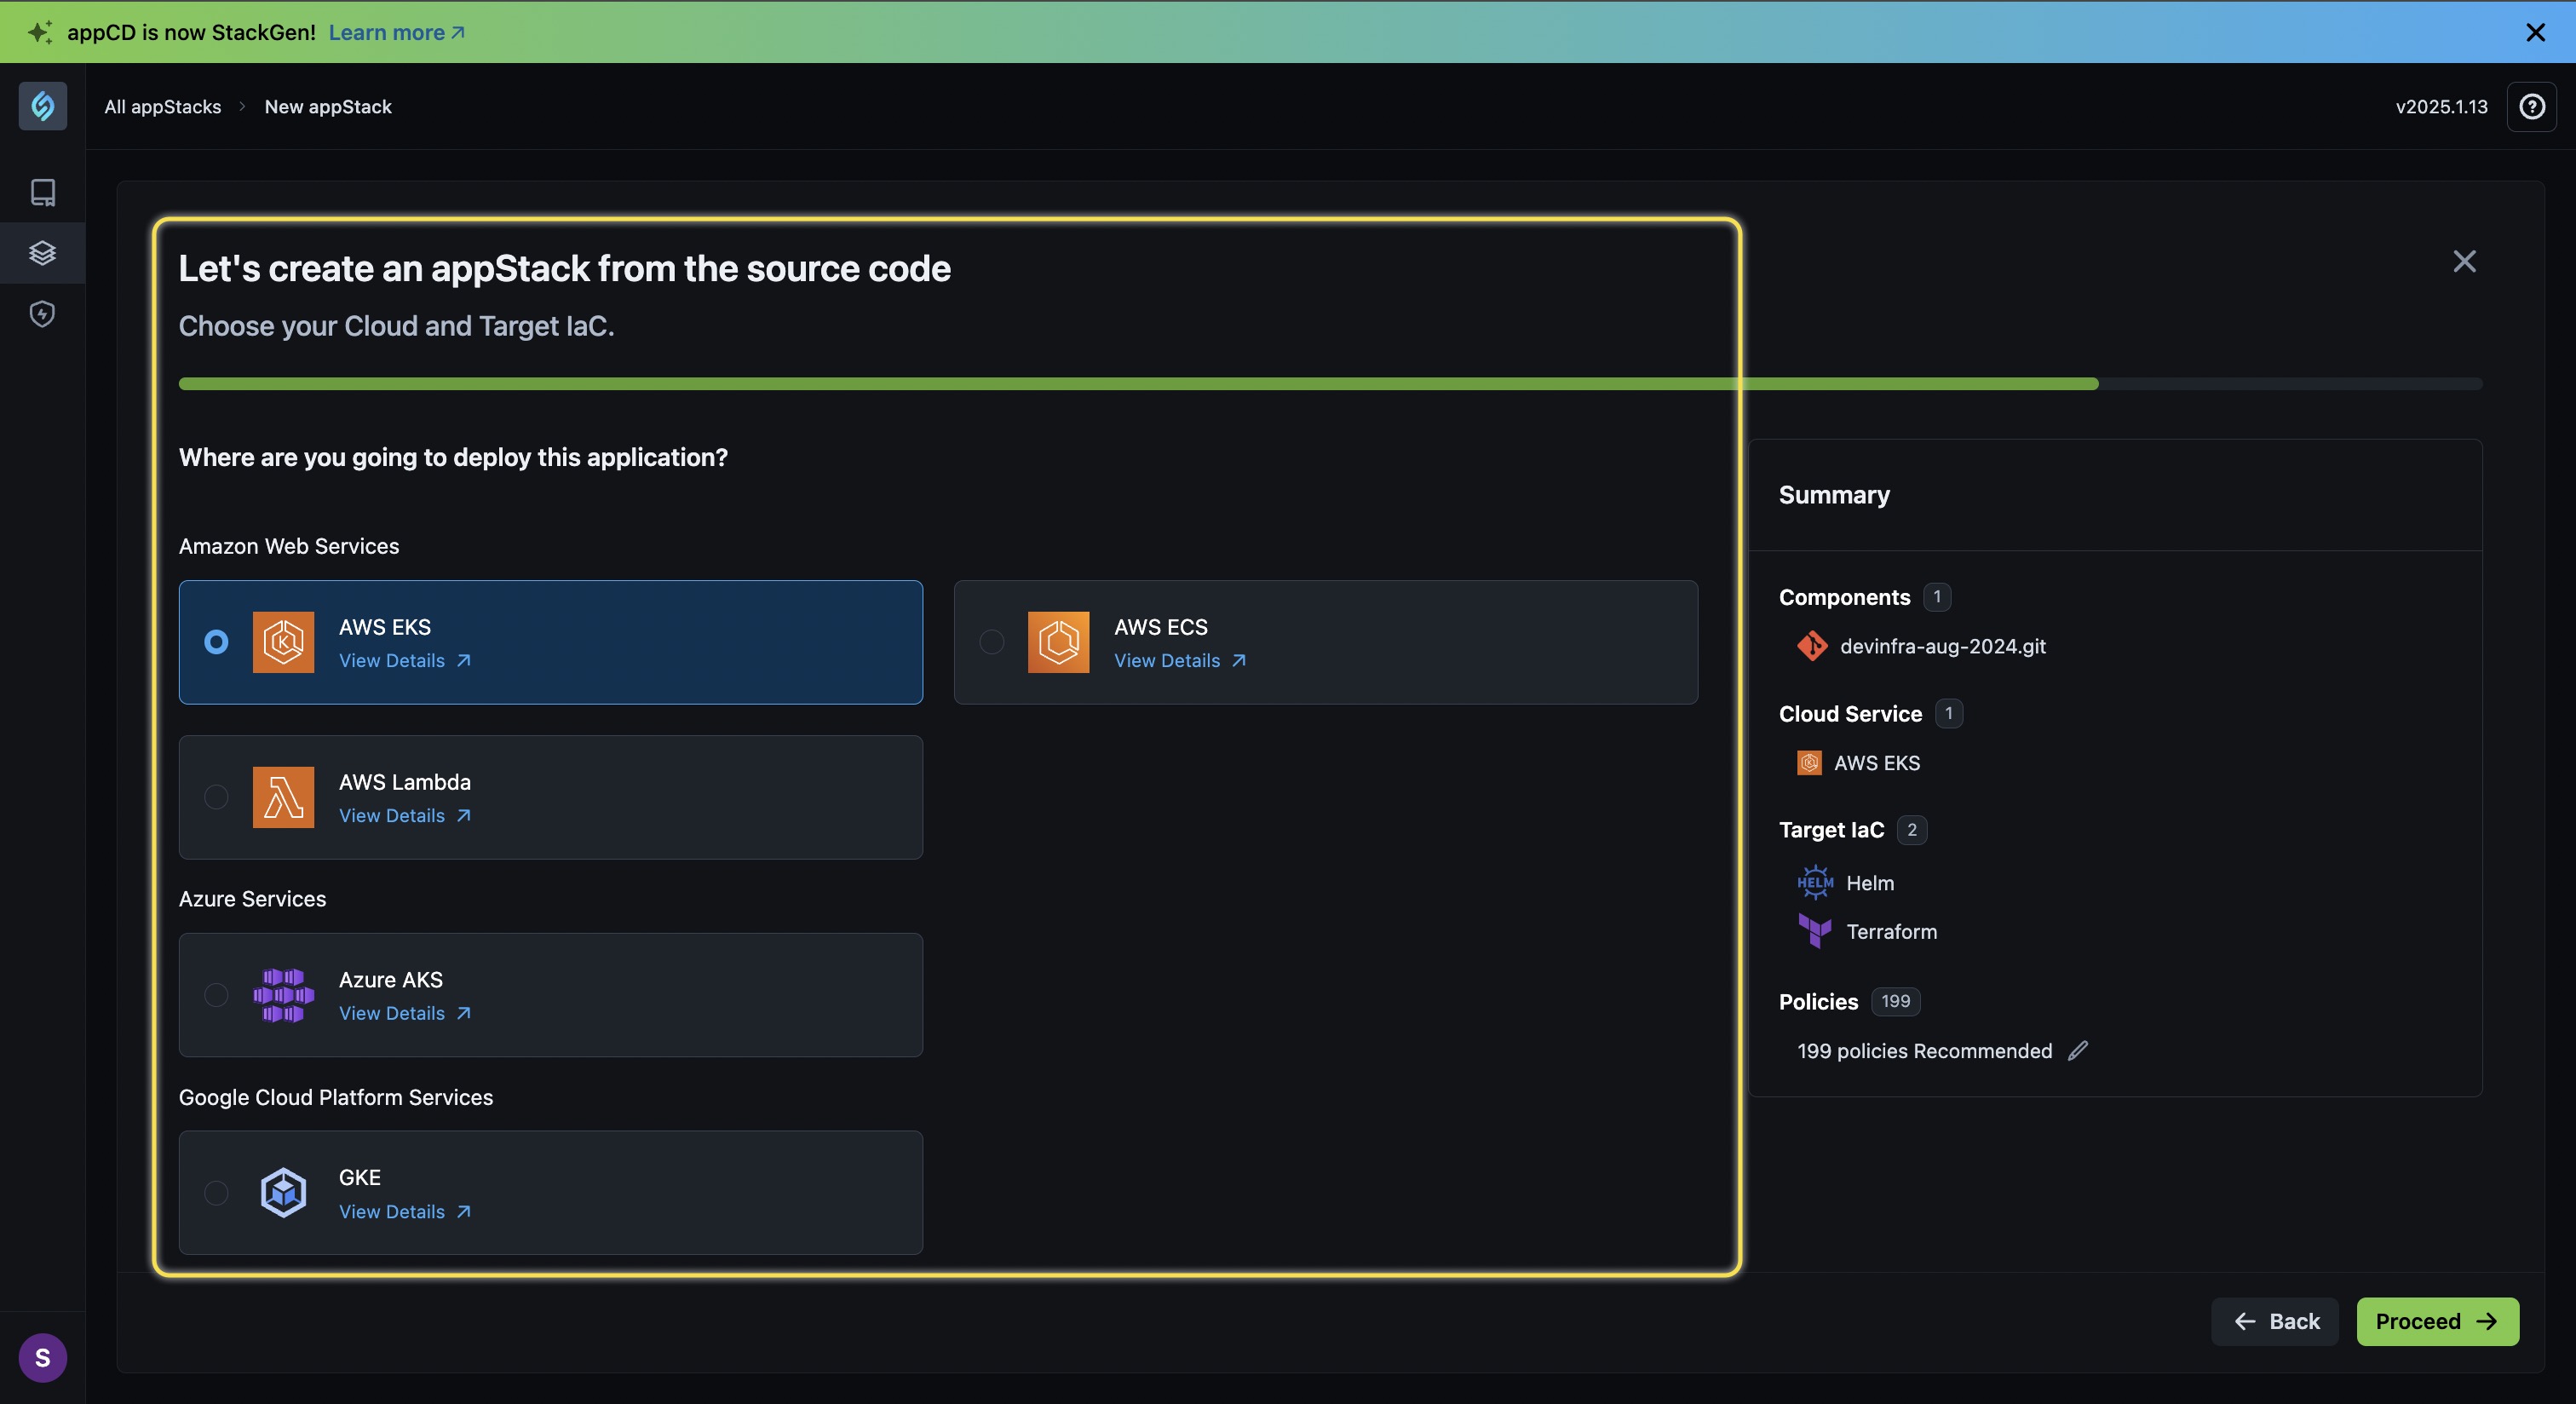
Choose your target storage cloud and IaC from the list and click Proceed.
-
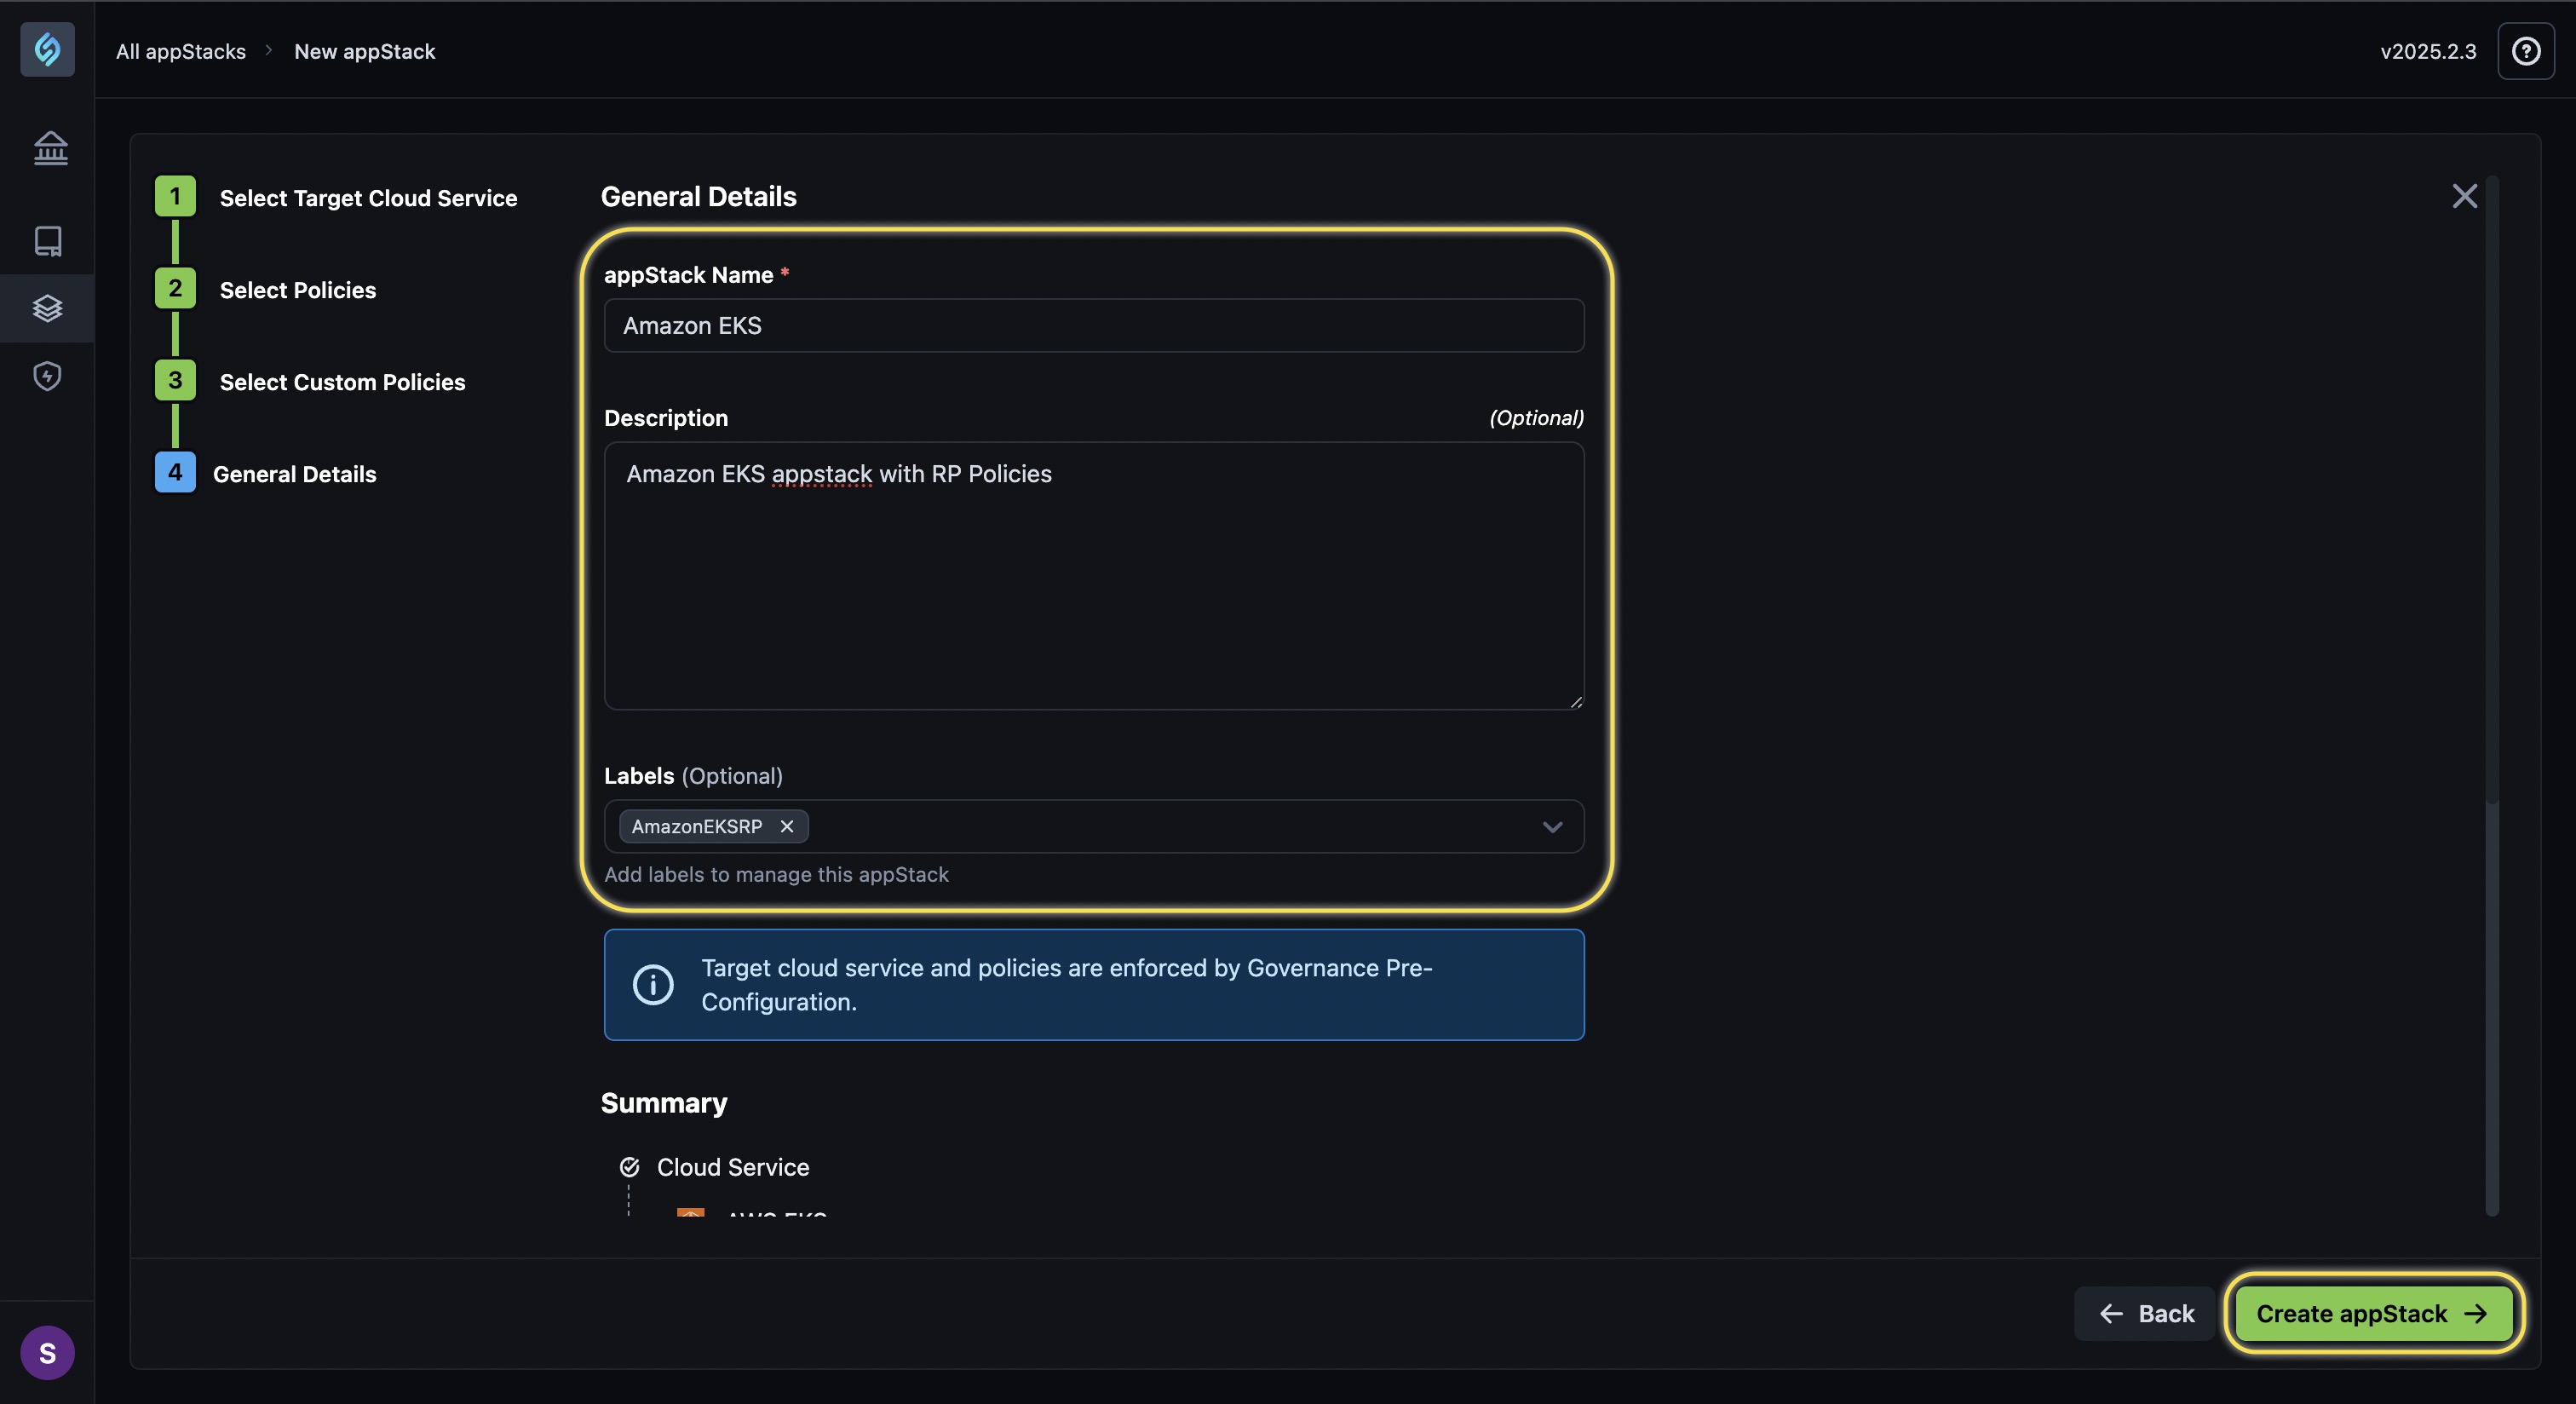
Enter the following details to create your appStack:
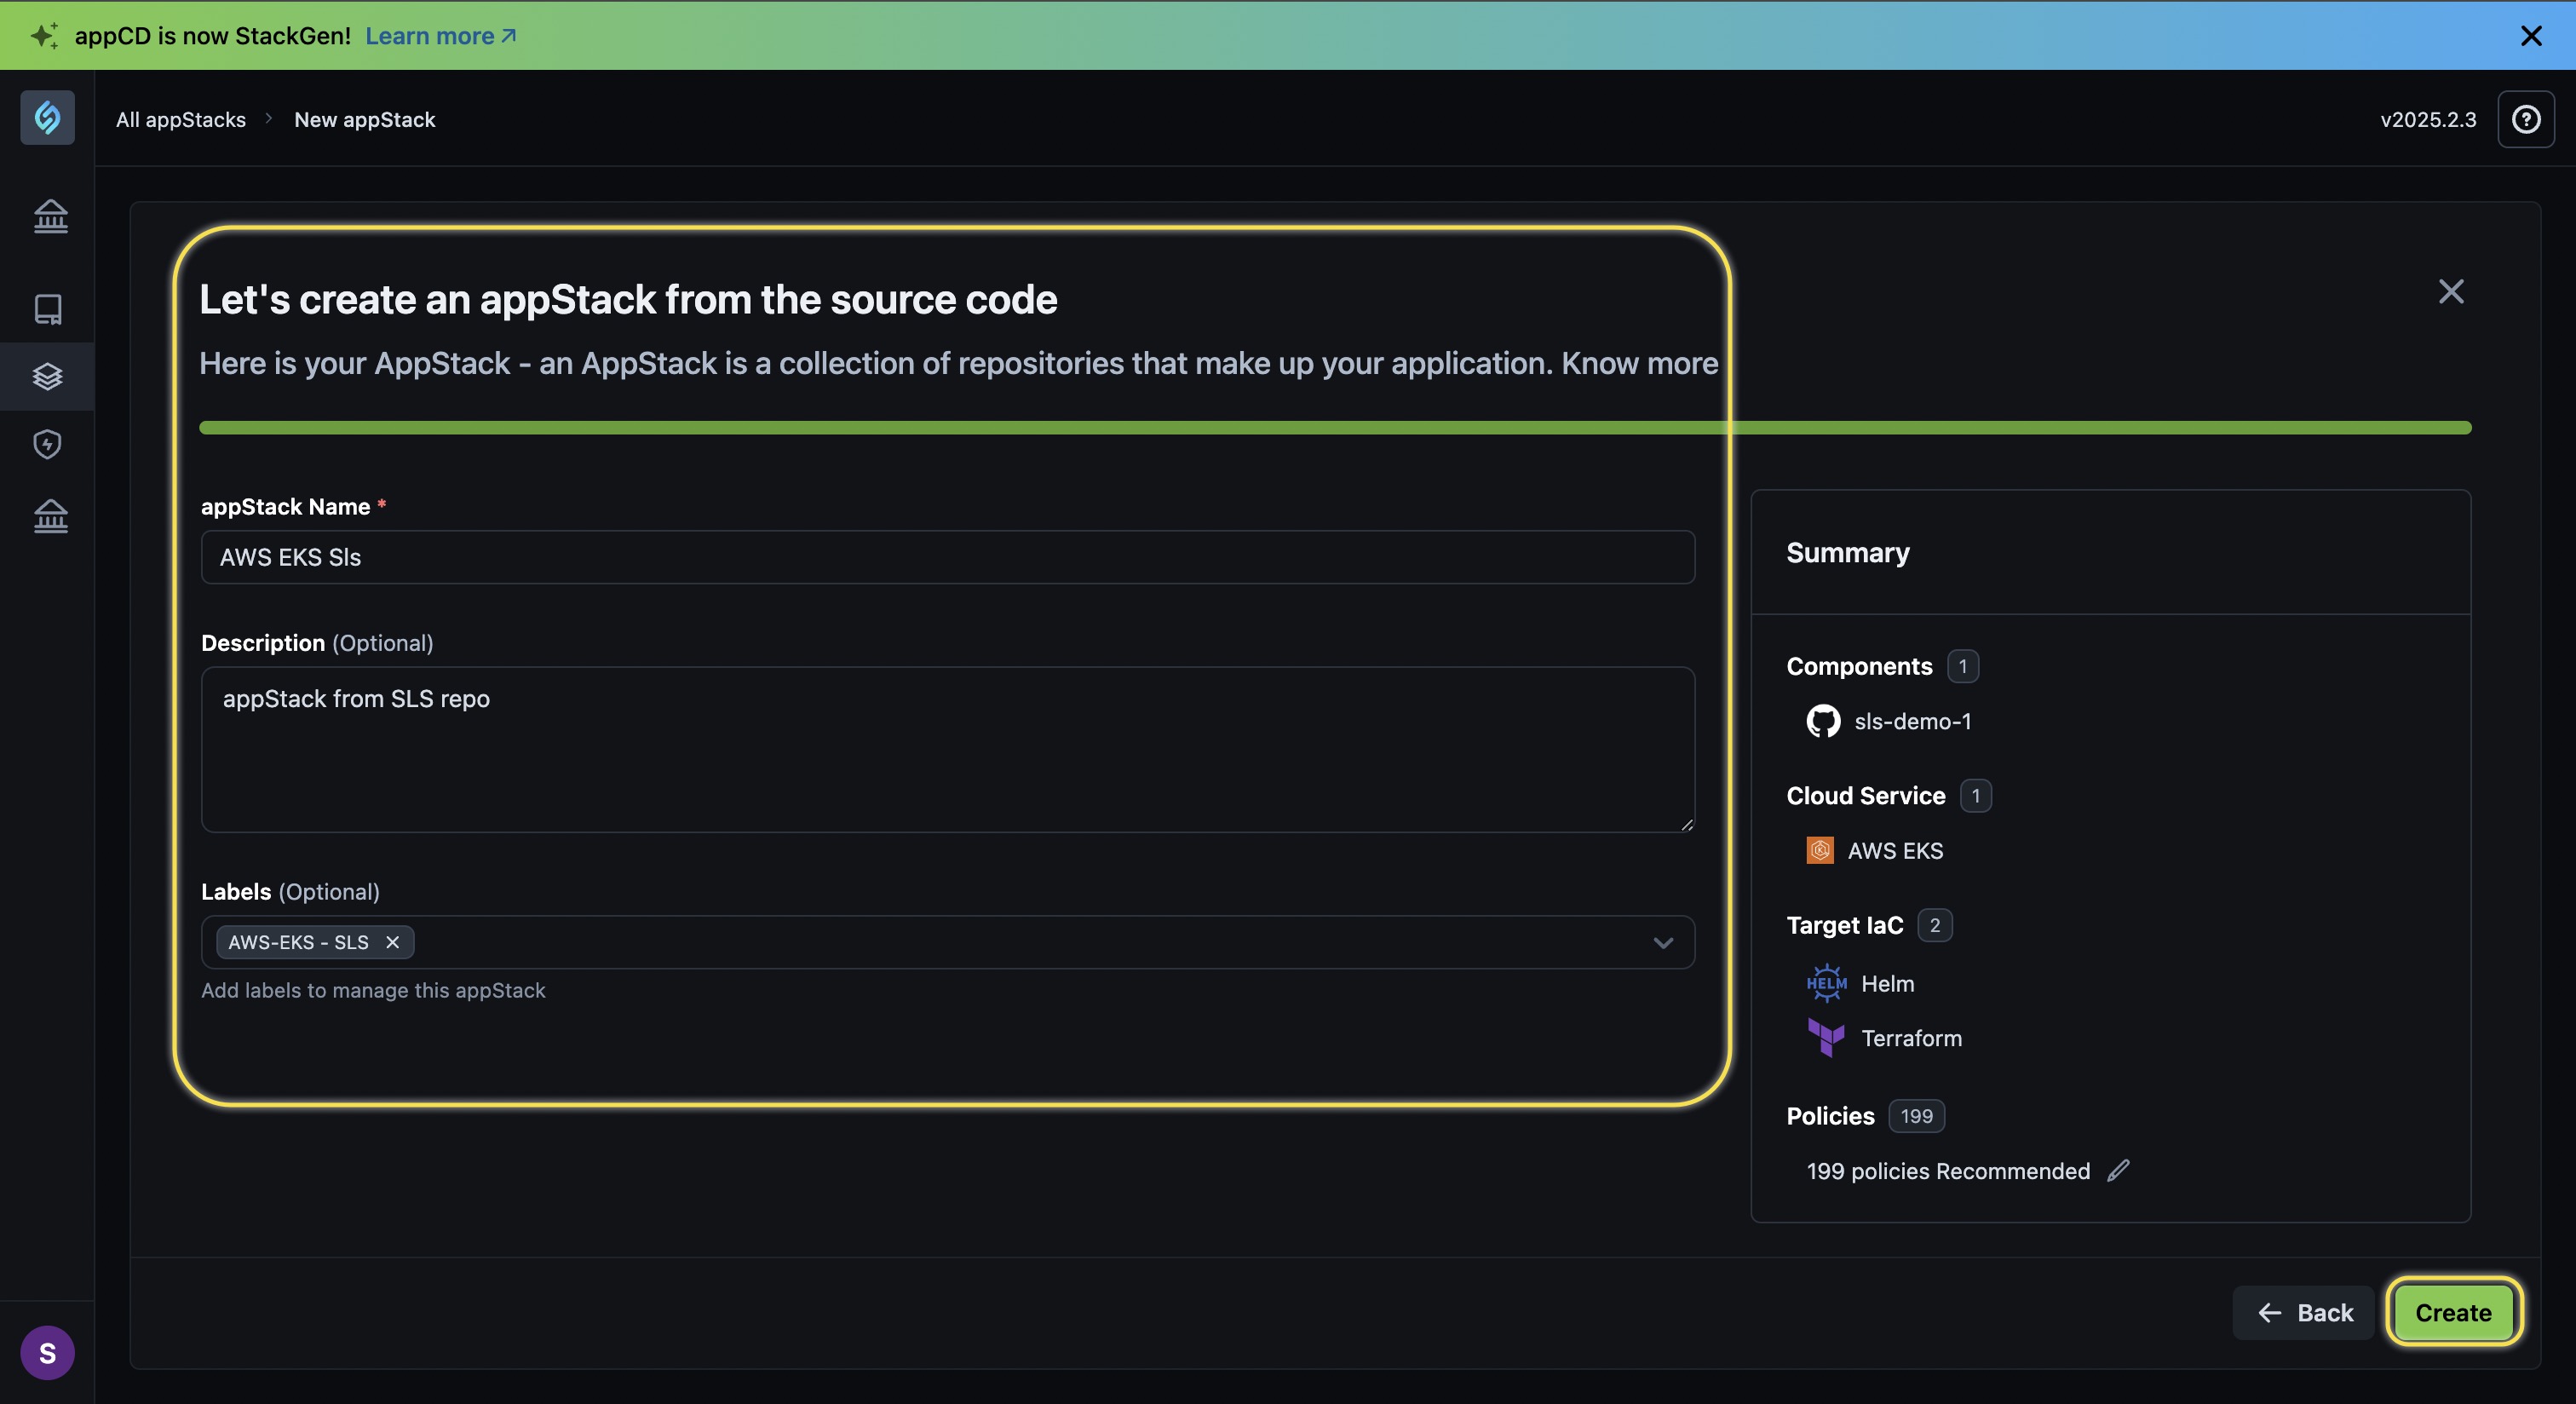
- appStack Name*: Enter a name for your appStack.
- Description (Optional): Provide a brief description for your appStack.
- Labels: We recommend that you add a Label for your appStack so that you can select it easily from a list of appStacks in the future.
-
Click Create.
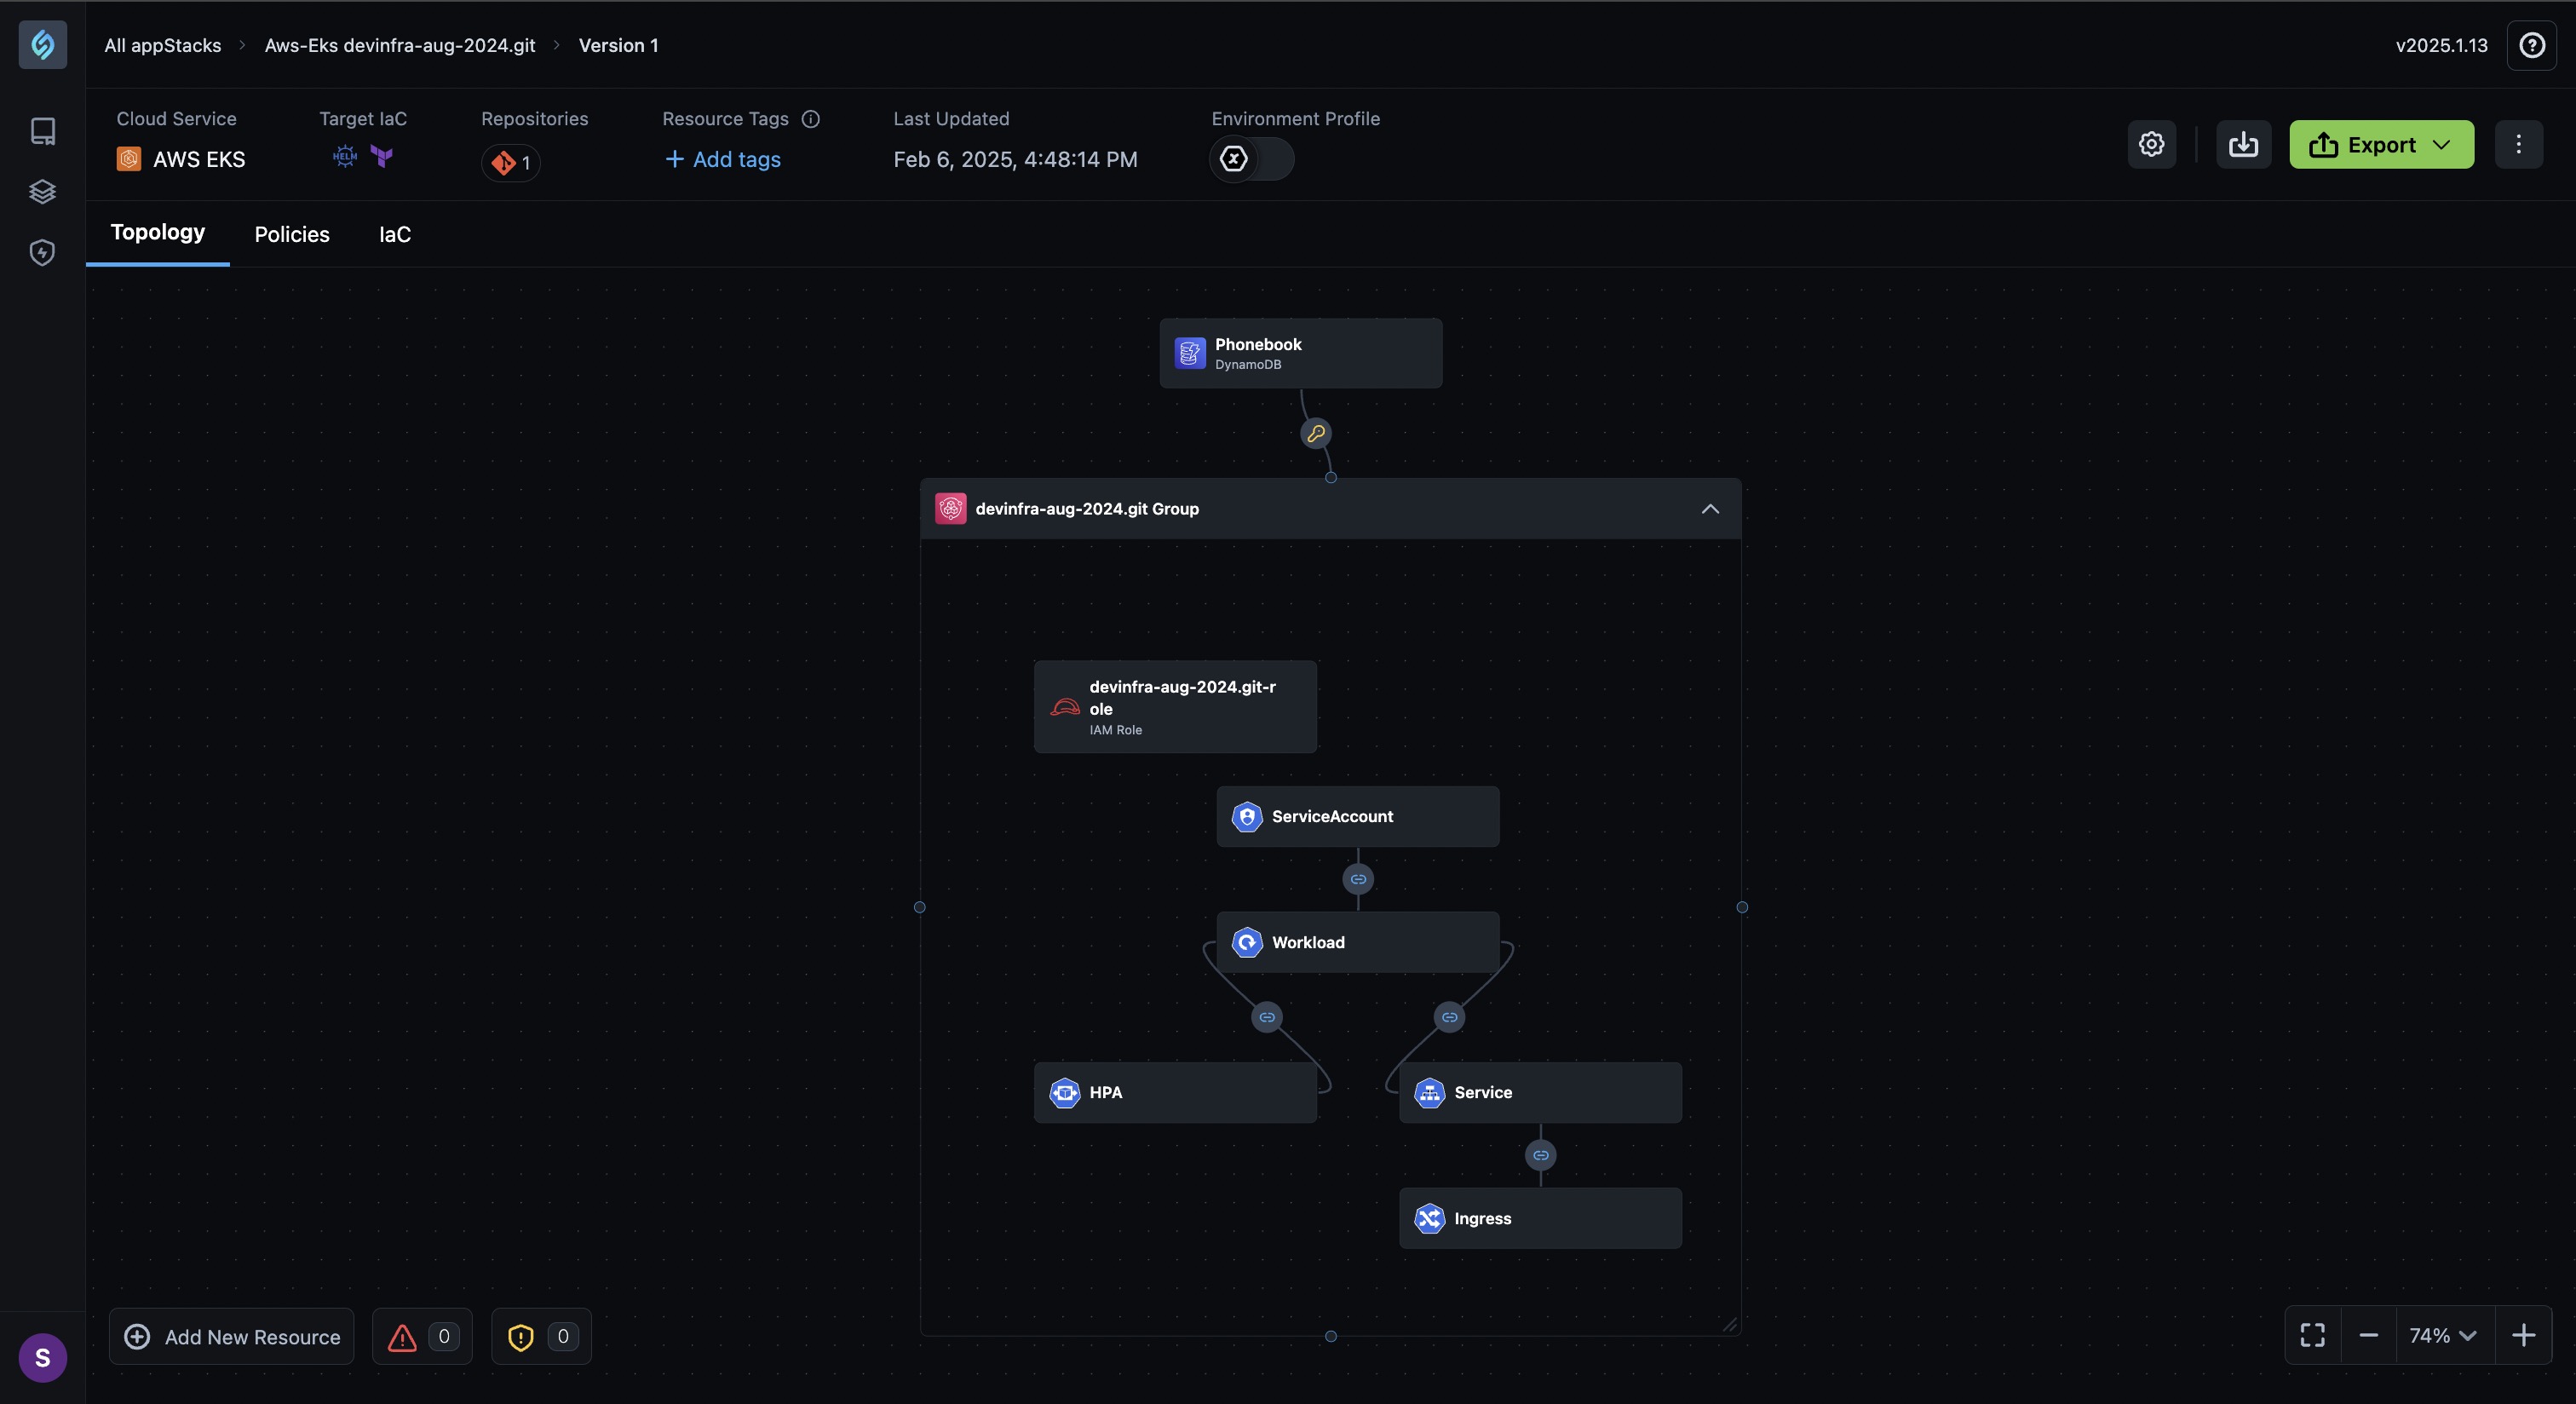
You will be redirected to the appStack details page where you can view the Topology, Policies, and IaC details for your appStack
Use a Personal Access Token (PAT) to Connect With StackGen
Click to view
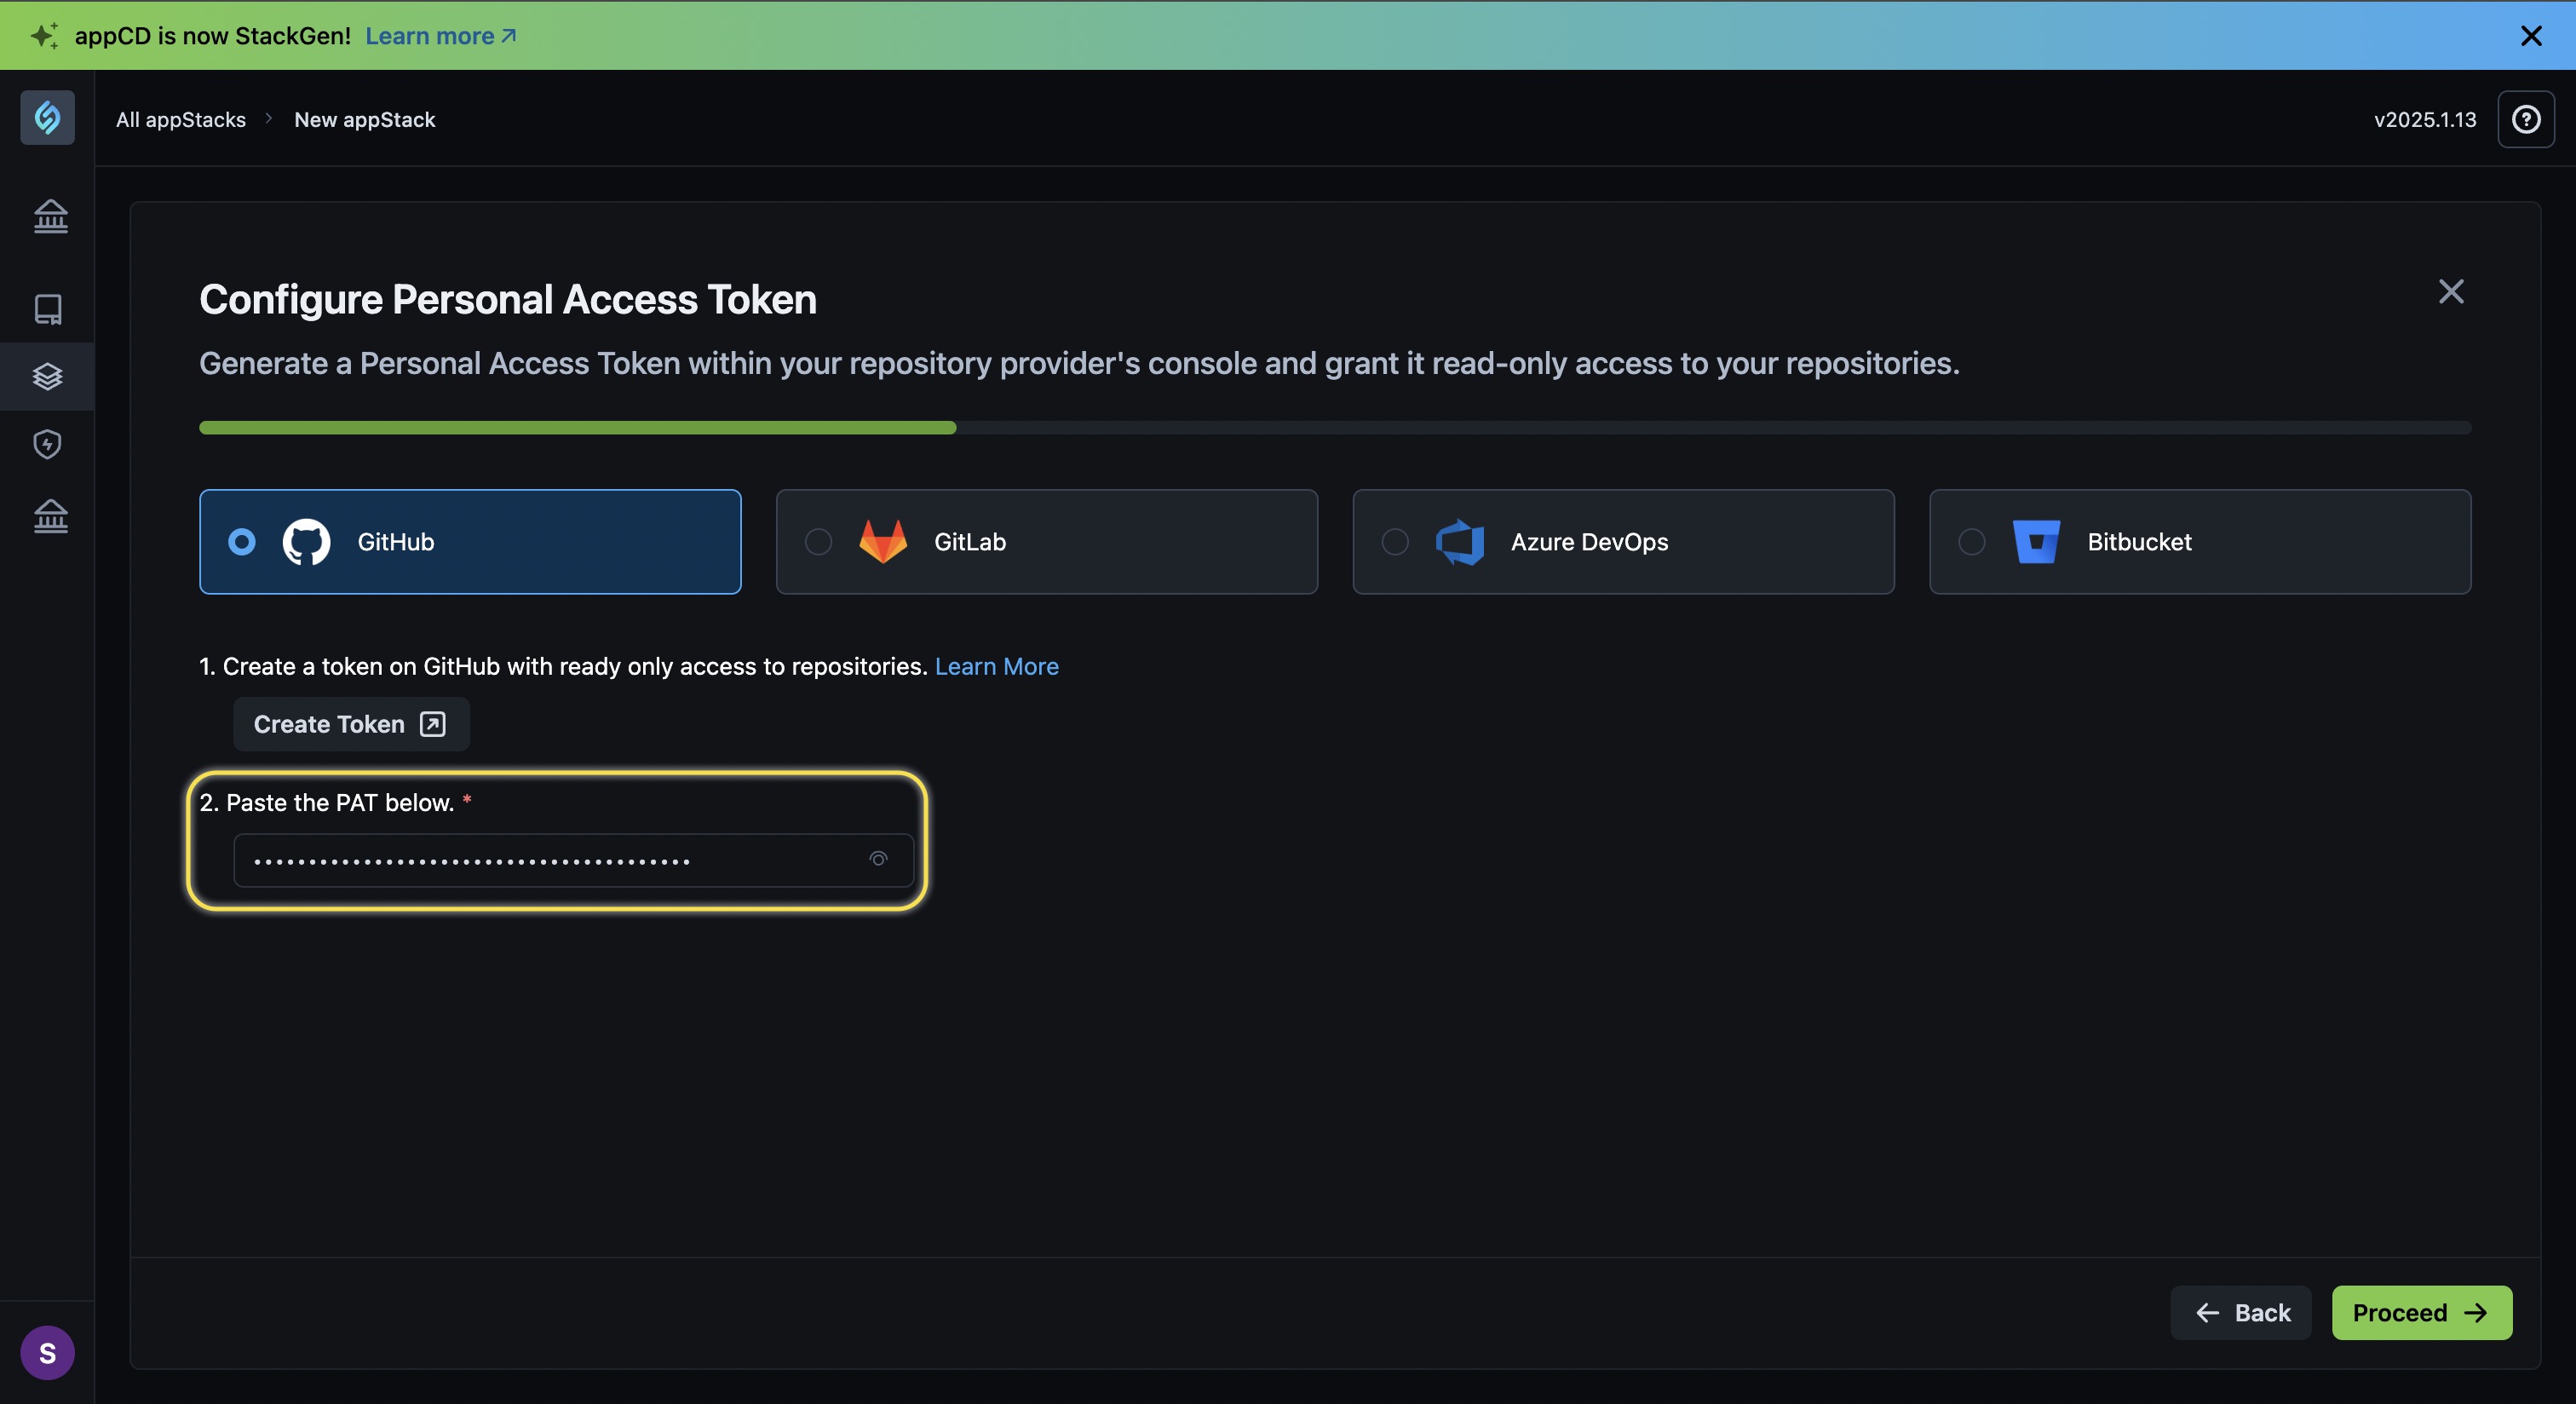
You can generate a Personal Access Token within your repository provider's console and grant read-only access to your repositories. StackGen supports connecting with the following repositories using PAT:
Follow these steps to create your appStack by connecting with your repository using PAT:
-
Click the + New appStack button.
-
Select From source code.
-
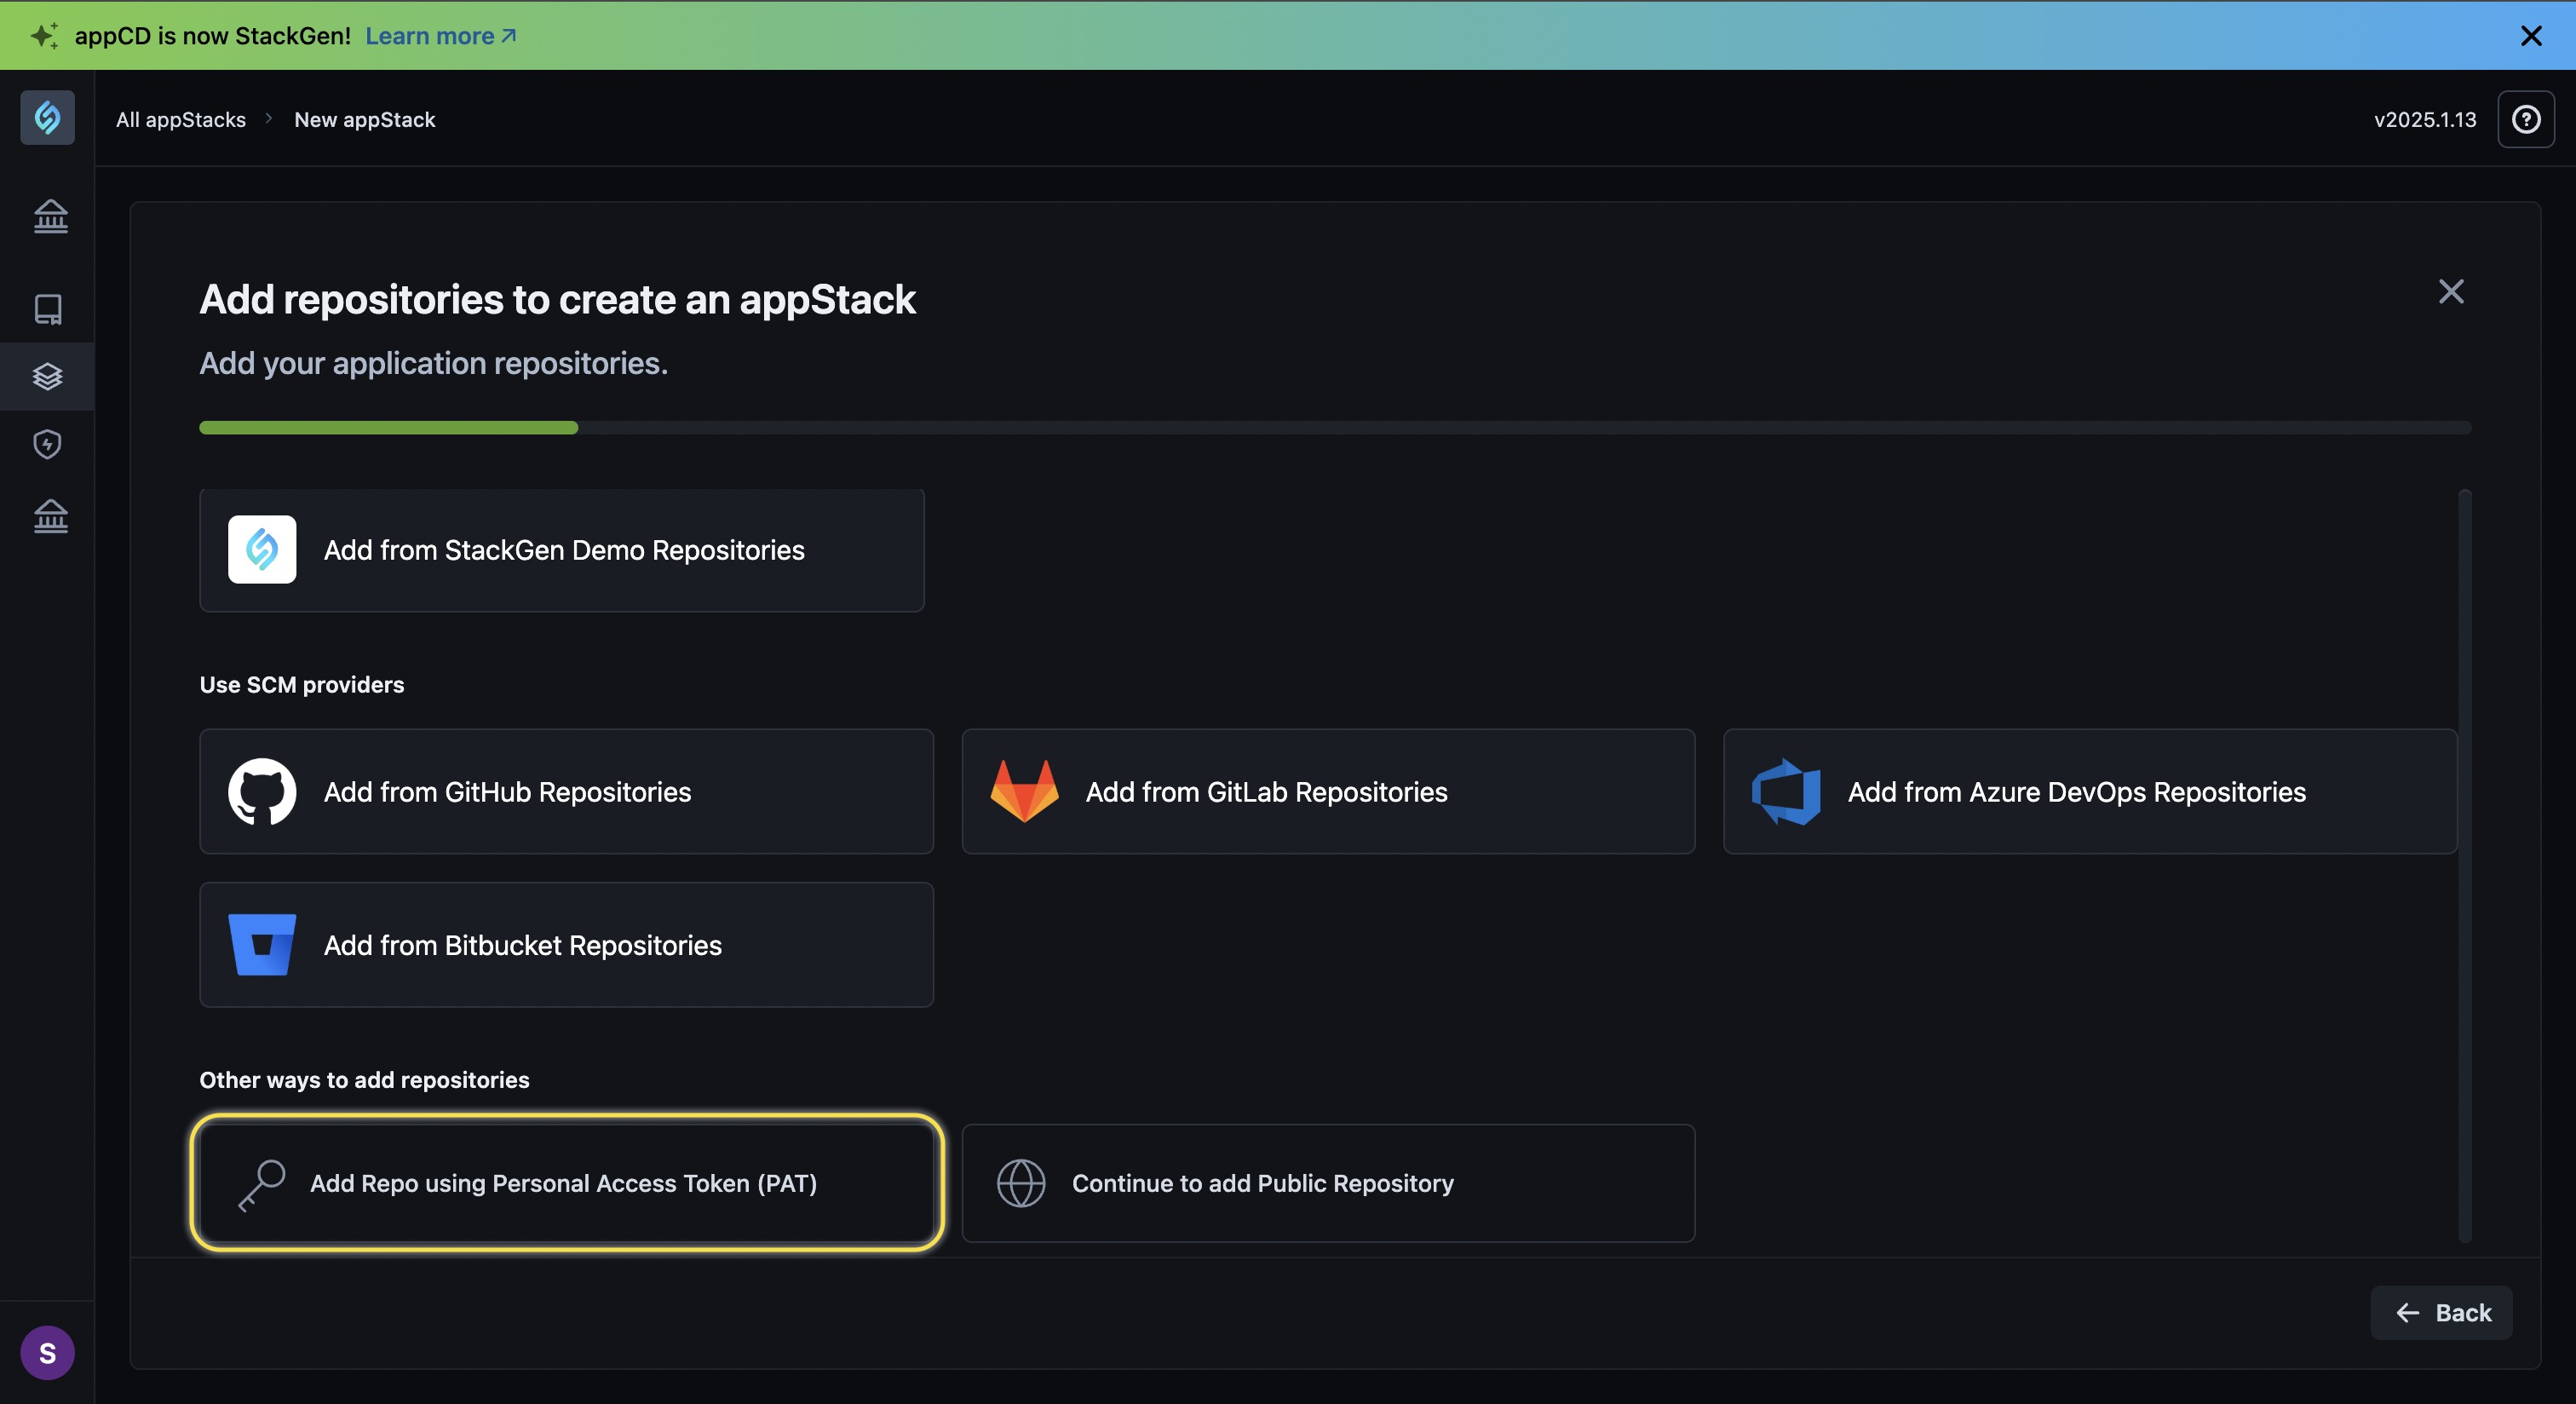
From the Other ways to add repositories section, select Add Repo using Personal Access Token (PAT).
-
Refer to your repository provider's documentation for generating the Personal Access Token (PAT) and enter the same in the respective fields.
-
Click Proceed.
-
Select the repositories that you want to add to your appStack and click Proceed.
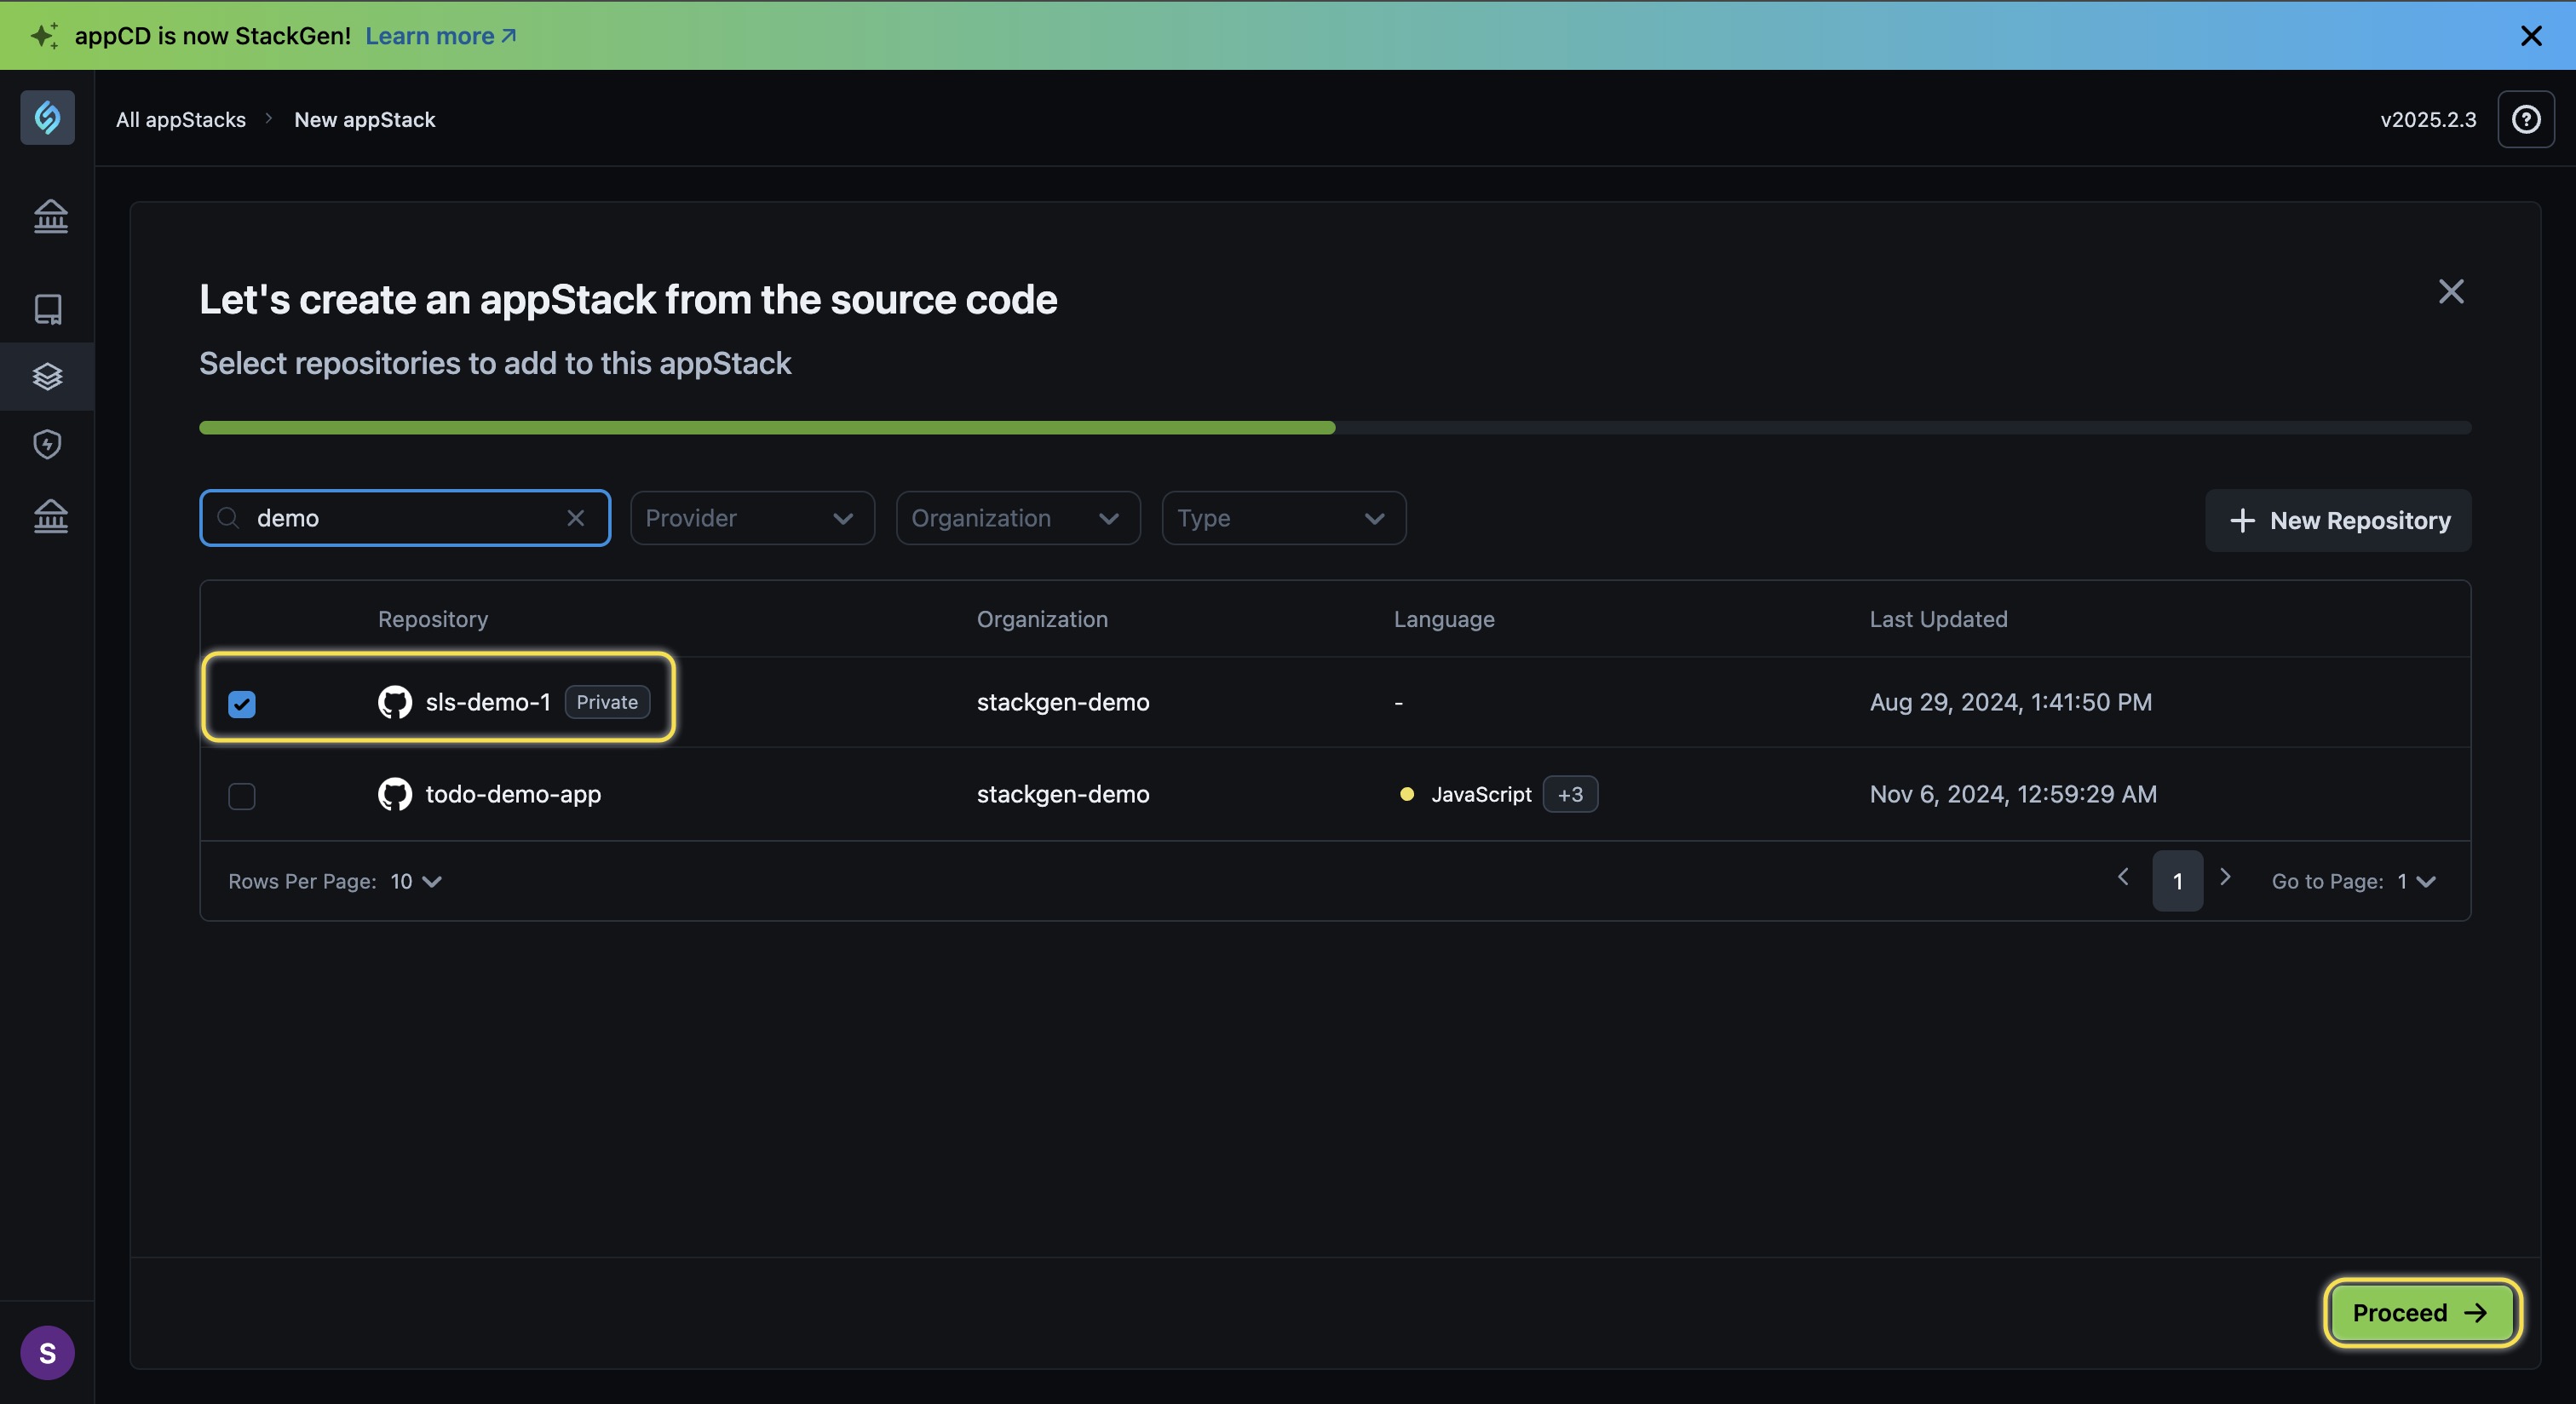
-
Enter the following details:
- Component Name*: Enter a unique name for your custom module.
- Analysis Path (Optional): Provide the path within the repository that StackGen needs to analyze for generating an IaC.
- Branch / Tag / Commit*: Select the Branch, Tag, or Commit for your image file.
- Language*: Choose the language of your repository where the image file is placed.
- Container Image Details:
- Image URL: Enter the relative path of your image file.
- Dockerfile Location: Enter the relative path of your Dockerfile in the repository.
- New Component: If you host microservices within the repository, you can add those components by clicking this option.
- Summary: You can view the component details under the Summary panel.
-
Choose your target storage cloud and IaC from the list and click Proceed.
-
Enter the following details to create your appStack:
- appStack Name*: Enter a name for your appStack.
- Description (Optional): Provide a brief description for your appStack.
- Labels: We recommend that you add a Label for your appStack so that you can select it easily from a list of appStacks in the future.
-
Click Create.
-
You will be redirected to the appStack details page where you can view the Topology, Policies, and IaC details for your appStack.
Provide the URL to a Public Repository
Click to view
If your infrastructure code image is hosted on a public repository, you can provide the URL for it to create your appStack in StackGen. Follow these steps:
-
Click the + New appStack button.
-
Select From source code.
-
From the Other ways to add repositories section, select Continue to add Public Repository.
-
Enter the following details and click Proceed once done:
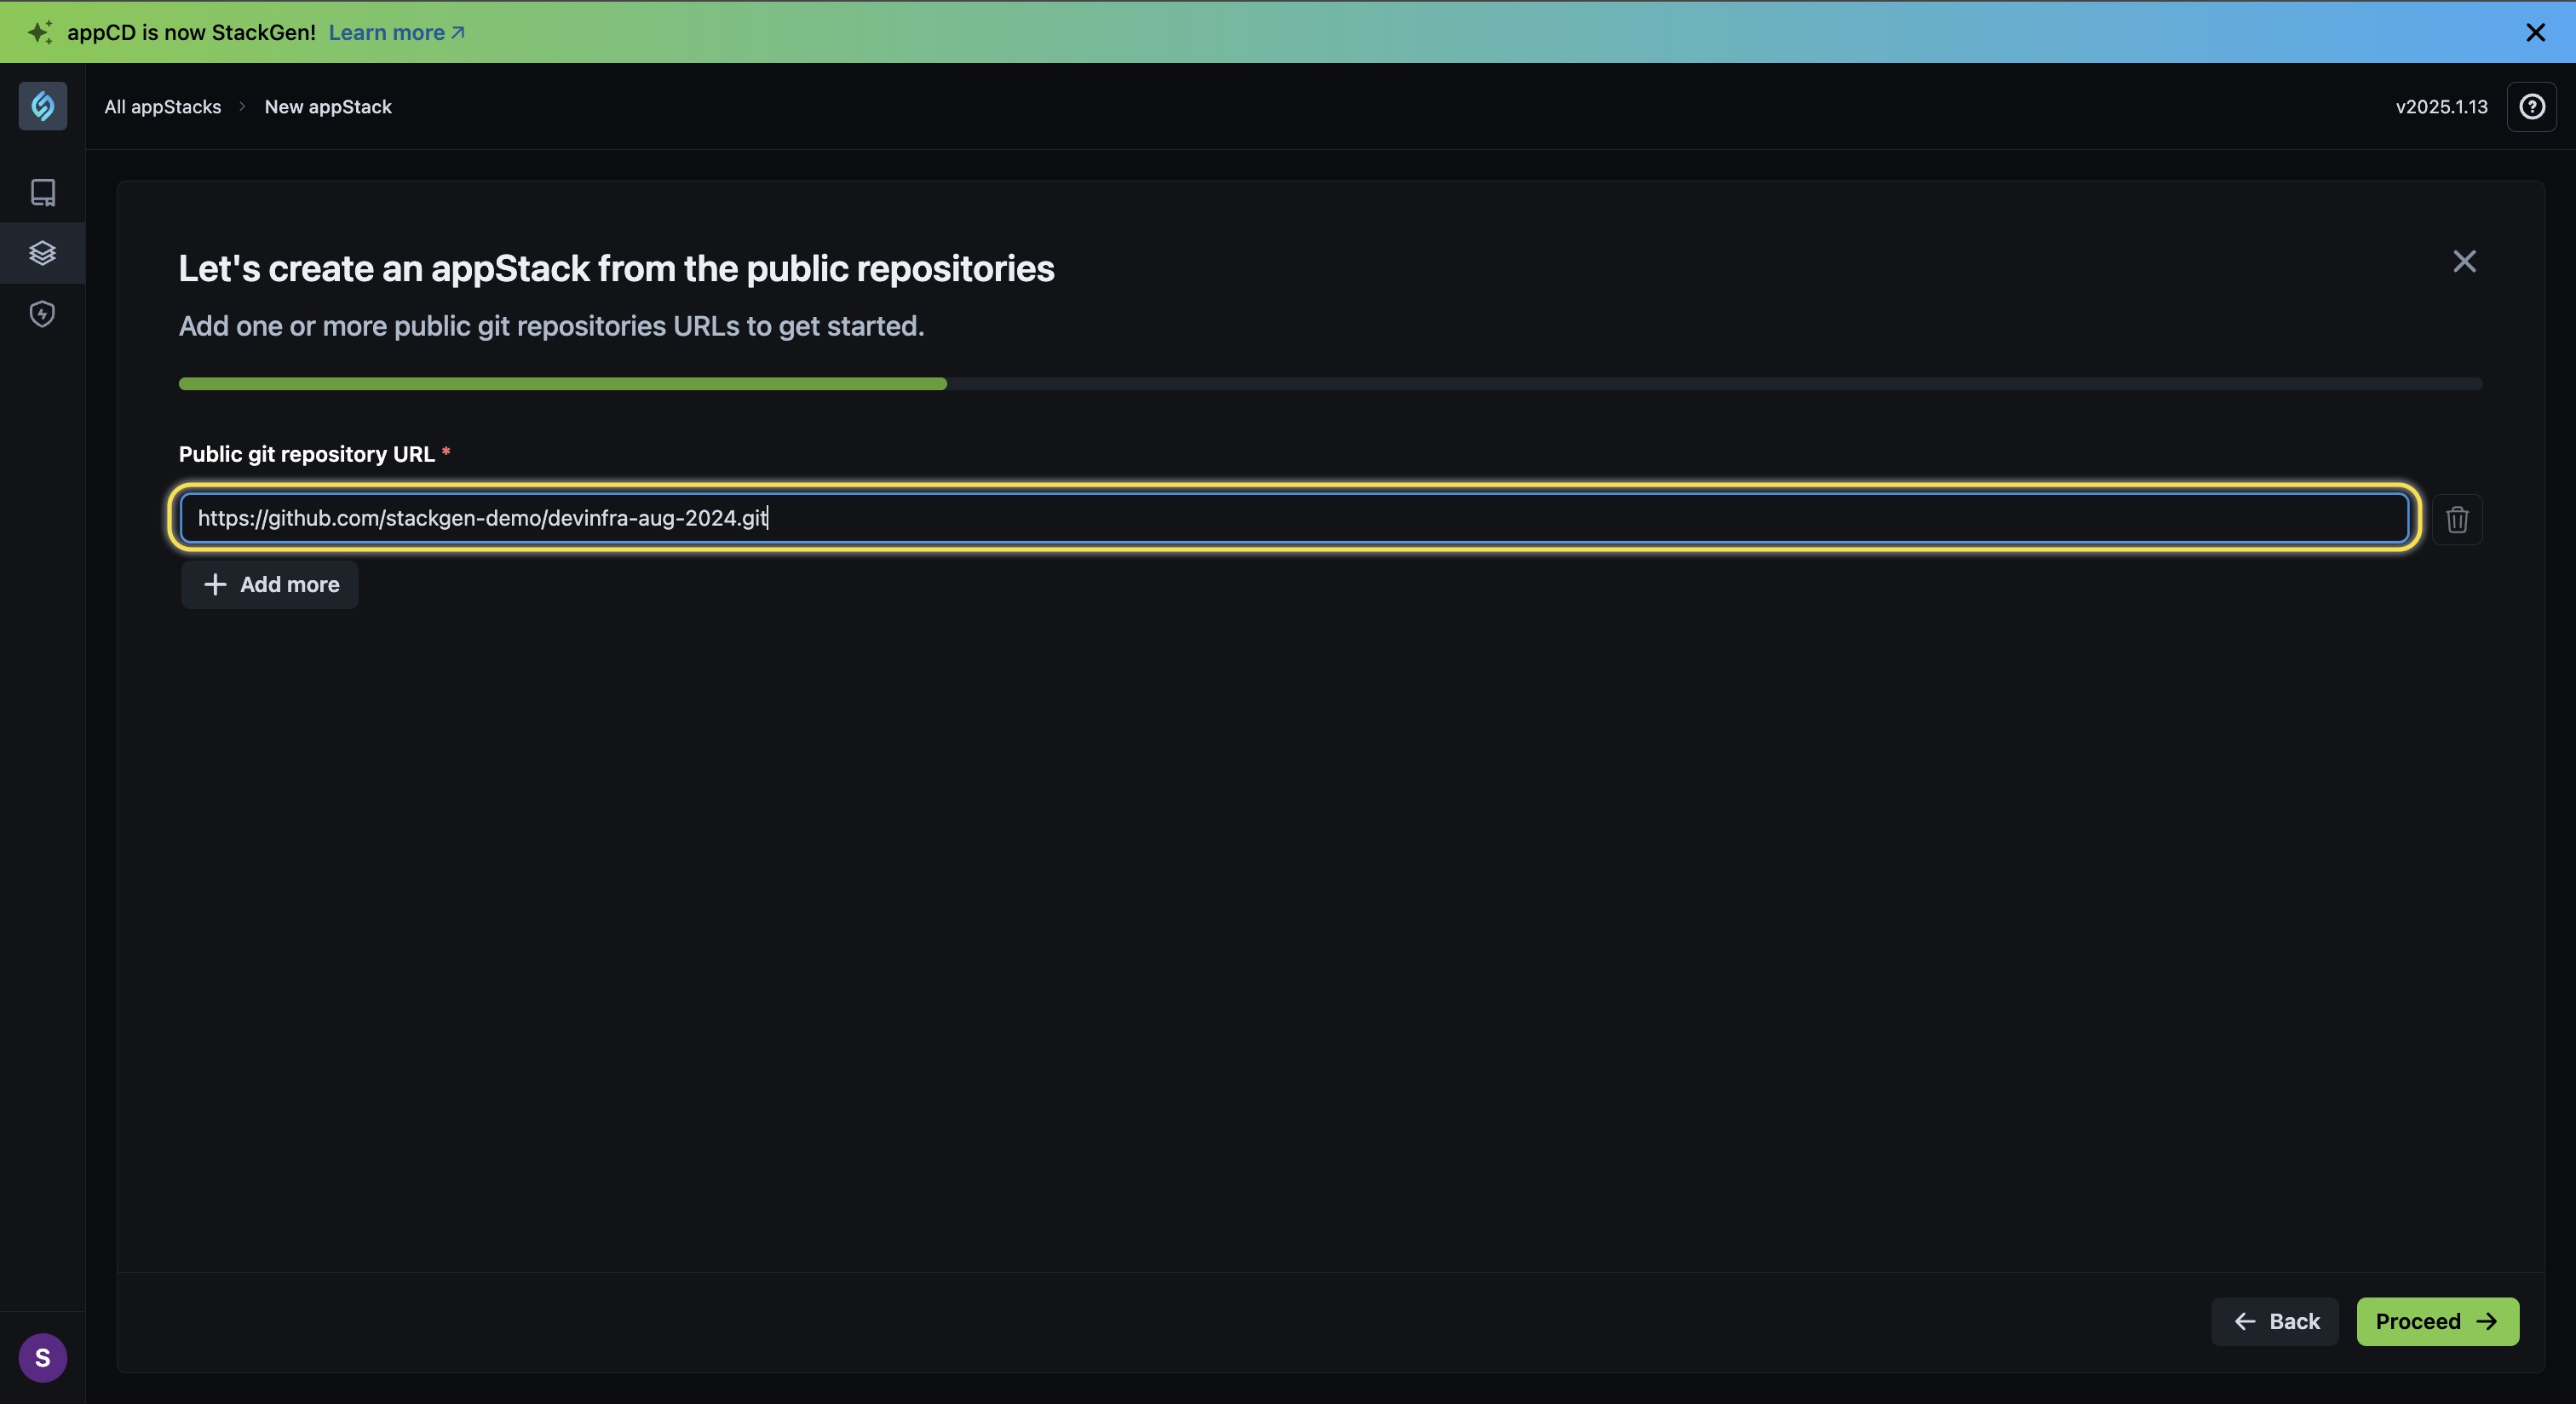
- Public Git repository URL *: Enter the URL for the public repository where your infrastructure is hosted.
- + Add more: Click this to add the URLs for multiple infrastructure images that are hosted across various public repositories.
-
Enter the following details:
- Component Name *: Enter a unique name for your custom component.
- Analysis Path (Optional): Provide the path within the repository that StackGen needs to analyze for generating an IaC.
- Branch / Tag / Commit *: Select the Branch, Tag, or Commit for your image file.
- Language *: Choose the language of your repository where the image file is placed.
- Container Image Details:
- Image URL: Enter the relative path of your image file.
- Dockerfile Location: Enter the relative path of your Dockerfile in the repository.
- New Component: If you host microservices within the repository, you can add those components by clicking this option.
- Summary: You can view the component details under the Summary panel.
-
Choose your target storage cloud and IaC from the list, then click Proceed.
-
Enter the following details to create your appStack:
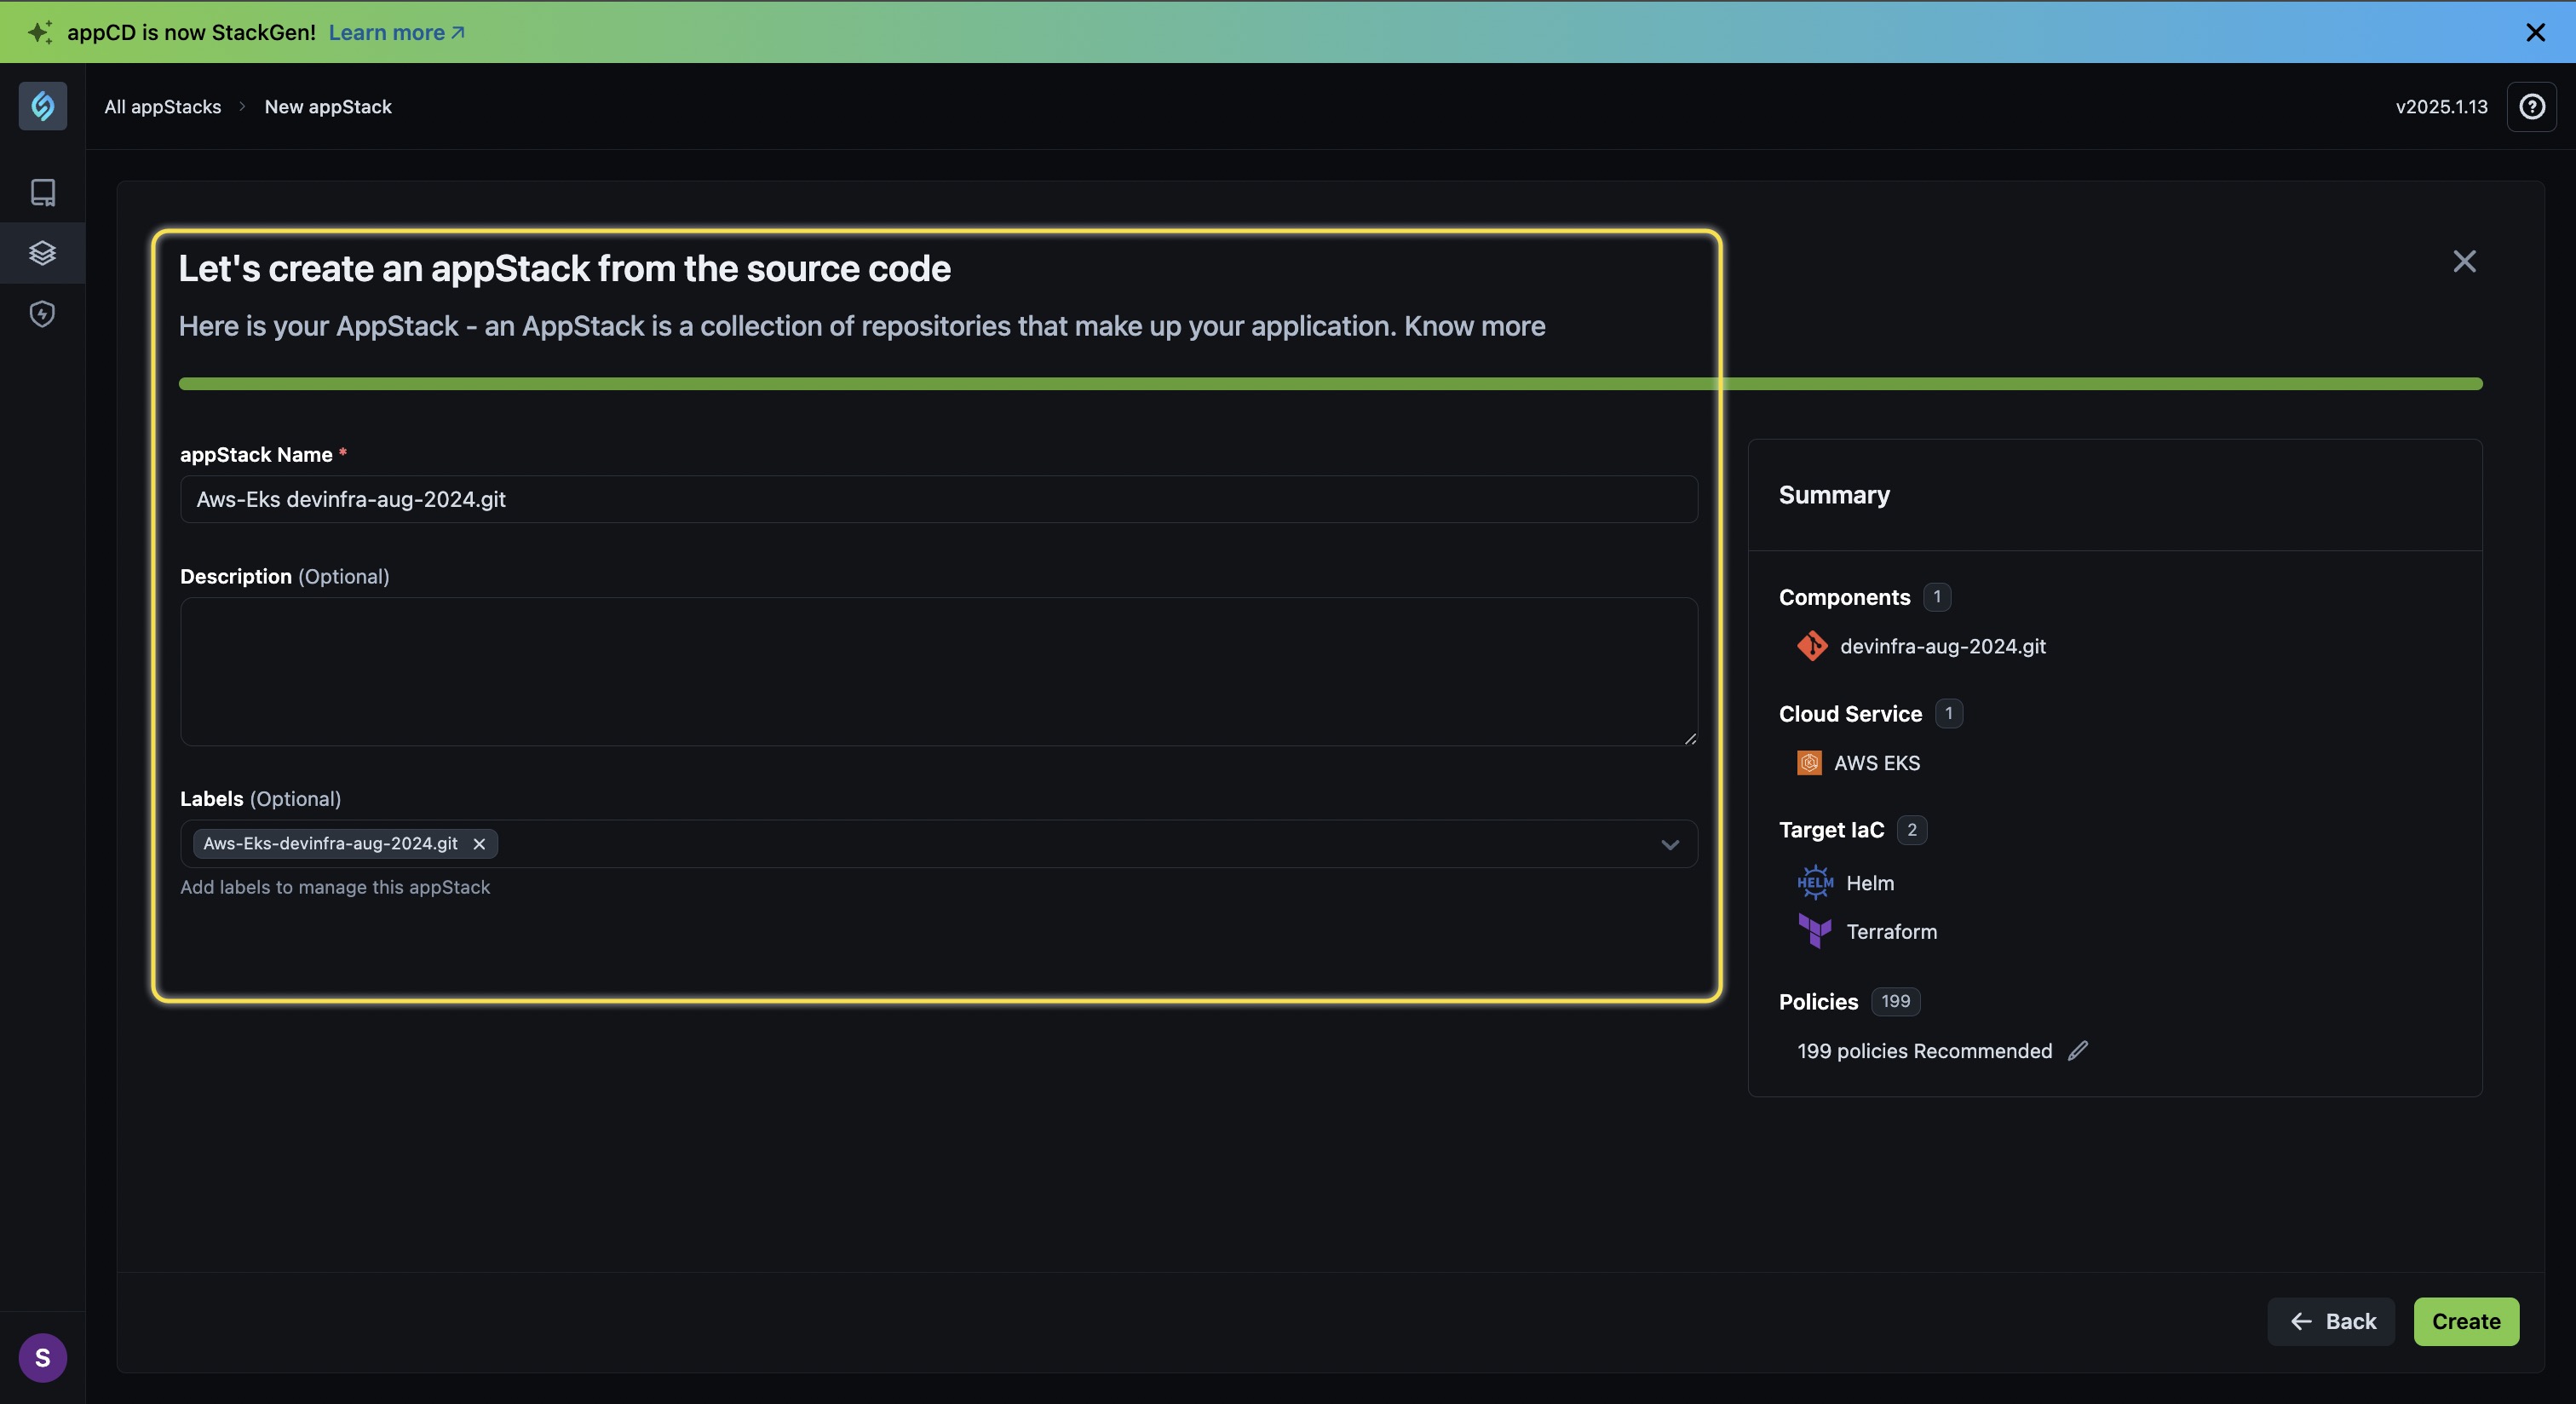
- appStack Name *: Enter a name for your appStack.
- Description (Optional): Provide a brief description for your appStack.
- Labels: We recommend that you add a Label for your appStack so that you can easily select it from a list of appStacks in the future.
-
Click Create.
You will be redirected to the appStack details page where you can view the Topology, Policies, and IaC details for your appStack.