Organisation Users
Organisation Users
The Organisation Users section lets you manage user accounts and permissions within your system. Whether you're an administrator looking to add new team members or manage existing user permissions, this guide provides step-by-step instructions for all user management tasks.
Roles and Access
Before getting started with this guide, ensure you have:
- Administrative access to the user management system. If you are a user, reach out to your Aiden Admin for access.
- Permission to create, edit, or delete user accounts.
- Basic understanding of your organisation's role structure.
- Access to user email information for account setup.
Getting Started
The Organisation Users Settings section is your central hub for managing all user-related activities.
Let's dive into the detailed steps for effective user management!
Add a New User
To add a new user, follow these steps:
-
From the StackGen Home page, navigate to Settings > Organisation Users, to begin managing your team's access and permissions.
-
Click the Add User button to the top right.
-
In the Add New User modal, enter the following information:
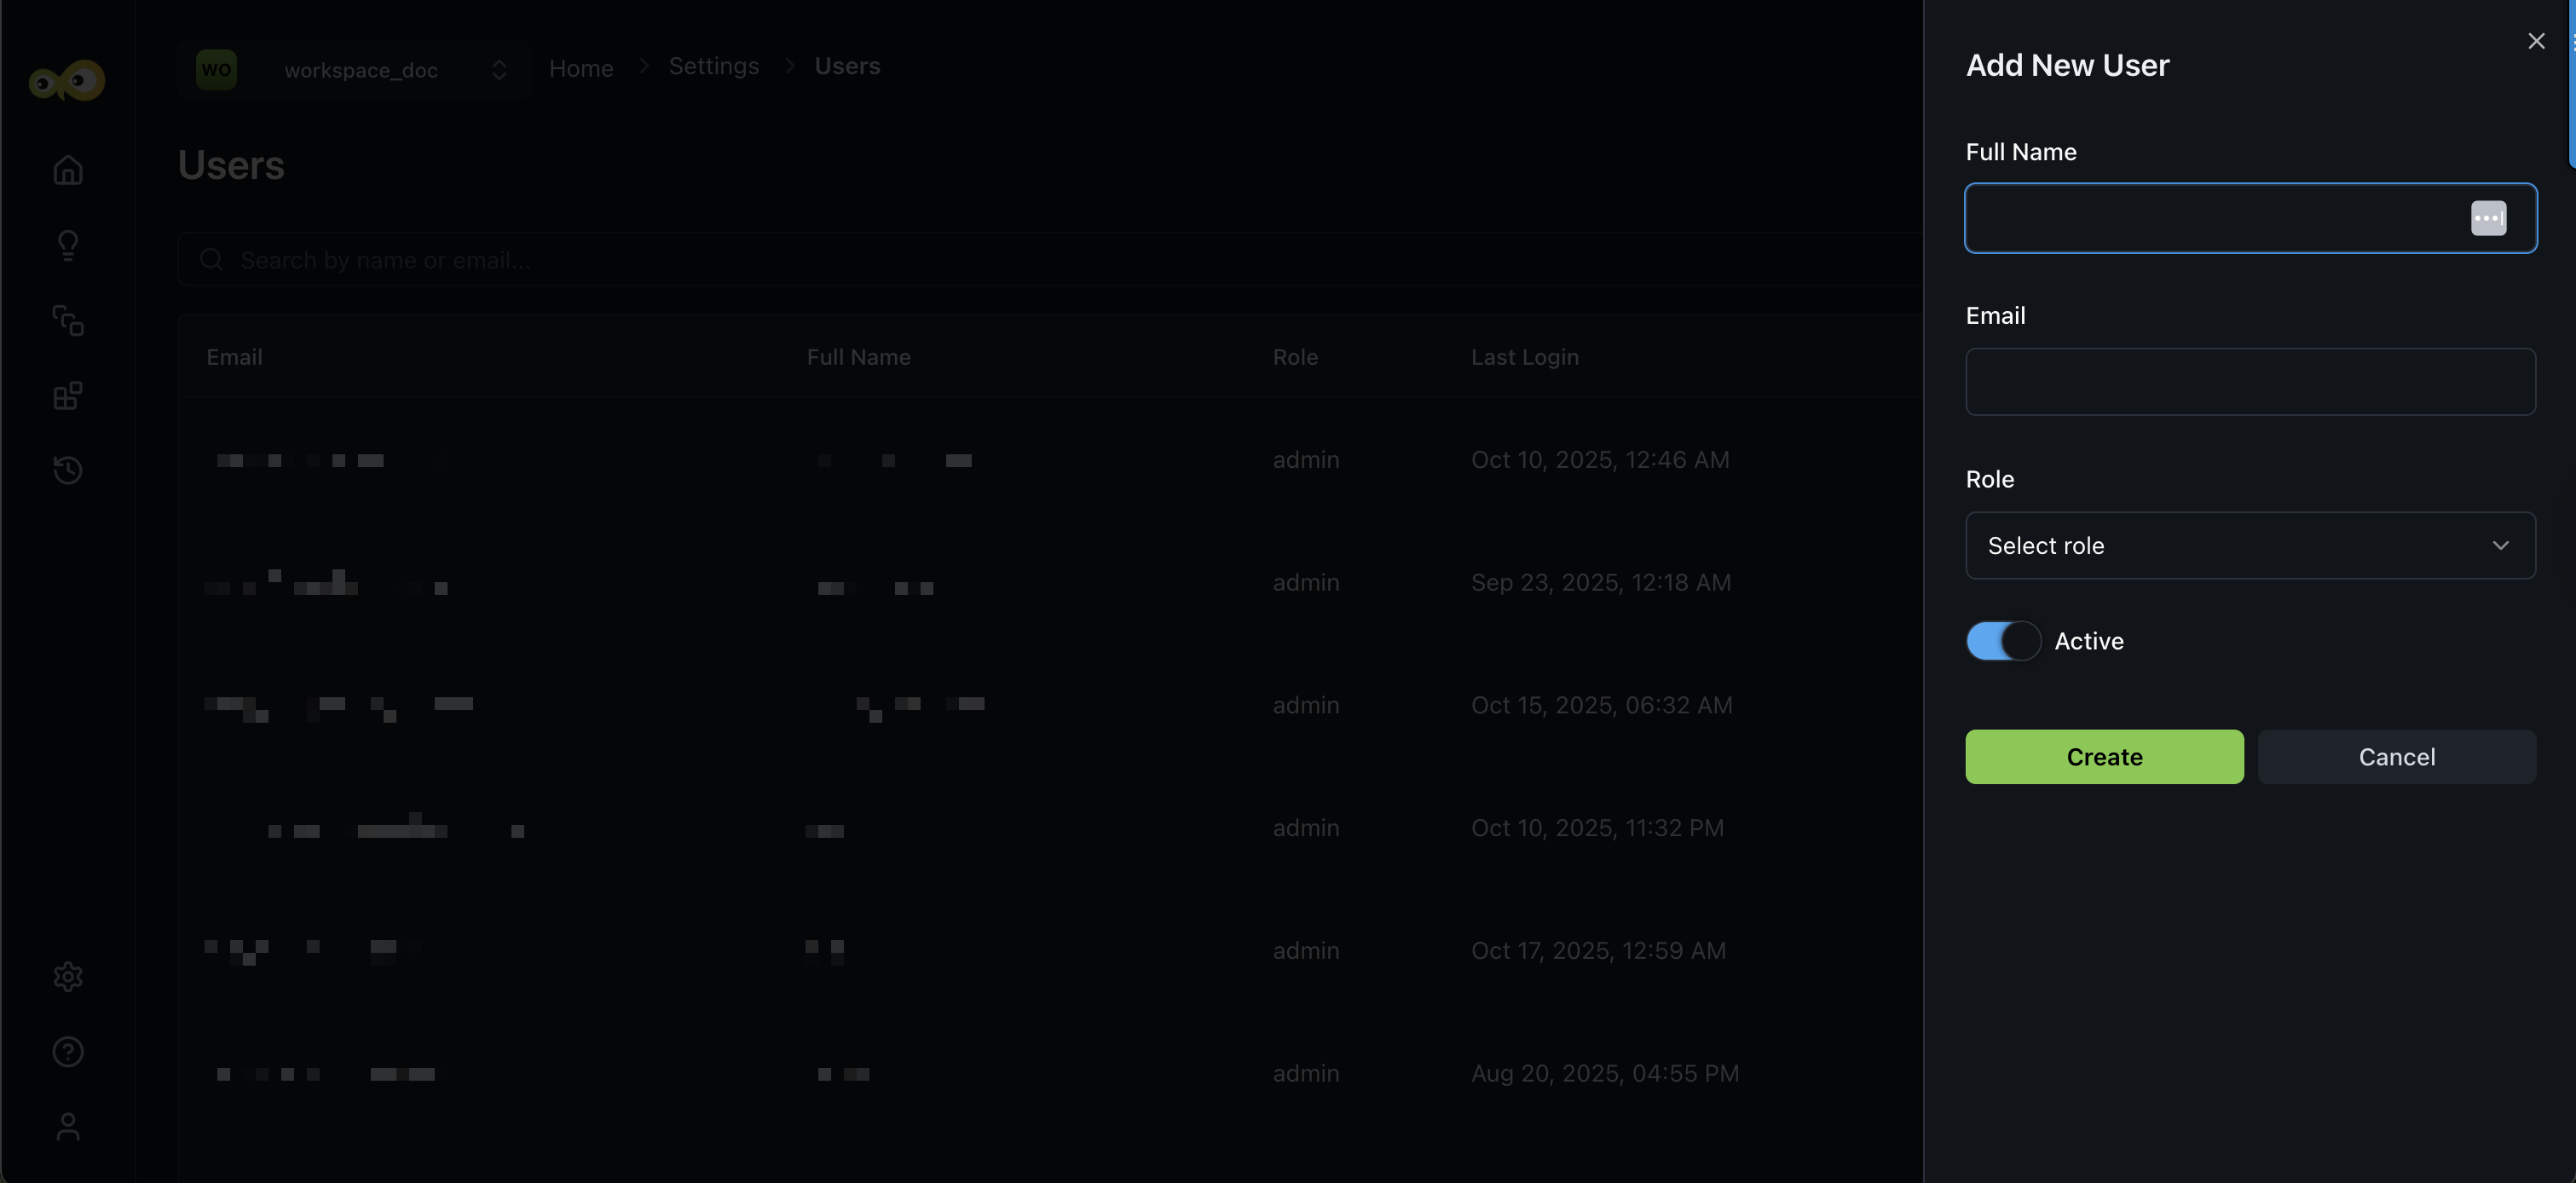
- Full Name: The full name of the new user.
- Email: The email address of the new user.
- Role: Select the appropriate role for the new user (e.g., User or Admin).
- Active: Use the Active toggle to activate or deactivate a user on Aiden.
-
Once you've filled in the required information, click the Create button to add the new user.
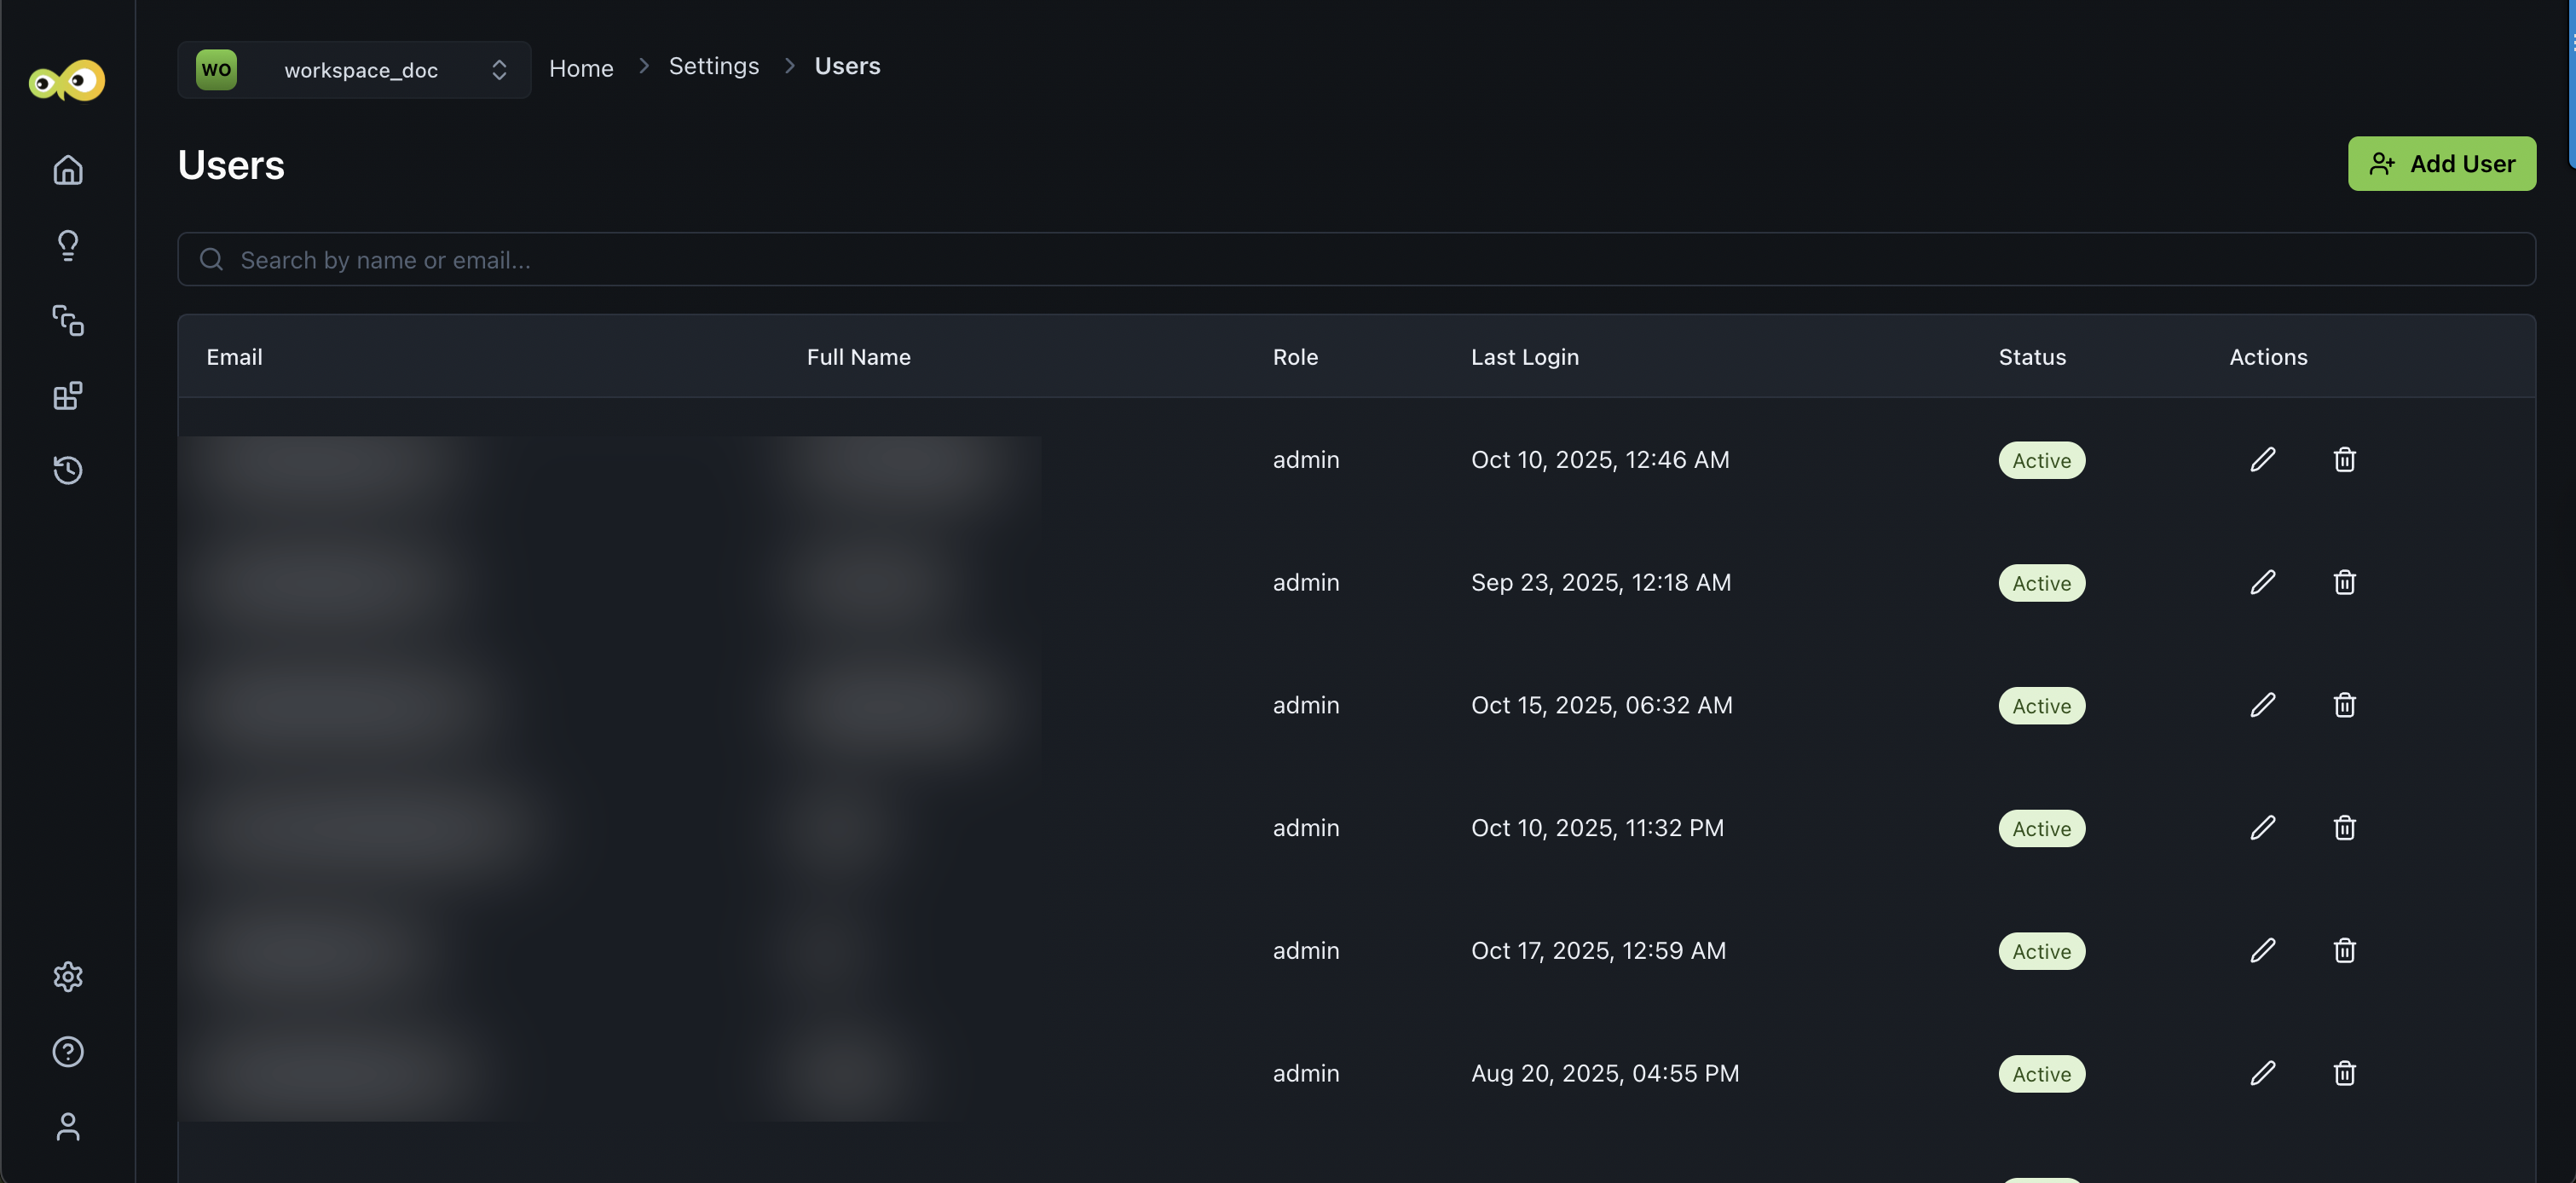
Manage Existing Users
The Organisation Users page displays a list of all the users in the system, along with the following information for each user:
- Email: The email address of the user.
- Full Name: The full name of the user.
- Role: The role assigned to the user (e.g., User or Admin).
- Last Login: The date and time of the user's last login.
- Status: Indicates whether the user is currently active or not.
- Actions: To manage an existing user, you can perform the following actions:
- Edit: Click the Edit icon to deactivate or activate a user.
- Delete: Click the Delete icon to remove the user from the system. Remember to always ensure that user information is kept secure and up-to-date to maintain the integrity of your application.
Activating/Deactivating vs Deleting Users
-
Activating/Deactivating Users: To activate or deactivate a user, locate the user in the list, click Edit, and use the toggle switch in the Edit User dialog. When a user is deactivated, their access to the organisation will be removed, but they will still be registered with the system.
-
Deleting Users: If you need to permanently remove a user from the system, click the delete icon next to the user's information. Keep in mind that deleting a user will completely remove their account and all associated data.
Remember to always ensure that user information is kept secure and up-to-date to maintain the integrity of your application.