Snapshots | appStacks
appStack Snapshots
appStack Snapshots provide a powerful system that automatically captures snapshots of every change to your appStack, giving you complete control over your infrastructure evolution with the safety of easy rollbacks. StackGen no longer supports manually adding new versions. Existing appStacks that already have versions will continue to work, and you can still toggle between existing versions using the dropdown.
This feature transforms how you experiment with and manage your appStack configurations, providing a comprehensive change history and the ability to restore to any previous state with confidence. Whether you're testing new configurations, experimenting with infrastructure changes, or need to quickly revert to a previous working state, snapshots eliminate the fear of experimentation by providing a safety net for every change.
This is especially valuable for complex infrastructure changes where the ability to quickly revert can save hours of troubleshooting and prevent costly mistakes.
Key Features
- Automatic Snapshot Capture: Every change to an appStack automatically captures a snapshot, ensuring you never lose your work and can track the complete evolution of your infrastructure.
- View Change History: Access a complete timeline of all changes made to your appStack, making it easy to understand what changed, when, and by whom.
- Label Snapshots: Organize and identify important snapshots by adding custom labels and descriptions, making it easier to find and restore to specific milestones or configurations.
- Restore to Any Previous State: Restore your appStack to any previous snapshot with a single click, perfect for experimentation and rollback safety when testing new configurations.
Why Snapshots Matter
Snapshots provide:
- Safety: Never lose your work—every change is automatically preserved.
- Confidence: Experiment freely knowing you can always roll back.
- Auditability: Complete change history with timestamps and user information.
- Flexibility: Organize and label snapshots to match your workflow.
How Snapshots Work
StackGen provides two ways to create snapshots: automatically when changes are made, or manually when you want to mark a specific milestone.
- Automatic Snapshots: StackGen automatically creates a snapshot when a resource is added to the topology, a resource is deleted from the topology, or you fill a value in the resource attribute panel and click Save. This happens in the background, so you don't need to manually save your work. Every change is preserved.
- Take a Manual Snapshot: While snapshots are created automatically, you can also create snapshots manually at any time to mark important milestones or before making significant changes.
Variables, locals, and providers are correctly captured and restored when you restore a snapshot. Your Terraform block configurations are fully preserved when you restore.
If you configure a state backend and take a snapshot, that backend configuration is stored in the snapshot so restore scenarios stay aligned with how state was pinned when the snapshot was taken.
All snapshots, both automatic and manually created, are securely stored on StackGen Cloud. This ensures your snapshot history is preserved and accessible from anywhere, even if you switch devices or browsers.
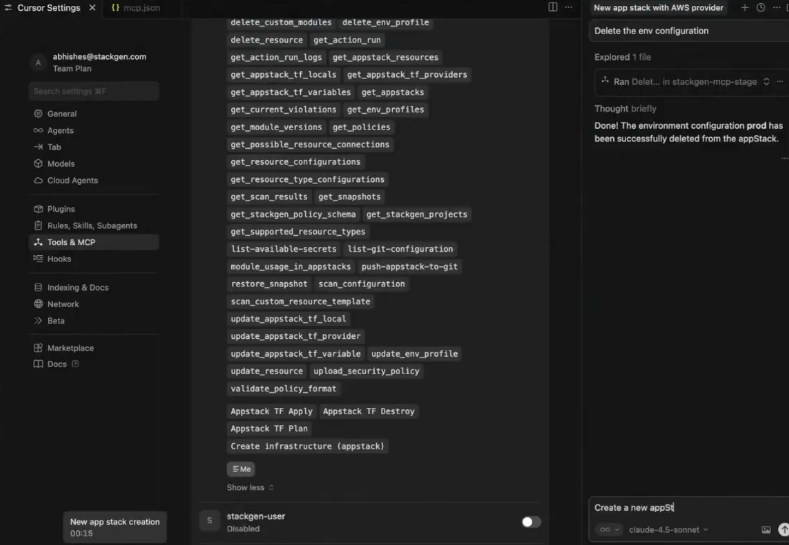
Snapshots through MCP
If you use StackGen MCP in a supported IDE, you can review snapshot history, create a snapshot before a larger assistant-driven change, and restore a previous snapshot without leaving the editor.
In the UI, many appStack edits create snapshots automatically. Over MCP, snapshot actions are prompt-driven. Snapshot deletion remains a UI action.
Take a Manual Snapshot
Click to view
To create a snapshot manually, follow these steps:
-
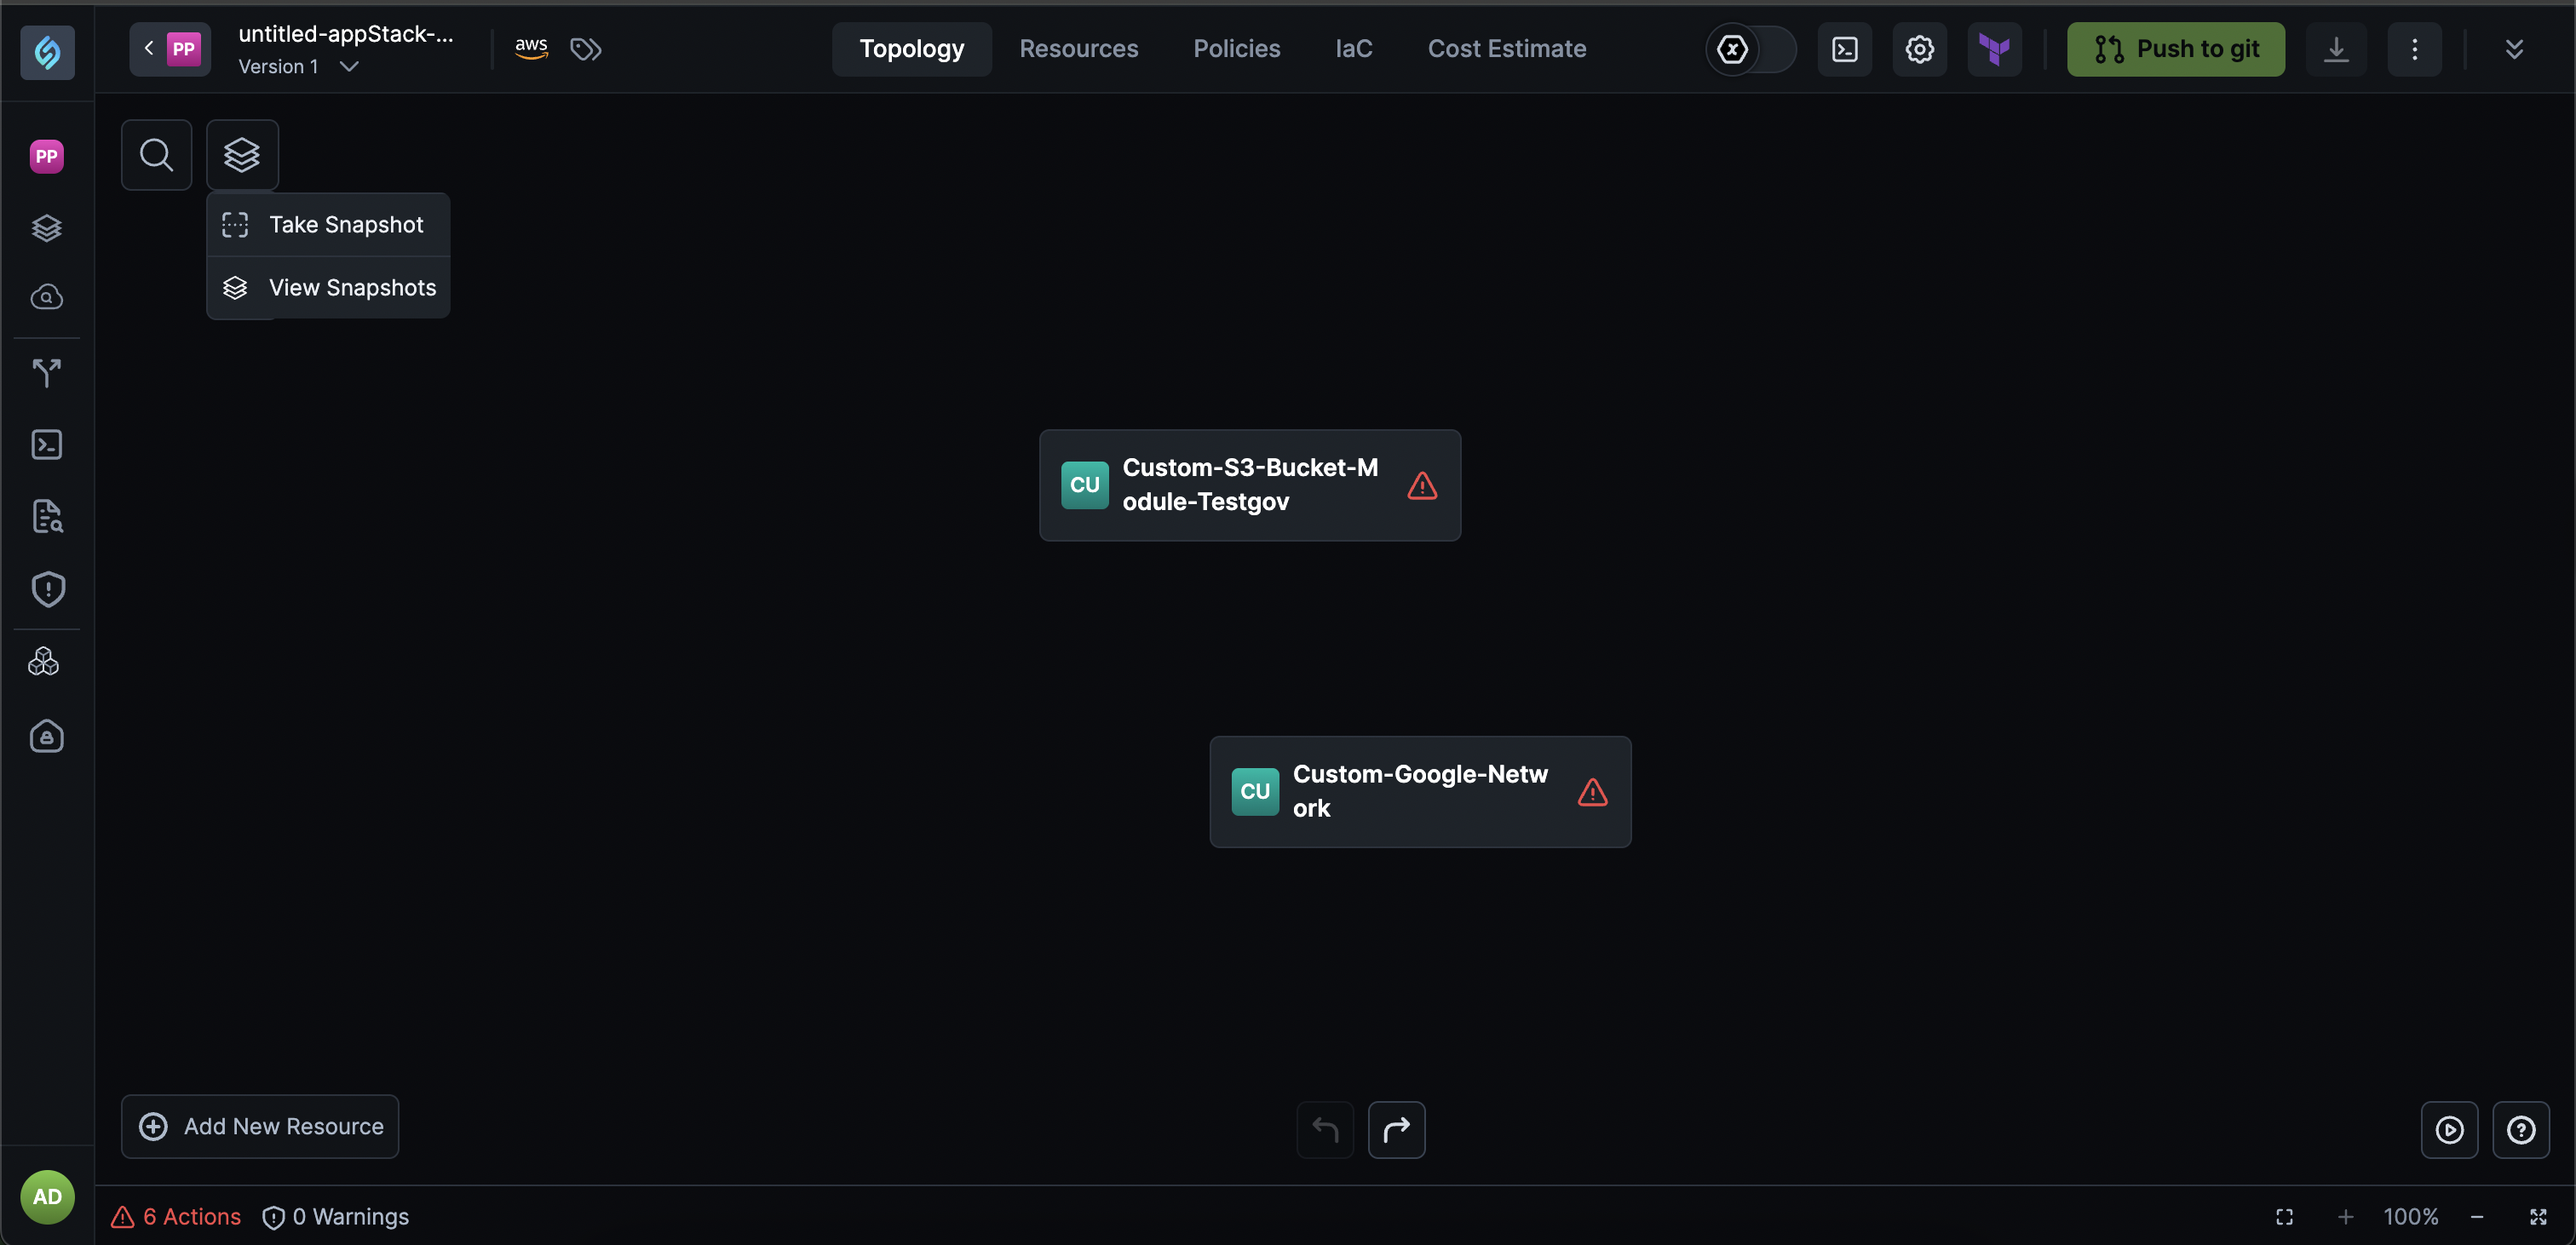
From your appStack, click the history icon (snapshot icon) next to Cloud Provider to open the Snapshots panel.
-
Click Take Snapshot and you're done.
-
You can also click View Snapshots and click Create Snapshot.
You'll need to enter the following details:

- Label: Enter a descriptive label for the snapshot (e.g., "Before major refactoring", "Production-ready state").
- Description: Add an optional description to provide context about why this snapshot is important.
-
Click Create Snapshot.
View Snapshots
Click to view
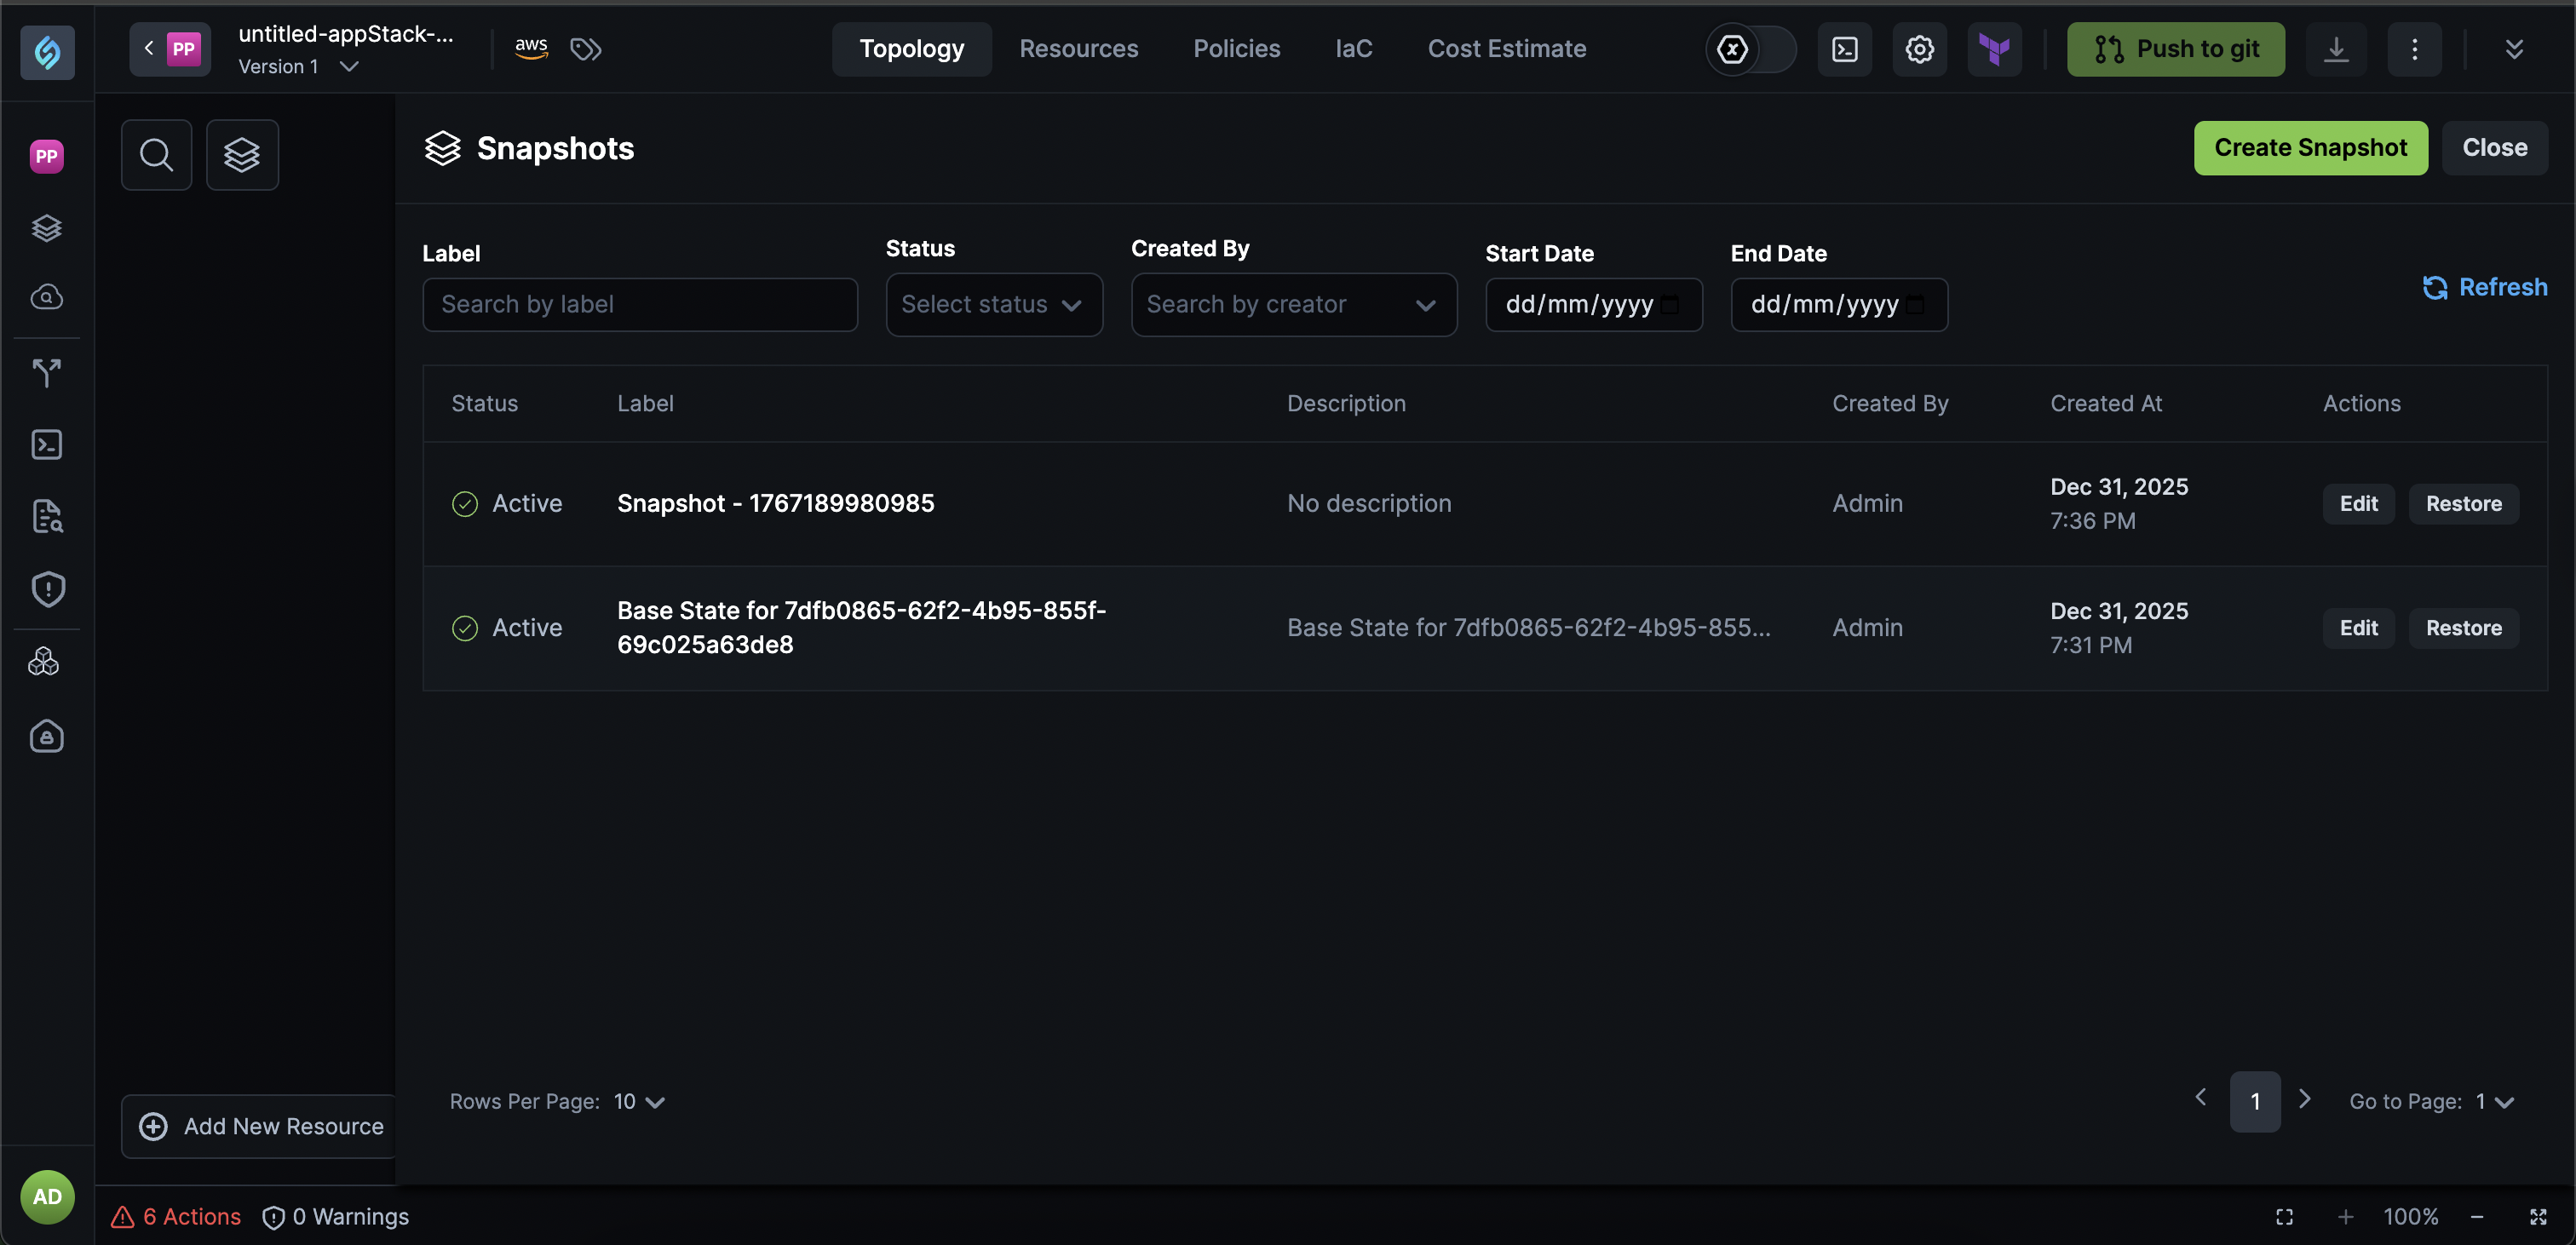
The Snapshots page provides a comprehensive view of all snapshots for your appStack, including automatic and manually created snapshots.
Accessing the Snapshots Page: From your appStack, click the history icon (snapshot icon) next to Cloud Provider to open the Snapshots panel, then select View Snapshots.
Filtering and Searching Snapshots: Use the filter options at the top of the Snapshots table to find specific snapshots:
- Label: Search snapshots by their label name.
- Status: Filter by snapshot status (e.g., Active).
- Created By: Search for snapshots created by a specific user.
- Start Date: Filter snapshots created after a specific date.
- End Date: Filter snapshots created before a specific date.
- Preview: Use Preview to see what the snapshot would contain before you rely on it (for example Terraform-related definitions, with variables, providers, and locals in separate blocks when those pieces exist).
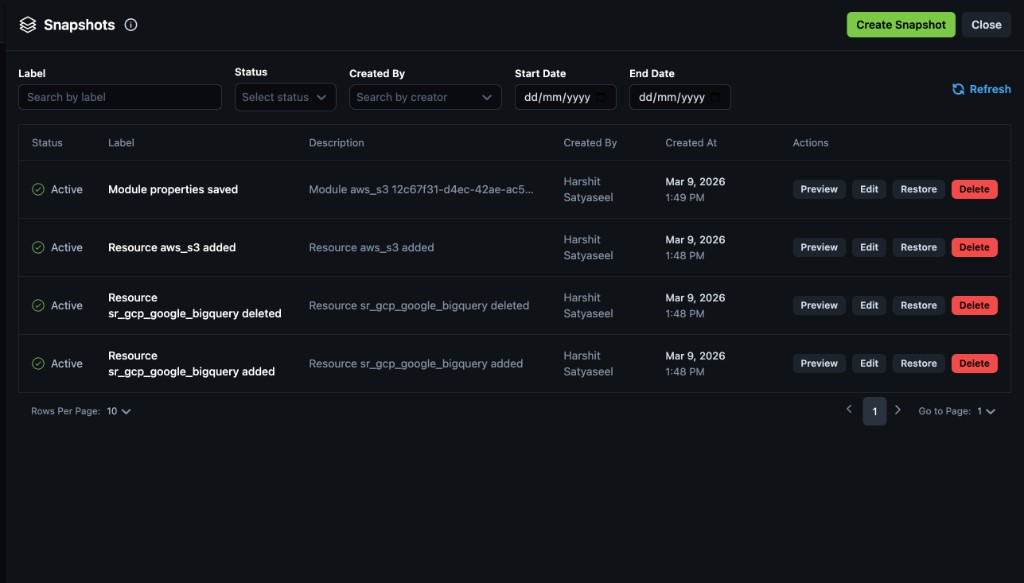
Click the Refresh button to update the snapshot list with the latest data.
Edit Snapshot Labels and Descriptions
Click to view
You can edit the label and description of any snapshot to better organize and identify important states of your appStack.
To edit a snapshot, follow these steps:
- From the appStack page, click the history icon (snapshot icon) next to Cloud Provider to open the Snapshots panel, then click View Snapshots and click Edit next to the snapshot you want to edit.
- The snapshot row becomes editable and you can modify:
- Labels
- Descriptions
- Click Save to apply, or Cancel to discard your changes.
Restore a Snapshot
Click to view
Restoring from a snapshot allows you to revert your appStack to any previous state. This is particularly useful when:
- An experiment didn't work as expected.
- You need to roll back to the last known good state.
- You want to compare current state with a previous configuration.
To restore a snapshot:
- From the appStack page, click the history icon (snapshot icon) next to Cloud Provider to open the Snapshots panel.
- Click View Snapshots and click Restore next to the snapshot you want to restore.
Your appStack state is restored. Restore recognizes existing deployed resources where possible, so rolling back a snapshot does not always schedule a full destroy-and-recreate cycle for every resource on the appStack.
Restoring a snapshot will revert all changes made after that snapshot was created. Before proceeding, ensure that you have a backup of your appStack state if you don't want to lose any changes made after the snapshot date.
After restoration, your appStack will return to the exact state it was in when the snapshot was created, including all resources, configurations, and topology.
Limitations
- New appStacks created from a template: Snapshot history from the template appStack does not carry forward. The new appStack starts a fresh snapshot timeline at create. For what templates copy and related behavior, see Create appStacks from Templates.
Best Practices
- Label Important Snapshots: Add descriptive labels to snapshots that represent significant milestones (e.g., "Production deployment", "Before security update").
- Create Manual Snapshots Before Major Changes: Before making significant infrastructure changes, create a manual snapshot with a clear label so you can easily identify and restore to the previous state.
- Use Descriptions for Context: Add descriptions to explain why a snapshot is important, making it easier for your team to understand the purpose of each snapshot.